Table of Contents
Limit Editing for Credit Bureau Sourced Liabilities
Additional Information on Liabilities
Restructured Liability Payoff Mechanism
Security Type and Configuration for Liability Overrides
Apply Credit Report on Ingestion
Show when Credit Report is > 30 days
Introduction
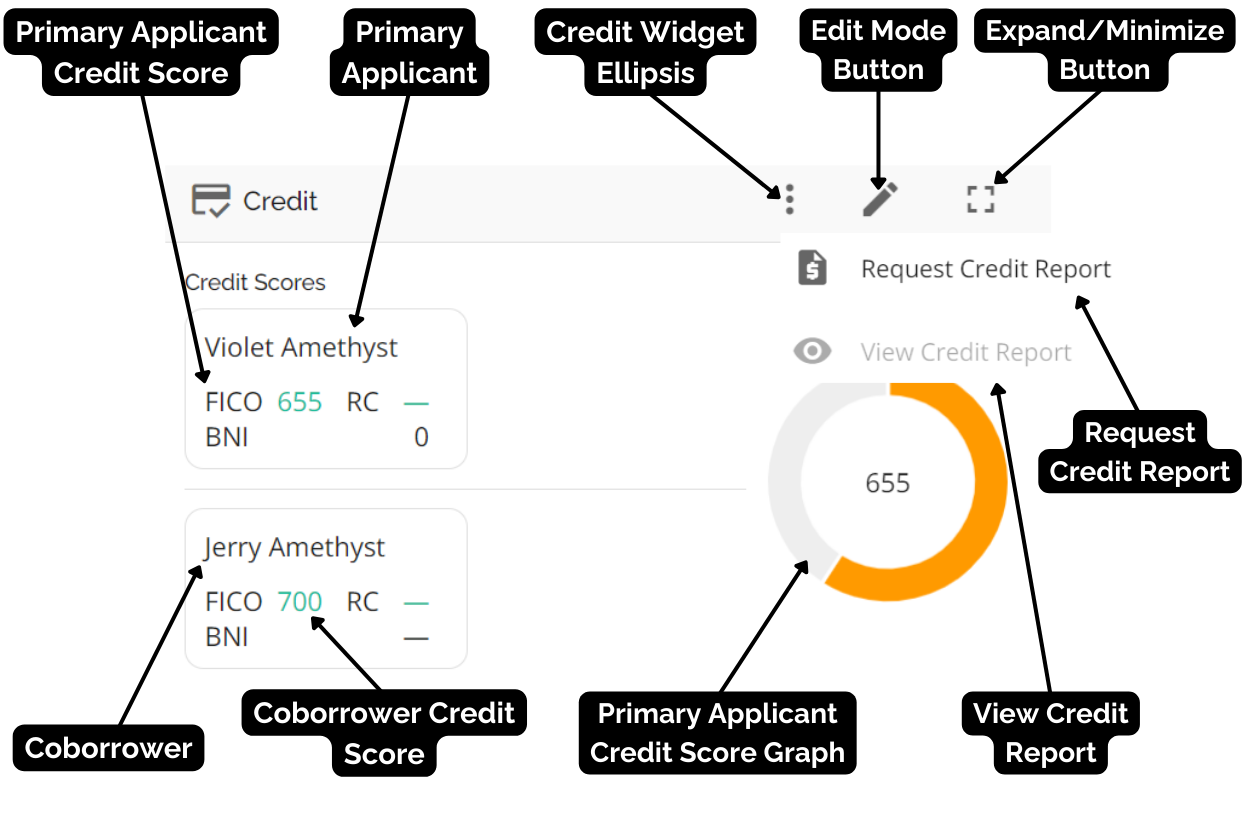
The Credit widget contains all the necessary information related to credit. The default location of the credit widget is directly beneath the Loan Details widget on the left hand side of the dashboard. It is to the left of the Income widget. This includes credit scores, credit summaries, tradelines, collections, and judgments, as well as copies of credit reports for all applicants. It is important to note that valid credit score entries fall between 300 and 900, and any changes to these scores will be reflected in the FundMore.ai Score.
The Credit Report will ingest with the application, but the liabilities will be based on the information input by the broker in the POS system, which may not always align with what is reported by the bureau. Users can refer to the Source field in the widget to understand the origin of the tradeline information.
Sources can be any one of the following:
POS_BROKER = 'POS_BROKER',
POS_CREDIT_BUREAU = 'POS_CREDIT_BUREAU',
CREDIT_BUREAU = 'CREDIT_BUREAU',
EQUIFAX = 'EQUIFAX',
MANUAL = 'MANUAL',
MORTGAGE_APPLICATION = 'MORTGAGE_APPLICATION',
Depending on the specific implementation, there may be an option to directly request credit reports within the widget.
To streamline the process, we have implemented an automation feature that allows predefined liability overrides. This means that the system can automatically calculate the payment the lender wants to consider in the ratios, according to their policies. For each type of liability, the system can override the payment as a percentage of the balance. If no override is configured, the payment remains the same as what is reported on the credit report.
To provide flexibility in managing credit information, users have the ability to manually add additional tradelines and make any required adjustments to tradelines, collections, and judgments.

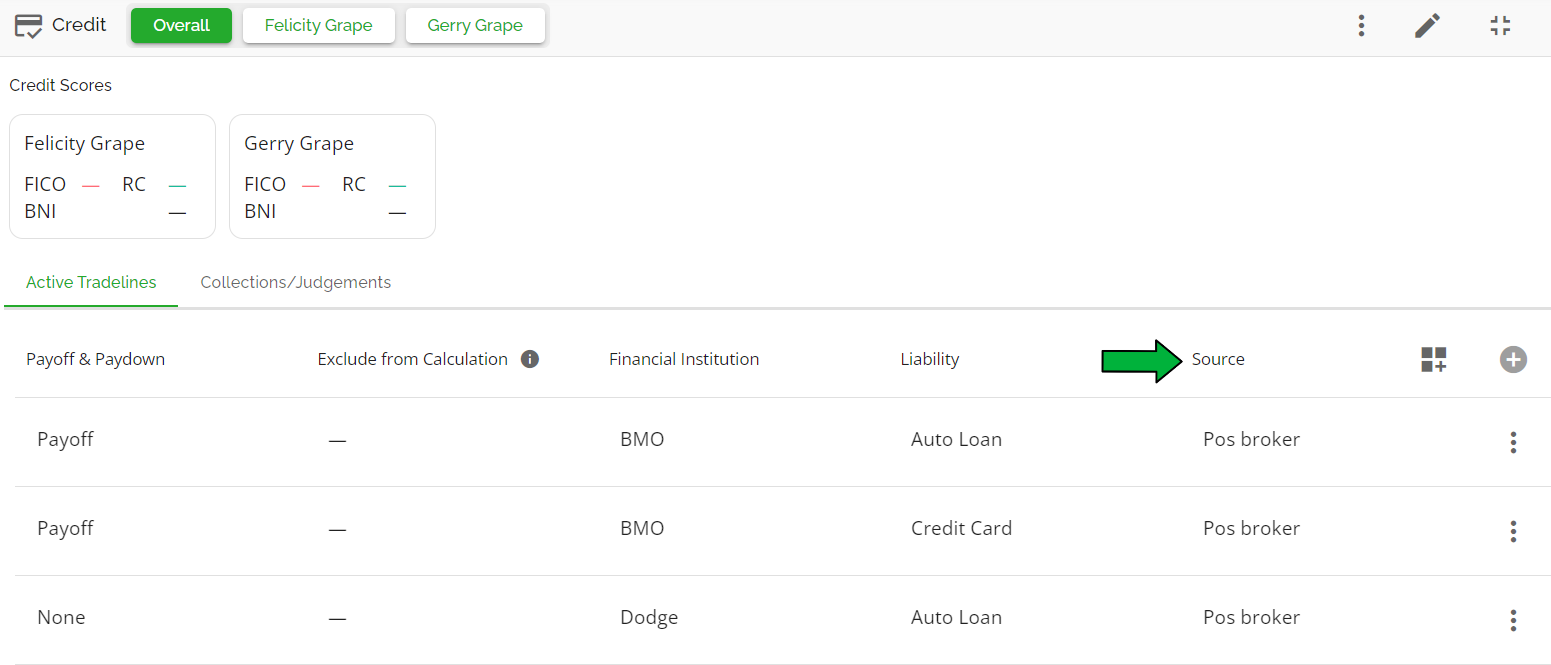
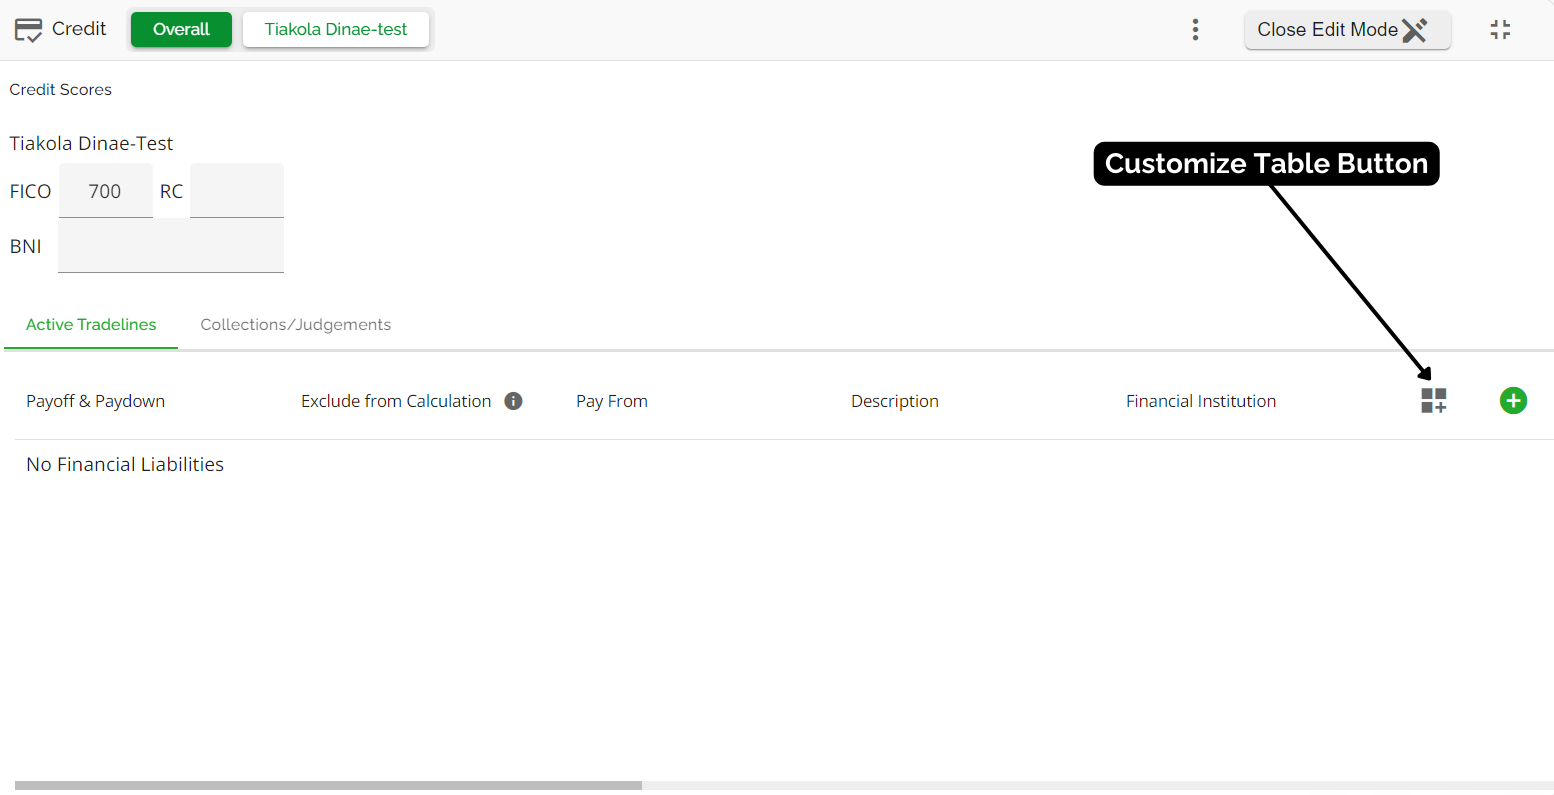
Initially, the Source field may not be visible. To modify the columns being displayed, you can use the Customize Table feature.
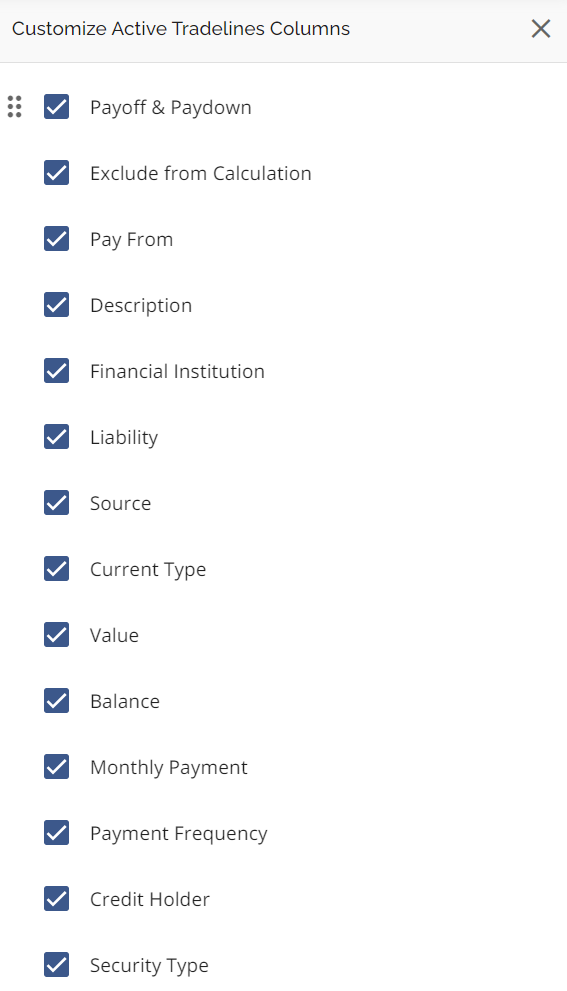
‘Customize Table’ Button - When this button is clicked, the ‘Customize Active Tradelines Columns’ sidebar will appear on the right of your screen. In the sidebar, you will see a series of checkboxes: Payoff & Paydown, Exclude from Calculation, Pay From, Description, Financial Institution, Liability, Source, Current Type, Value, Balance, Monthly Payment, Payment Frequency, Credit Holder, and Security Type. These checkboxes are the same as the fields in the ‘Add Financial Liability’ sidebar. The purpose of this feature is to enable users to customize which columns appear in the tradelines list and the order that they appear in. Selecting the checkboxes next to the headers will populate those columns on the screen and unchecking them will hide them. To rearrange the columns, drag and drop the headers within the sidebar list. Once you are satisfied with the order of your columns, click the 'x' button on the top right of the sidebar to close it. Utilizing this feature is unique to the individual user only. Their selections will remain until they make any changes and are visible only to them.
Minimized View Credit Widget
Editing In Minimized View
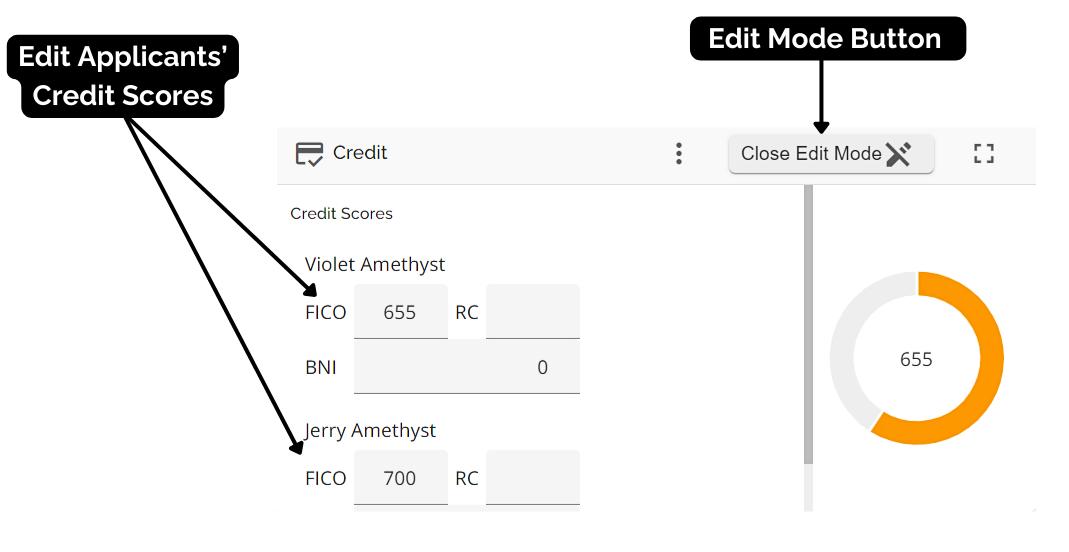
To edit in the minimized view, follow these steps:
- Click on the gray pencil button in the top right corner of the widget. This will bring you into the edit mode of the credit widget. In the minimized view, you are able to edit the applicant’s credit score, request a credit report, or view existing reports.
- Click on the credit score of the applicant you wish to update. When the field underlining changes color, you are able to edit the data.
- Once completed, click on the close edit mode button in the top right corner of the widget.
Refer to the appropriate sections for instructions on how to Request a Credit Report or View a Credit Report.
Note: We have restricted users' ability to modify liabilities sourced from Credit Bureaus. For more information on this, refer to the Limit Editing for Credit Bureau Sourced Liabilities section.
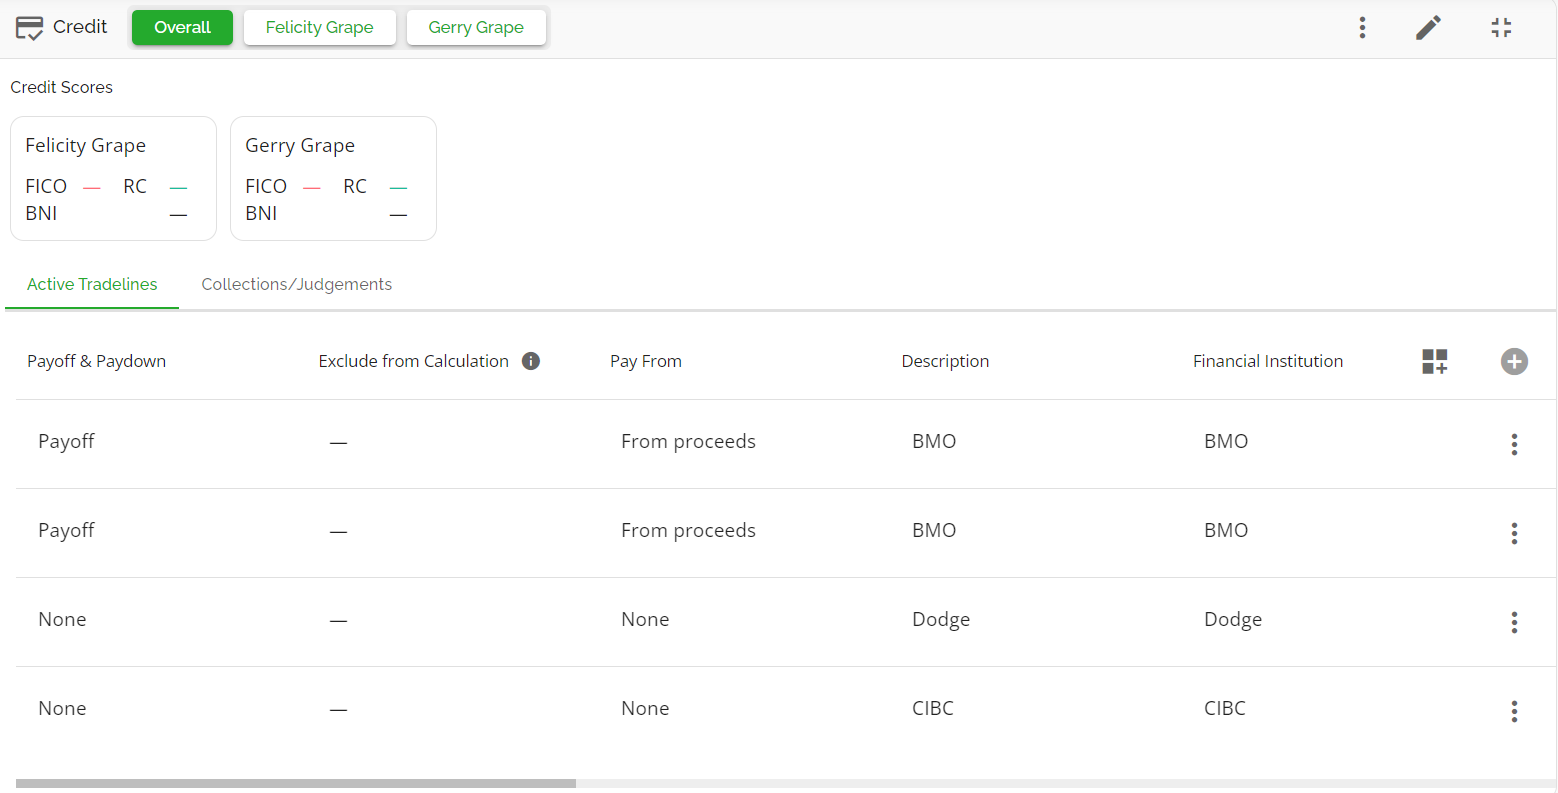
Maximized View Credit Widget
When the Credit Widget is expanded, you can see a more detailed view of the credit items for each stakeholder. The expanded view has the following features: Credit Widget Ellipsis, Grey Pencil or Close Edit Mode button, Minimize/Expand Button, Overall Tab, a tab for each borrower (e.g. Primary Applicant Tab or Co-Borrower Tab), Credit Guide Scores for all applicants, Credit Summary for each applicant, a list of the active tradelines, and any active collections or judgements, if applicable.
In the expanded view, you are able to make edits to the credit summary, individual tradelines, collections, or judgements as needed. You are also able to make manual entries for information not reported on the credit report.
Note: The Credit Summary can only be edited within the tab for each borrower. This option is not available in the Overall tab.
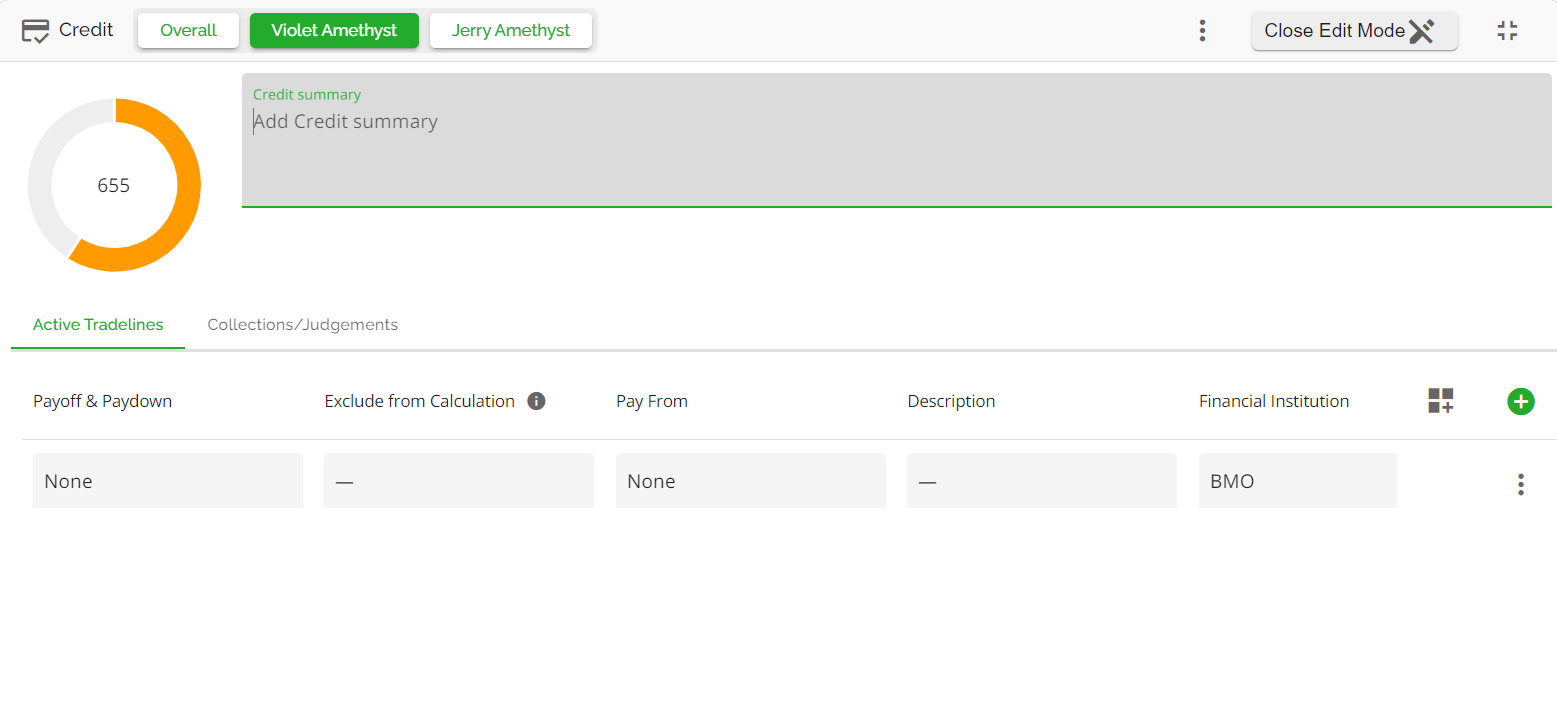
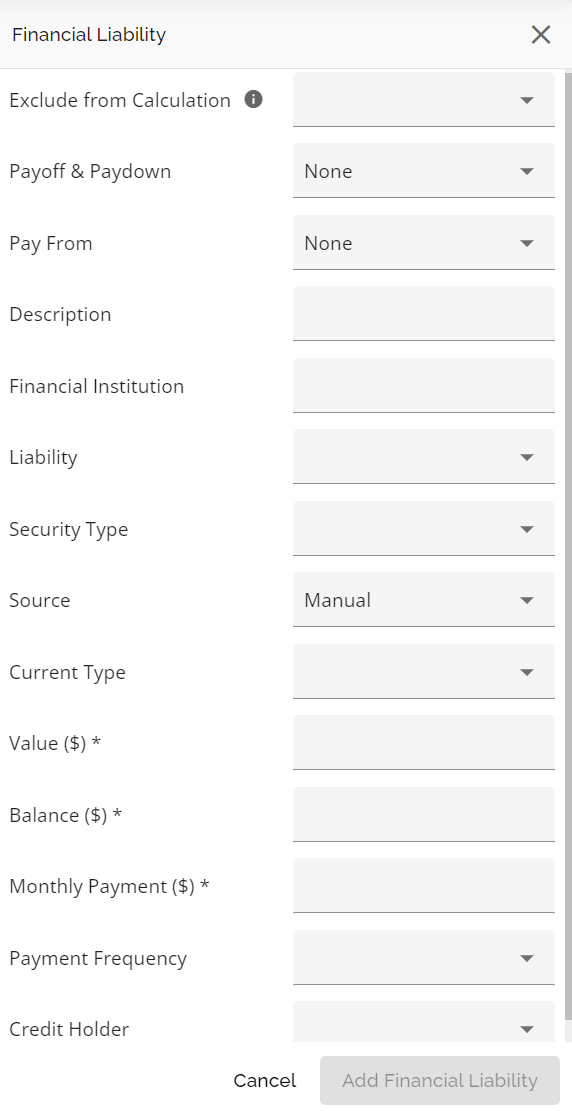
To add a tradeline, collection, or judgement, simply click on the green plus (+) button in the top right hand corner of the active tradelines or collections/judgements tabs. This will open up a sidebar menu with the fields required for your addition.
| Active Tradeline: | Collection/Judgement: |
 |
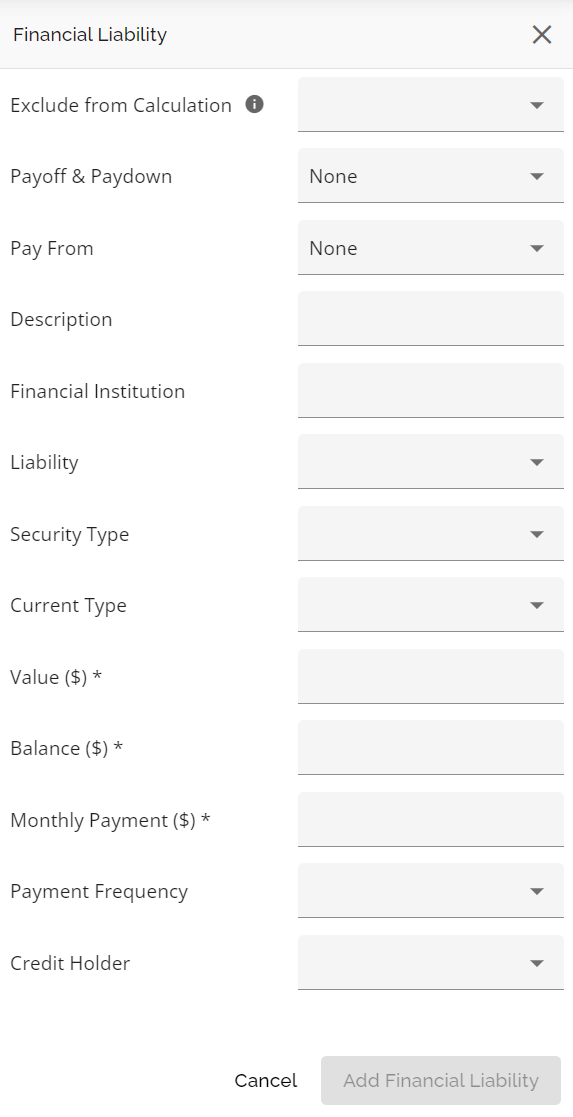 |
Once you have added all the relevant information, select the “Add Financial Liability” button and your line item will be added to the list.
You can edit the various fields in the different tabs by clicking into them and making the necessary changes. The system will automatically save your changes.
Alternatively, you can use the Open Details in Sidebar option. To do so, hover your cursor between the Name and Category fields to reveal the “Open details in sidebar” icon. Click on the icon to open the details sidebar. Within this sidebar, you can view the document type details and perform edits. Once completed, close the sidebar and your edits will be saved automatically.
There is no limit to the number of tradelines you can add.
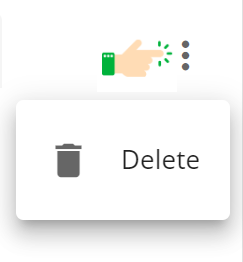
The ellipsis to the far right of each line item in both the Active Tradelines and Collections/Judgements tab can be used to delete the line item altogether. Simply click on the ellipsis and select the Delete option.
Limit Editing for Credit Bureau Sourced Liabilities
Note: This is a tenant-specific feature. It defaults to disabled and must be requested to be enabled.
In enhancing the system's management of credit reports, we have implemented restrictions on users' ability to modify liabilities sourced from Credit Bureaus. This adjustment applies to applications ingested through Filogix, Lendesk, and Velocity platforms.
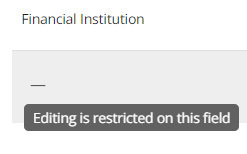
With this update, editing and deleting liabilities sourced from Credit Bureaus are restricted in most fields. However, the following fields remain editable: Exclude from Calculation, Balance, Monthly Payment, Payoff & Paydown, and Pay From, ensuring that financial actions can still be performed on the liability record. When users are restricted from editing a field, a tooltip will be shown indicating that “Editing fields on this liability source is restricted”.
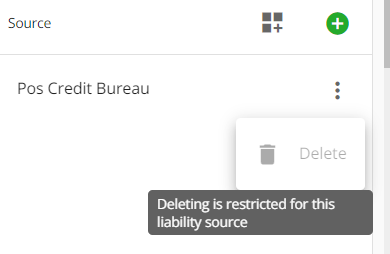
The delete function will also be disabled when the liability source is a Credit Bureau.
Additional Information on Liabilities
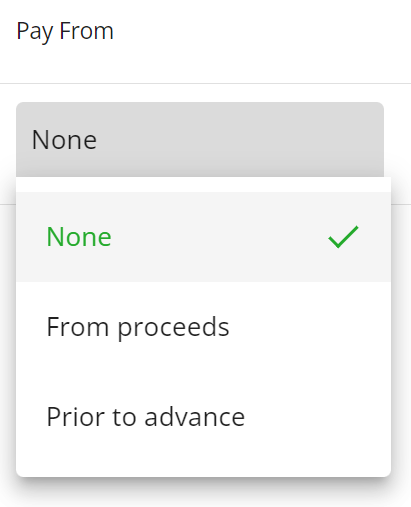
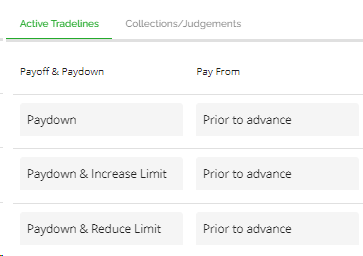
You can select whether or not a tradeline or collection/judgement will be paid off from proceeds, prior to advance, or none. The selection here will reflect in your debt service calculations if applicable.
Restructured Liability Payoff Mechanism
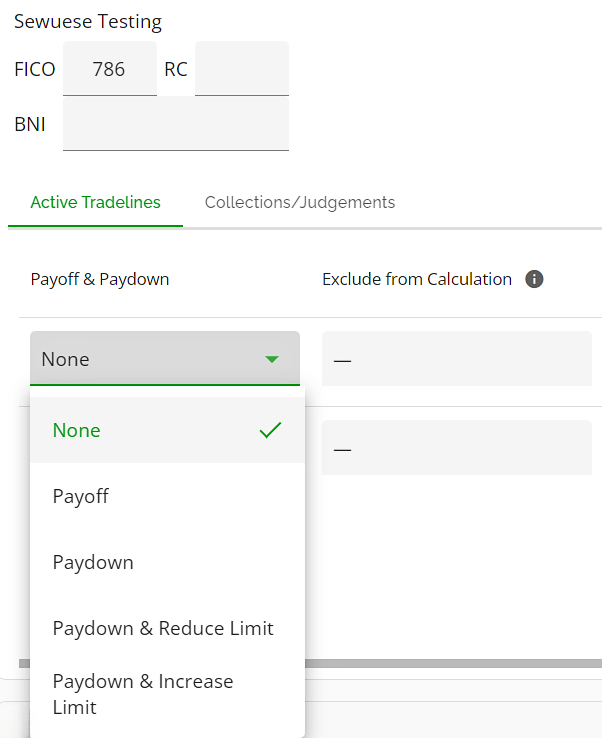
This feature has been implemented for both liabilities not secured by real estate, and existing mortgages. It provides underwriters with more flexibility when indicating that liabilities have been paid off. We have also included a single select field in Liabilities and Existing Mortgages called Payoff/Paydown with the following options:
- None
- Payoff
- Paydown
- Paydown and Increase limit
- Paydown and Reduce limit
Liabilities not secured by Real Estate
The options for the "Payoff & Paydown" column and the "Pay From" column are managed with the Custom Fields section of the Manager Portal.
Our calculations consider the Payoff/Paydown field when liabilities are included. The calculations will update as noted below:
Note: These updates will only apply to liabilities not secured by real estate. In order to exclude a liability, the Payoff & Paydown field should be set. The Pay From field is not excluding the liabilities, it is just an indicator of the source of funds.
- When Payoff: Exclude liability from calculations. It is excluded from GDS/TDS and Future Net Worth. It is included only in Current Net Worth.
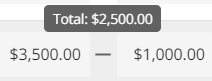
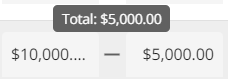
- When Paydown: The user is able to input how much the balance should be paid down by. The new balance will update GDS/TDS and Future Net Worth. It will not affect Current Net Worth. You can view the new balance by hovering over the minus (-) sign between the balance and the amount the account is being paid down by.
Balance Reduction:

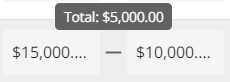
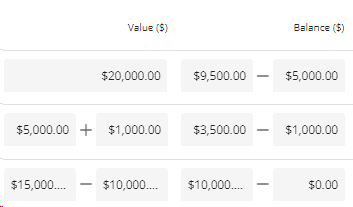
- When Paydown and Increase limit: The user is able to input how much the balance should be paid down by and how much the value (credit limit) should be increased. The new balance and value will update GDS/TDS and Future Net Worth. It will not affect Current Net Worth. You can view the new limit by hovering over the minus (-) sign between the balance and the amount the account is being paid down by.
| Limit Increase: | Balance Reduction: |
 |
 |
- When Paydown and Reduce limit: The user is able to input how much the balance should be paid down by and how much the value (credit limit) should be reduced. The new balance and value will update GDS/TDS and Future Net Worth. It will not affect Current Net Worth. You can view the new limit by hovering over the minus (-) sign between the limit/balance and the amount the limit/account is being reduced/paid down by.
| Limit Reduction: | Balance Reduction: |
 |
 |
- When the Balance or Value are reduced, the max allowed number the user can input cannot be greater than the current Balance or Value. The system will not stop the user from doing so but, will indicate there is an issue by showing a red line below the field like so:

Liabilities not secured by real estate:
Existing Mortgages (liabilities secured by real estate):
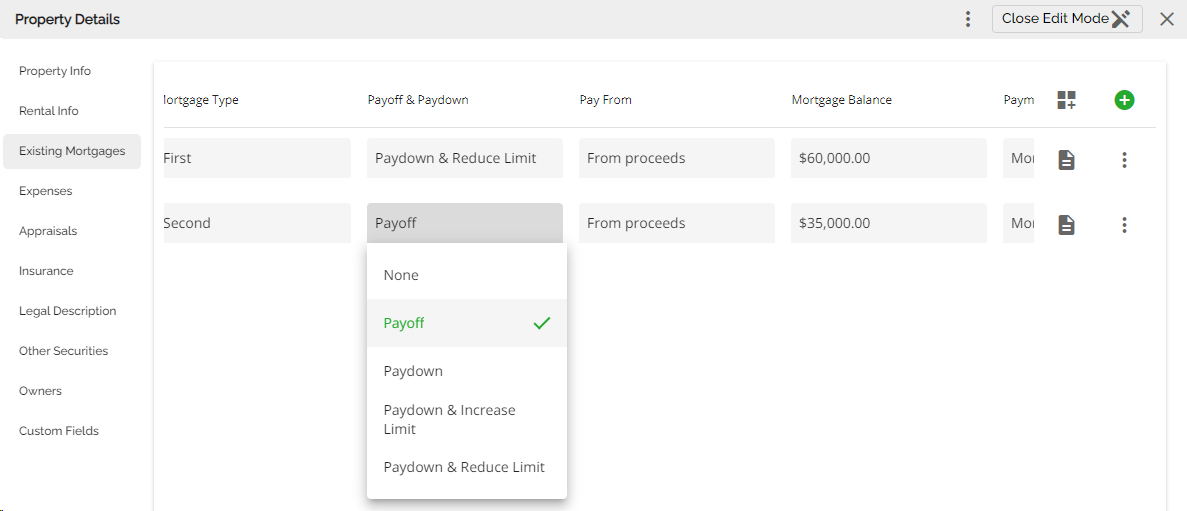
There are no UI changes on mortgages when indicating paydown. To learn more, click on this link to watch a video demonstration.
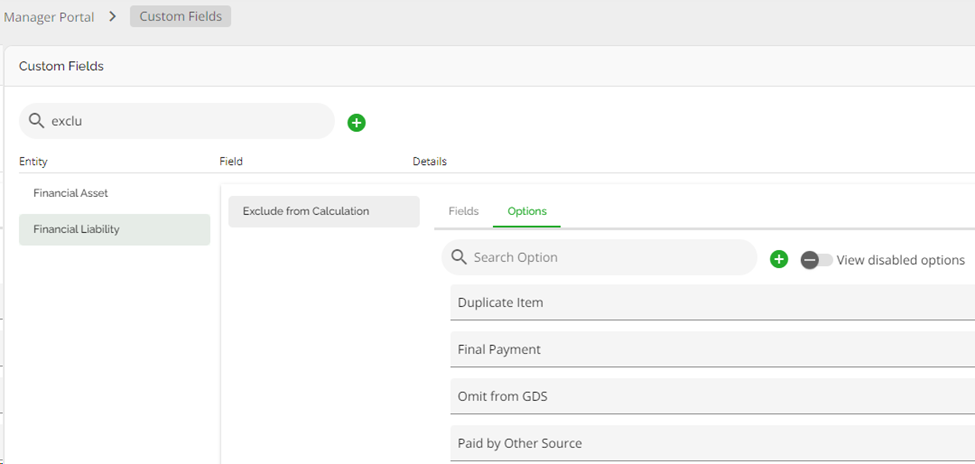
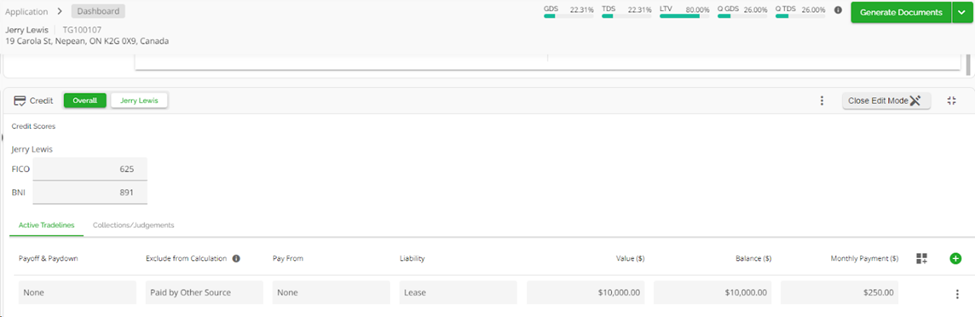
We have included an “Exclude from Calculation” column in the Credit Widget. This is a single select field with options that can be managed within the Custom Fields section of the Manager Portal. The following are the default options:
- Paid by other source
- Final payment
- Duplicate item
- Omit from TDS
Manager Portal:
Within the application dashboard, this is how the column presents:
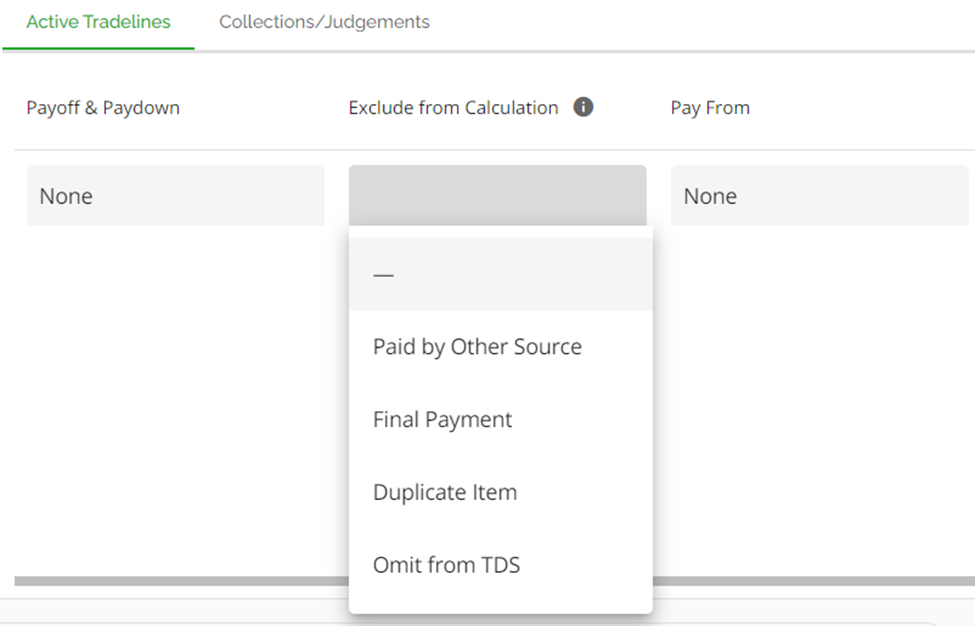
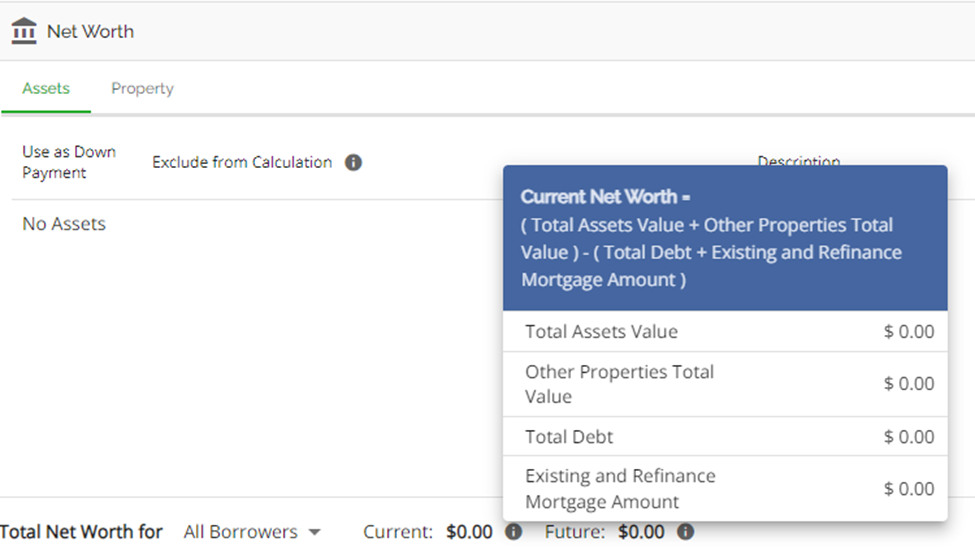
If any option is selected, the liability is removed from calculations i.e., debt servicing and Net Worth calculations (both Current and Future).
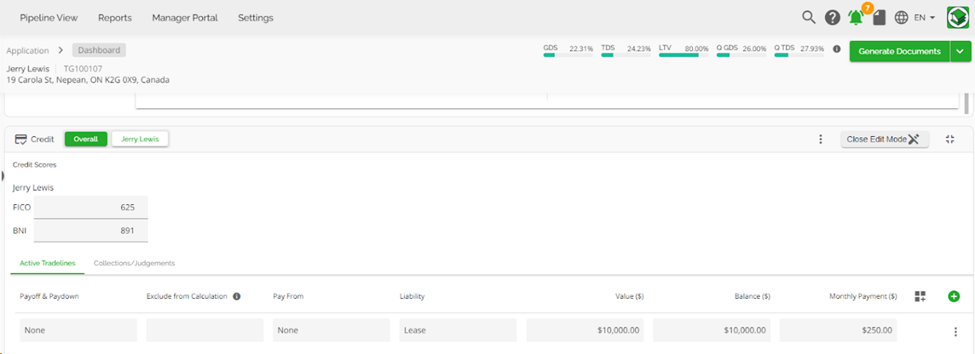
Before selecting Exclude from Calculation:
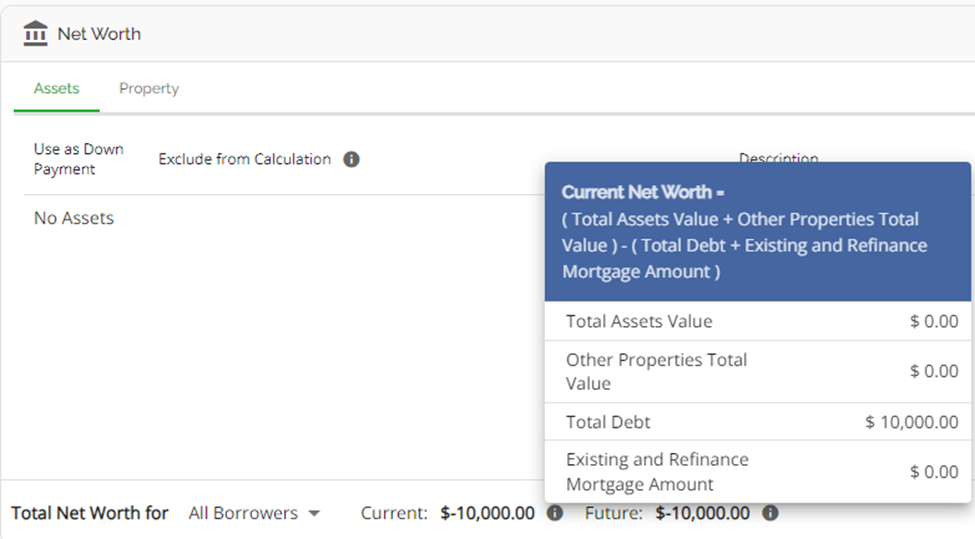
After selecting Exclude from Calculation:
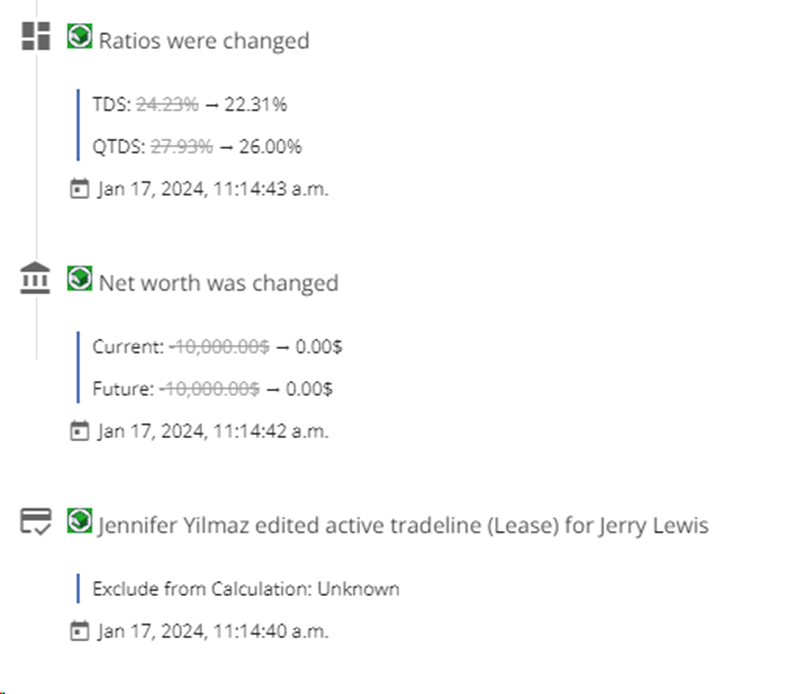
The application’s history log will update with any changes made. It will show who made what change and when, it will also display how the net worth and ratios were changed.
Security Type and Configuration for Liability Overrides
Note: This is tenant specific and may not apply in your environment.
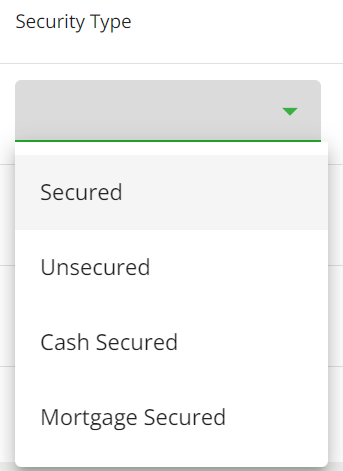
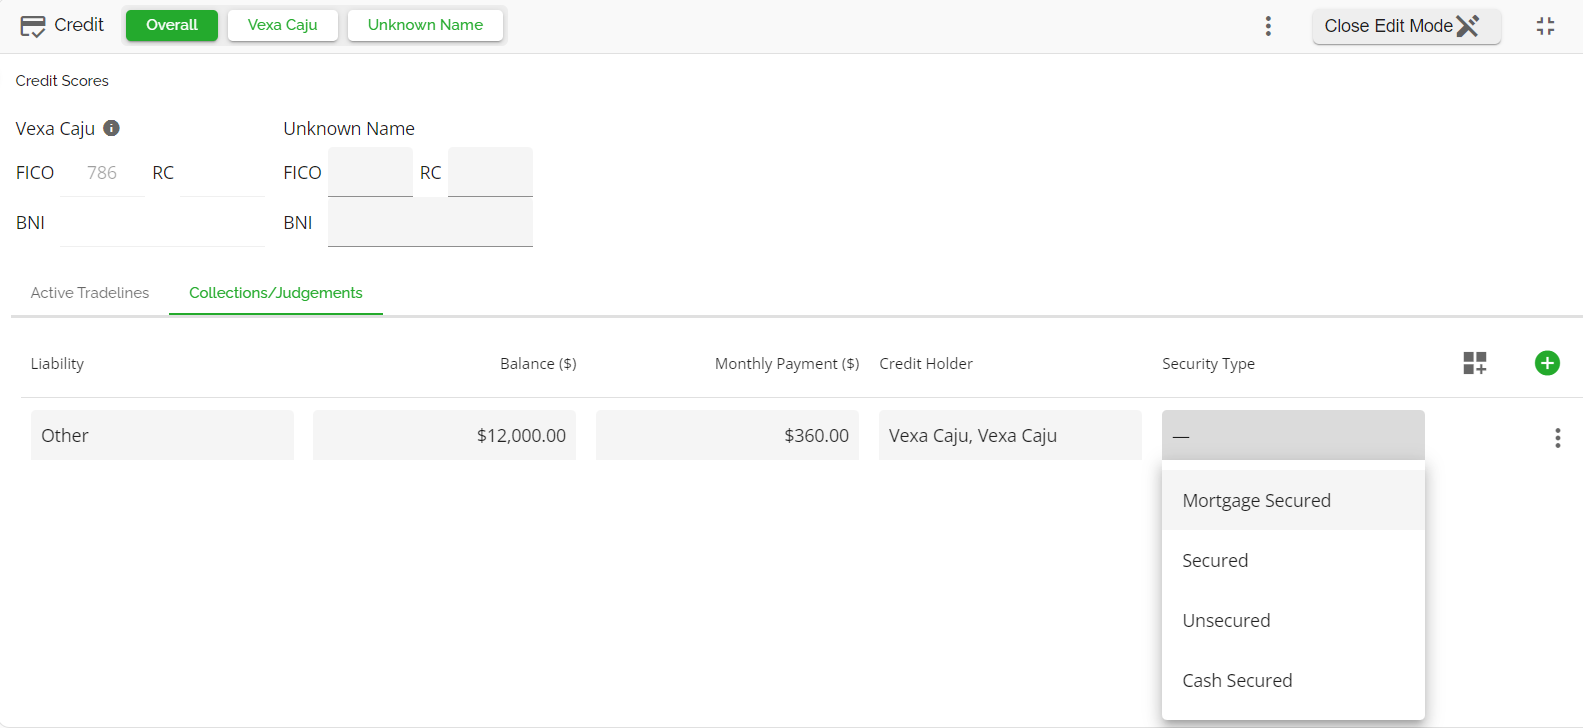
We have included a Security Type field in the Credit Widget. It is a single select, manual population/edit field that will tie into aggregates. The system or user can now designate a security type for each liability. Within the Credit widget, users have the ability to specify the type of security for each liability. The available choices include: Mortgage Secured, Cash Secured, Secured, and Unsecured.
When the Mortgage Secured option is selected, the mortgage information can be pre-populated from a list of liabilities the user can choose from, rather than manually adding all the existing mortgage information. Additionally, once selected, the mortgage item seamlessly transitions to the asset section.
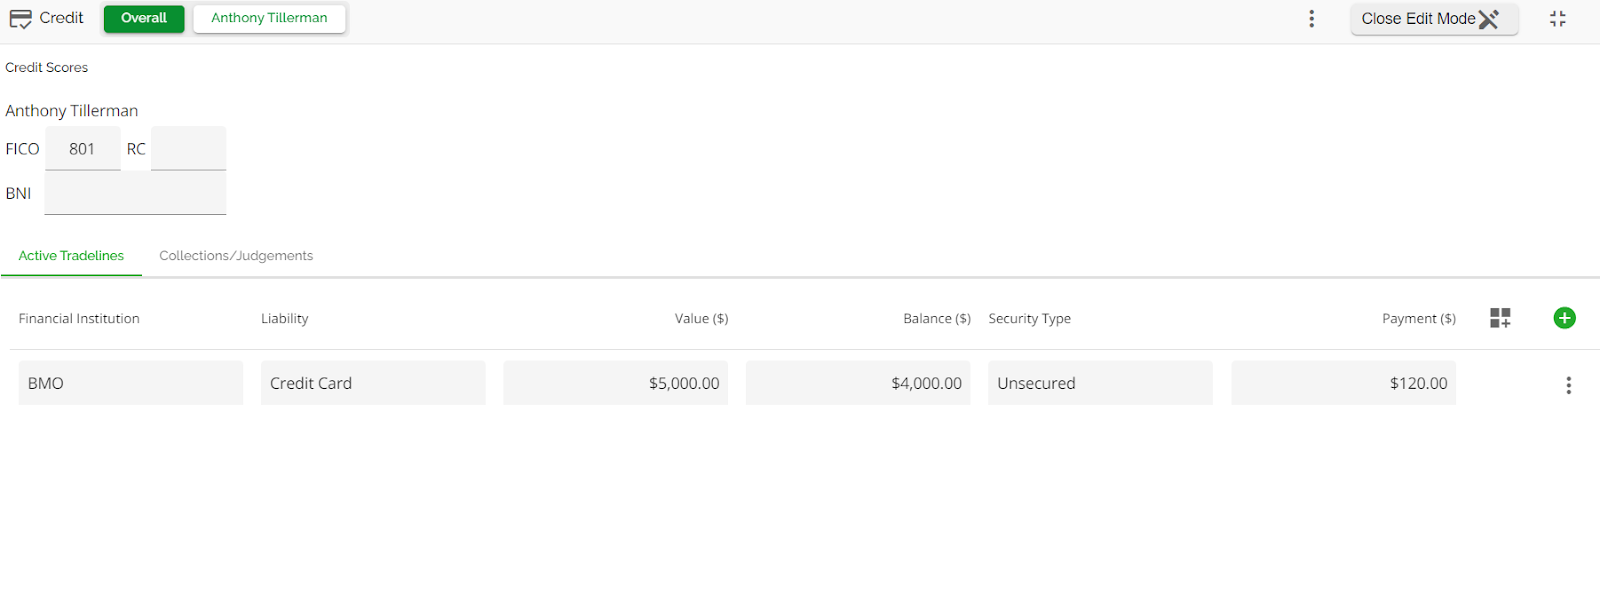
Relating to this field, we have implemented configuration to improve how payment calculations for liabilities are determined. Depending on the option selected, the system will update the relevant calculations, as per the requested configurations from the lender. When a liability of the type 'Credit Card' is entered into the system, it triggers an automatic update in the payment field. This update ensures that the payment field reflects 3% of the balance shown for that credit card liability. Suppose you enter a credit card with a credit limit of $5000 and a current balance of $4000. The system will automatically calculate the payment amount to be $120, which is 3% of the balance ($4000) showing.
Equifax Integration
Note: This is a tenant specific feature and defaults to disabled. If you would like this feature enabled, a ticket must be submitted to FundMore.ai. Please direct your request to the designated individuals within your company responsible for initiating support tickets.
Due to our Equifax integration, we can pull information from the credit report into the FundMore application upon ingestion. When credit reports are accepted, liabilities are parsed directly from the Credit Bureau, reducing the reliance on the data inputted by the broker. We also map previous credit report inquiries to the system. This functionality applies to applications ingested from Velocity, Lendesk and Filogix.
Apply Credit Report on Ingestion
If enabled, the system will use the tradelines and public records from the credit report to populate the credit widget in addition to what the broker has input. Any liabilities input in the application by the broker will remain and be identified in the source field as POS Broker. Any liabilities ingested from the Credit Bureau will be identified in the source field as Equifax. As a result, it is very likely there may be duplicate tradelines that will require cleaning up. Tradelines ingested from Equifax can not be deleted and only select fields are editable. Tradelines ingested from the POS Broker can be deleted entirely or edited.
It is worth noting that, any Mortgage tradelines ingested from the Credit Report will appear in the tradelines section of liabilities and will not be systematically transferred to existing mortgages as we have no way of knowing which properties those mortgages are tied to. As these are ingested from Equifax, they can not be deleted. We recommend you add the mortgage to existing mortgages for the property it is associated with (if the broker has not already done so), and mark the tradeline in the credit widget as Exclude from Calculations using the reason code Duplicate. This way, the Equifax tradeline will not be double counted in the calculations (i.e. Net Worth and debt servicing).
It is also worth noting that Lendesk has a system limitation when it comes to ‘Couples’ liabilities. The liabilities of the co-borrower are added to the primary borrower. Couples get put into "borrower pairs" - and all of the assets + liabilities owned by anyone in that borrower pair get put on the first borrower.
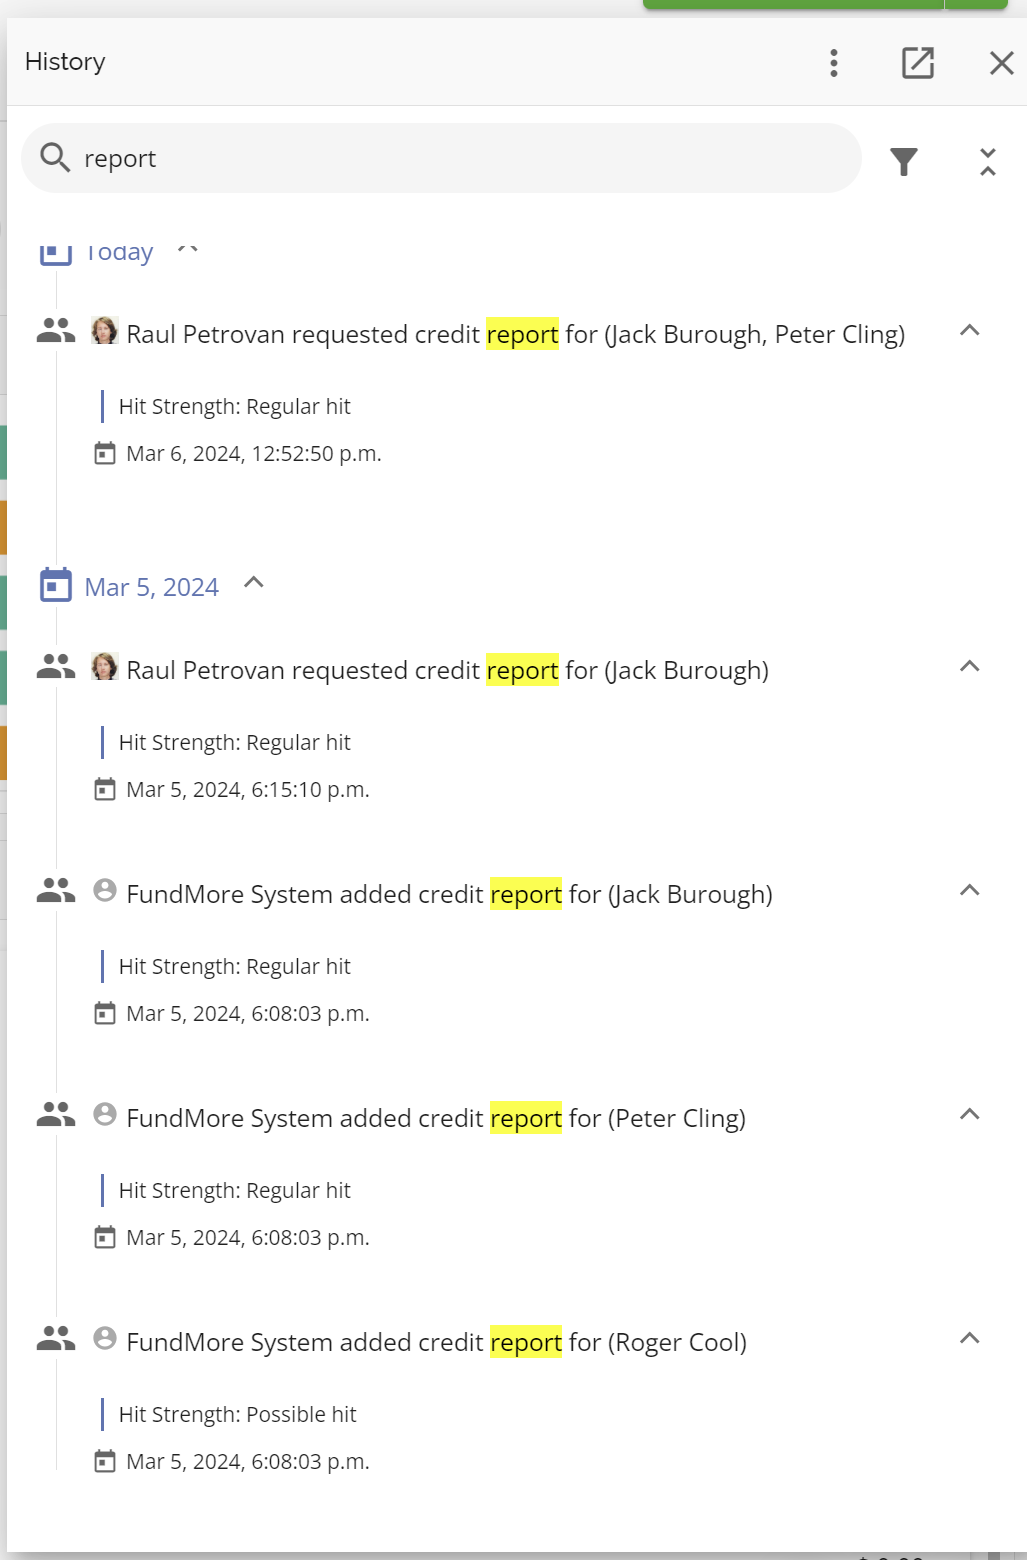
All activity related to credit reports are tracked in the application history.
Request Credit Report
The ability to request a credit report is permission-based and is linked to the “Pull Equifax Report” permission. To request a credit report, follow these steps:
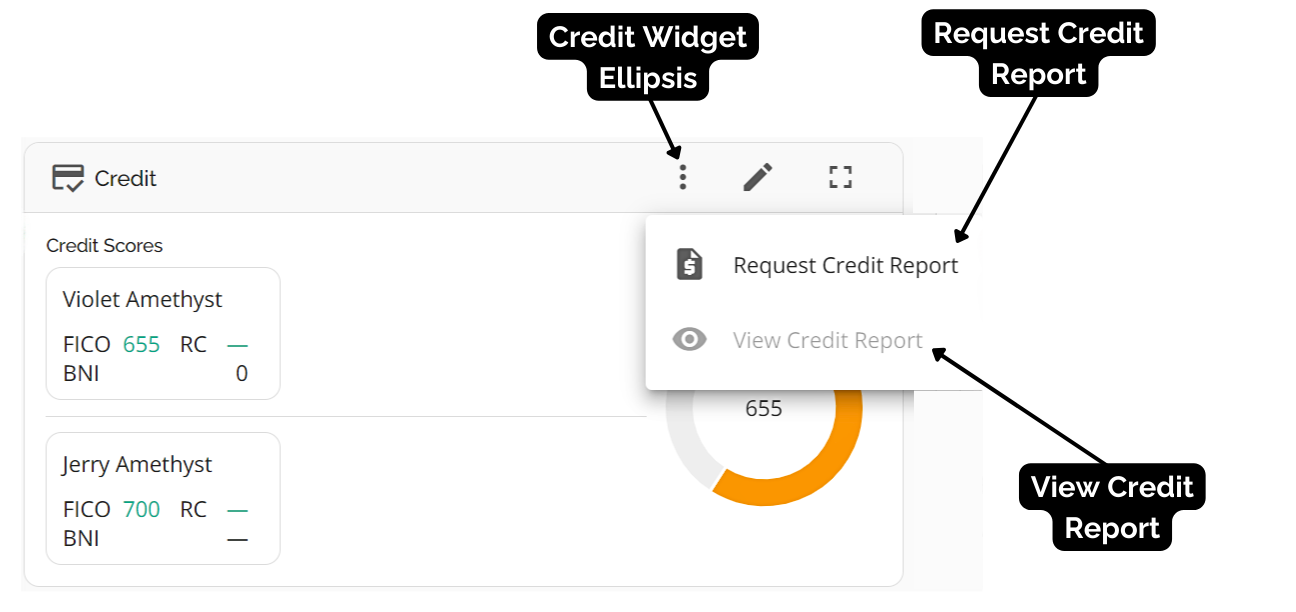
- Click the ellipsis located on the top right corner of the widget when expanded.
- A drop down will appear with the options of request a credit report and view credit report:
- Select the request for a credit report option.
- A pop up will appear listing all the applicants on the file.
- Select the applicants you wish to request a credit report for by selecting the check box to the left of the applicant’s name.
- In the next pop up that appears, scroll to the bottom of the pop up and select 'No' to the question ‘Requesting a joint credit report?’ and edit any error messages that may appear.
If you have multiple applicants you are requesting credit for, you will need to complete this process for each applicant.
-
Once you have completed these steps, click the ‘Next’ button.
-
A pop up will appear next with the applicant’s information summarized. Review to ensure all client information used to pull the report is accurate.
- When you are satisfied with the applicant’s information, proceed by clicking the ‘Request Credit Report’ button. If you need to, you can go back and modify the stakeholder's information by clicking the ‘Back’ button.
- If any hits are possible it will show a ‘Possible Hit’ above the list of potential individuals. You can accept the reports by clicking the ‘Accept Reports’ button.
If the reports do not pull any potential hits, it will show ‘No Hit’ and you will need to review the applicant information to ensure you have accurate information. Once the information is reviewed and updated, you can proceed to request a new report and accept any possible hits.
- Once the reports are accepted, you can proceed to viewing the credit report.


Only active tradelines (i.e. those with balances on the credit report) will populate the tradelines section of the Credit widget. This is to reduce any possible “noise” for underwriters when working a file. We also will identify the liability type based on the information received from the credit report. All liabilities can still be seen on the credit report itself.

View Credit Report

To view a credit report, follow these steps:
- Click the ellipsis located on the top right corner of the widget.
- A drop down will appear with the options to 'Request Credit Report' and 'View Credit Report':
- Select the View Credit Report option and the Credit Report pop up will appear.

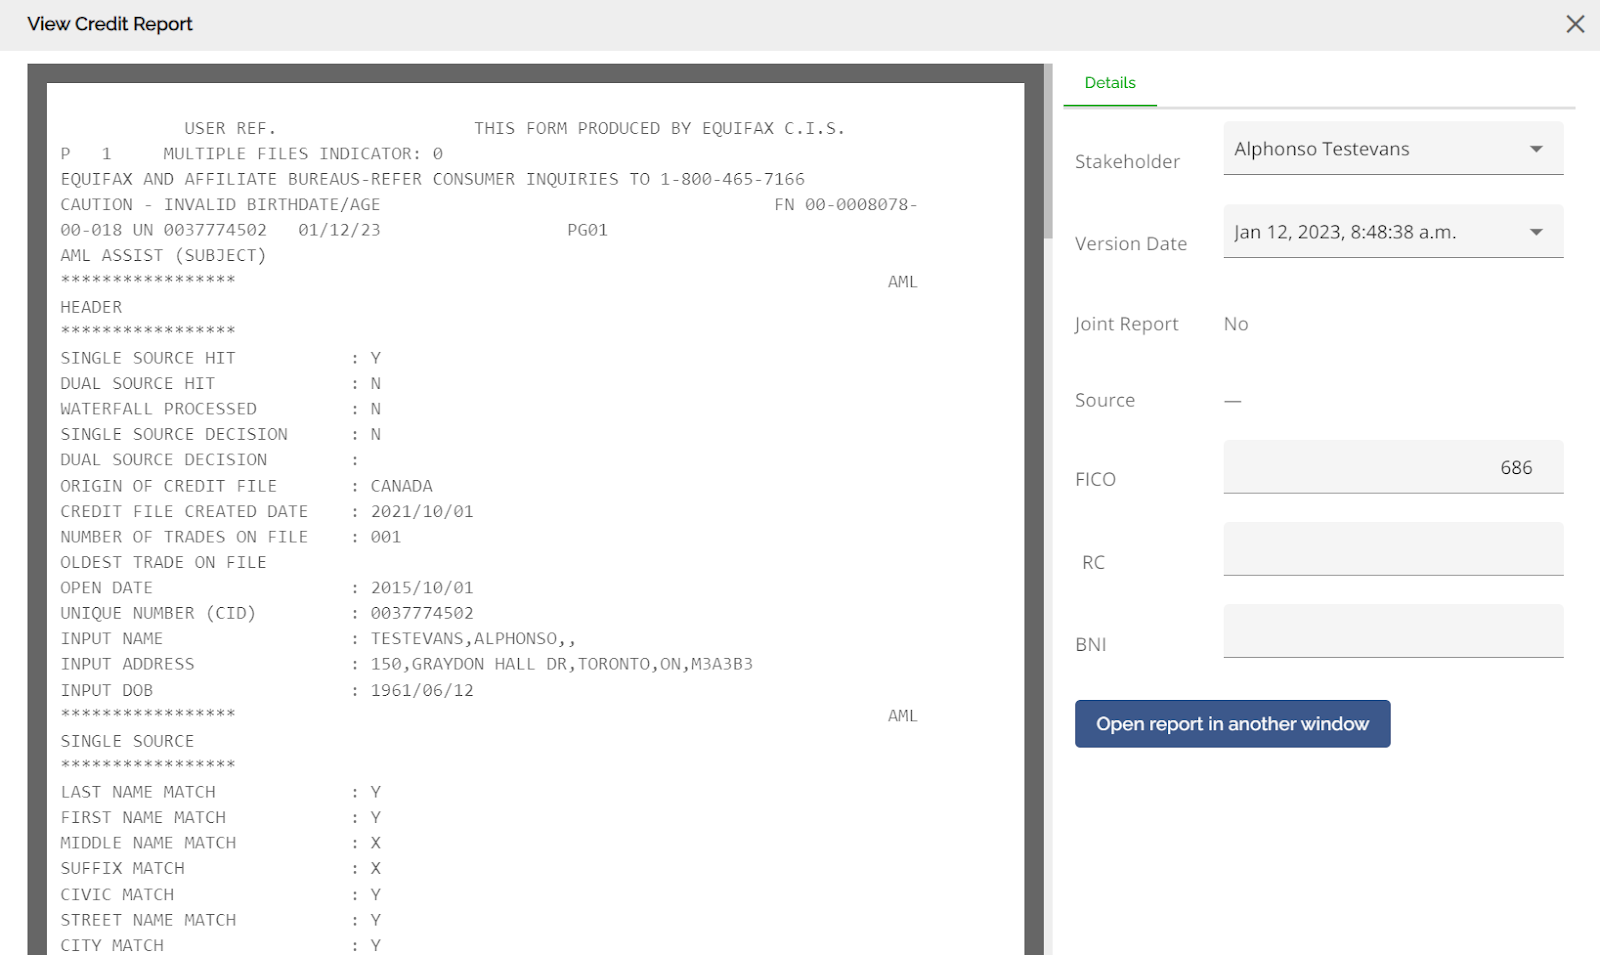
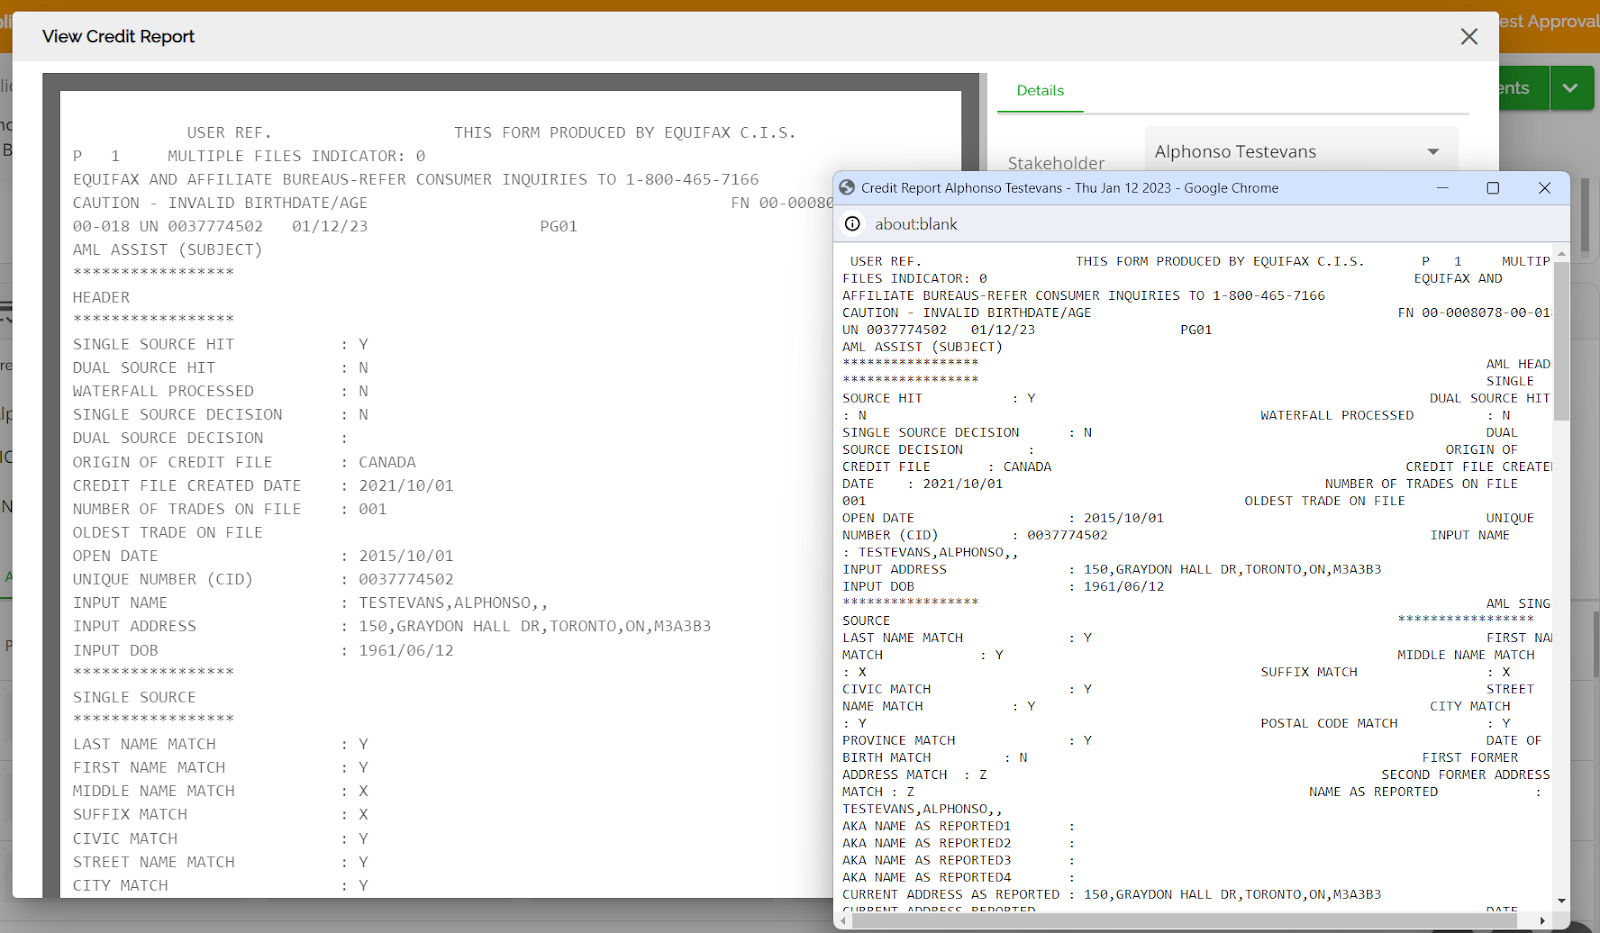
Within the Details section, there is an option to open the report in another window. Opening the report in another window provides a convenient way for users to view it alongside the application, allowing them to make necessary edits immediately without any back and forth. This feature is available for all versions of the credit report.
Below are the fields in the details section of the View Credit Report:
Stakeholder - Click on this field to select the stakeholder whose credit report you want to view.
Version Date - Click on this field to choose the specific credit report version you want to view.
Joint Report - This field indicates whether the report is a joint report or not.
Source - This field shows the credit report source.
Note: If the source is Equifax the user can not edit scores. Watch this demo to learn more.
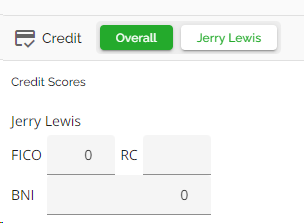
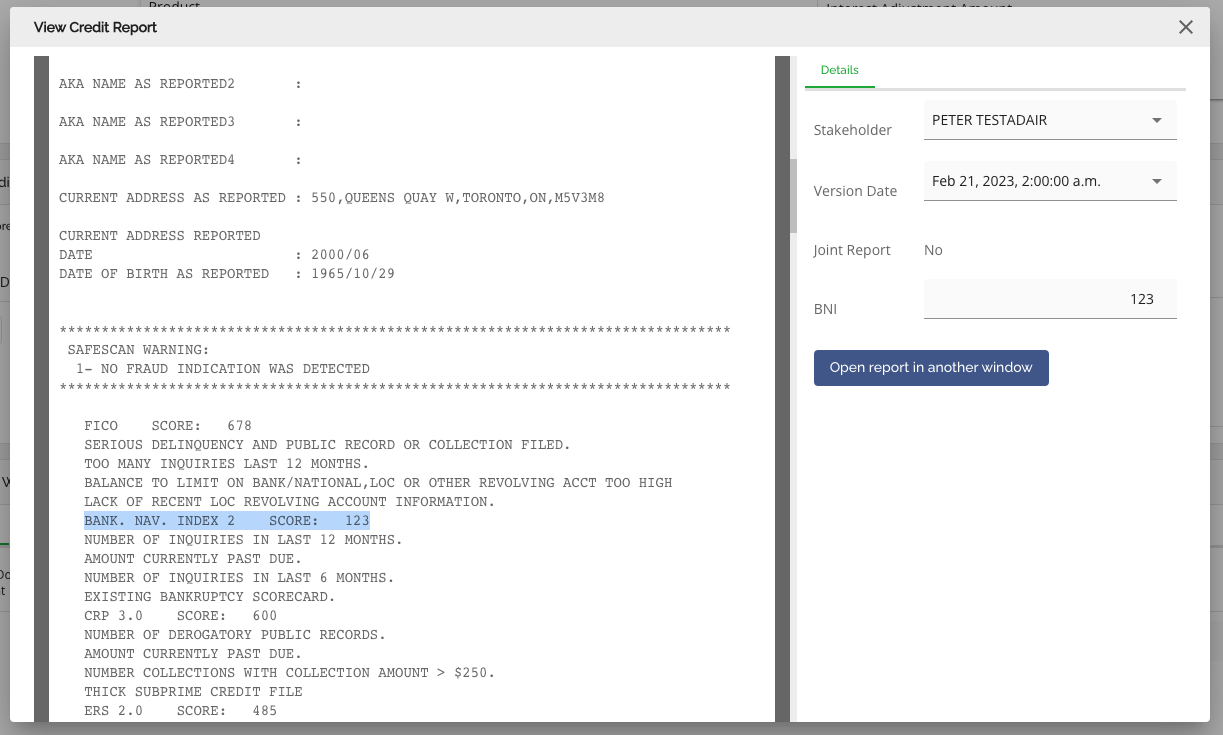
FICO - The FICO score for each applicant is displayed in this field. This score must be greater than 300 but less than 900. During a credit request check, Equifax may return rejected FICO scores. We show the FICO score for each applicant in the details section of the View Credit Report, and it is always displayed in the Credit Widget.
The FICO field allows manual input of numeric values (whole numbers, not decimals), including 0 or null.
RC (Rejection Code) – If a FICO score is rejected, we support these cases by allowing users to manually input values of 0, null, or letters (i.e., R, N, I) within the RC field in the Credit Widget. A null or a letter will be interpreted as a 0 and should map to credit tiers accordingly.
Additionally, if rejection codes are received from the credit bureau, they will be automatically mapped to the corresponding RC field.
For example, a 0 would go in the FICO Score section with an RC of "R."
BNI - We allow users to view and set the BNI score pulled from Credit Reports. The BNI score will be displayed in the credit widget in the same manner the FICO score displays.
Open Report In Another Window - Allows the user to open the report in another window so they can review the report side by side with the application.
Automations
Show when Credit Report is > 30 days
Note: This is a tenant specific setting that defaults to disabled. If a tenant wishes to enable it, they need to submit a request to FundMore.
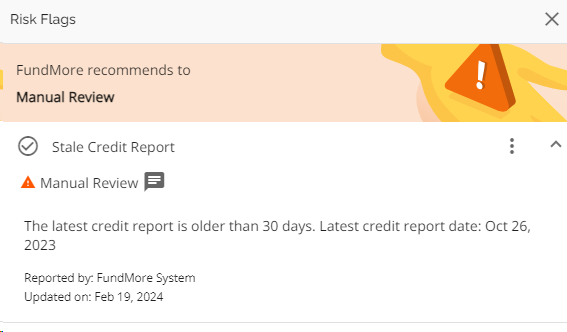
We have automated the system to perform daily checks that detect applications with credit reports older than 30 days. These checks occur everyday at 1AM, and the system looks at the latest credit report on the application. Upon completion of the check, the system generates a risk flag to highlight these applications, as per the company’s configurations.
For example, a risk flag type called “Stale Credit Report” could be generated. It may have a Manual Review severity level attached to it and the description may read “The latest credit report is older than 30 days. Latest credit report date: XXXX.”
On subsequent days, the system will update the number of days until a new credit report is requested, or the system detects a report newer than 30 days at which point the risk flag will be deleted.