Table of Contents
Key Points on Approvals for Underwriters
Mark as Conditionally Approved Workflow
Requestor to Recommender Workflow
Requestor to Requestor Workflow
Additional Notes on Approval Requests
Conditional Approval for Applications over the Underwriter’s Lending Limits
Conditional Approval for Applications within the Underwriter’s Lending Limits
Committed and Awaiting Docs Flags
Automatically Decline based on Subject Property Province
Automatically Decline if broker is Blocked
Introduction
In the FundMore system, there are four decisions that can be made on an application: Mark as Pending, Decline/Cancel, Conditionally Approve, and Fund (Final Approval). If the application originated from a POS system, these decisions will be sent back to the POS system. Otherwise, they will need to be manually communicated to the broker or borrower. To mark an application as Pending or Conditionally approved, you can find the action buttons in the drop-down menu by clicking on the ellipsis next to the Decline button in the left-hand menu of the application dashboard. The Fund and Decline action buttons are located to the left of the ellipsis.

Each POS system handles decisions a little differently. For example:
Filogix will update with Approved, Pending, & Declined. It does not update with Fund or Cancelled. Decision comments only go through with Approved, Pending, & Declined.
Velocity will update with Approved, Declined, & Fund. It does not update with Pending or Cancelled. However comments applied on a Pending decision will go through to Notes in Velocity but not Cancelled.
Lendesk/Finmo will update with Approved & Declined. It does not update with Pending, Cancelled, or Fund.
Mark as Pending Workflow
Once a deal is marked as pending, you can only change the decision to approve or decline (POS restriction). A pending decision will feed back to the POS system. We recommend that anytime a user is reconsidering an application that already had a decision go through the POS (i.e. conditionally approve, decline, etc.), they apply the Pending status to advise the broker via the POS they are reconsidering. To mark a deal as pending, follow these steps:
- Open the application you wish to action.
- Click on the "More Actions Ellipsis" located in the left-hand menu next to the Decline button.

- Select the "Mark as Pending" option.
- Select an underwriter and click "Next".

5. Enter your notes then click on the "Mark as Pending" button.

The status of the application on the dashboard will be updated to Pending and if you hover over the status it will show the notes entered when marking as pending and the date it was marked as pending. Additionally, there will be a pending status icon that will show in the pipeline view. A history log will be created to track the decision and any comments entered. This information will also be documented in the application notes.
![]()

When you are ready to begin working on your application again you continue to do so. The application’s status will only update once another decision has been made on it. Whether that be Decline, Cancel, or Conditionally Approve.
Approval Workflows
FundMore supports a fully auditable, configurable and easy to use approval process. The system is able to recognize lending authority limits, prevent users from funding applications when approvals are missing and it notifies all parties involved in the approval process in order to get to a fast resolution of issues while maintaining full compliance with internal and external audit requirements.
Currently, conditional approval is only blocked by a DLA approval requirement. This only functions if the necessary setting is enabled by the company i.e., "Conditional Approval Block if DLA is required" setting. On the other hand, "Fund" is blocked by all approval requests, including DLA and Custom approvals. However, Custom Approval requests, which are triggered by risk warnings, only block "Fund", not conditional approval. The system will disregard invalid approvals caused by a change in Loan Amount when checking for Mark As Approved or Fund actions. This means that if a user has the necessary DLA limits, they will not be blocked even if there is an invalid DLA approval requested by someone else. Our development team can modify this behavior to block conditional approval for all approval requests, but this change will only take effect once an approval request is generated. Therefore, it is crucial to have a task management system in place to ensure that an approval is created to block conditionally approved deals for risk warnings. This will ensure appropriate tracking and documentation for all exceptions.
For better understanding of the available options, we have discussed the different approval workflows within this section. The workflows relate to the ability to configure approvals from the Manager Portal where users can define DLA limits, custom exceptions or approvals based on their internal policies, such as GDS and TDS exceptions.
Key Points on Approvals for Underwriters
- Underwriters will only see deals assigned to them in their Pipeline View. This is a limited, more focused view in comparison to Managers.
- Underwriters have the ability to view and make changes to deals that have been assigned to them, either manually or automatically. The actions they can take depend on whether the deal aligns with their Designated Lending Authority (DLA), specifically if the requested amount falls within their approval limits. Their actions are also influenced by certain company automations, such as conditional approval blocking, which may require additional permissions or approvals.
- This will determine if an underwriter can conditionally approve or fund the deal.
- Within Approval Limits: If a deal falls within the underwriter's DLA, they enjoy full system functionality. This includes the power to conditionally approve, mark as pending, fund, or decline a deal. Additionally, they can issue commitments without the need for managerial input.
- Outside Approval Limits: Deals outside the underwriter's DLA still afford editing and underwriting capabilities including marking it as pending, declining it, and generating a commitment. However, to move forward, an approval request must be submitted to someone with the appropriate authority. The ability to conditionally approve depends on company settings and the presence of Conditional Approval Block automation.
- Generating a commitment letter is not the same as sending a commitment letter. It is simply creating the commitment letter document. The commitment is sent as part of the conditional approval process flow documented below.
Mark as Conditionally Approved Workflow
The conditional approval workflow will differ depending on whether DLA is required or not. Here is a flowchart depicting the paths within the workflow:

Note: There is automation available to block underwriters from conditionally approving a deal when DLA is required. If this setting is enabled and DLA is required, the underwriter cannot conditionally approve the application or send the commitment package until they receive the necessary approval. However, DLA approvals are often specific to the application, not the user. This means that if another user has already been approved for a DLA request, other users will not need to request approval on that deal unless the loan amount changes. However, there are exceptions and instances where even if one user has already obtained DLA approval for a specific request, subsequent users involved in the same deal might still need to seek DLA approval. For instance, in certain tenant environments, Funders or Closing Specialists might need to request DLA approval based on their lending limits. In such scenarios, when an underwriter transfers an approved deal to Pre-Fund and Closing Specialists, the DLA banner will prompt these individuals to obtain DLA approval, irrespective of prior approval for the file. Consequently, these team members will need to follow the DLA approval process.
DLA Approval Overview
When Lending Authority limits (DLA) are exceeded, users are prompted to ask for an approval. Decision Lending Authority (DLA) approvals are pre-configured and used to determine when a user exceeds their defined lending limit. The user limits are set up by Managers in the User Management section in the User Details section. To view your lending limits, follow these steps:
- Navigate to the Settings page either by clicking on "Settings" from the top navigation bar or by click the profile icon and clicking on "User Profile".

- Scroll to the User Settings section and click "View User Preferences".

- A pop-up window will open showing the "Preferences" associated with your account. This includes a "Loan Amount" field that displays your lending limit.

DLA Approval Workflow
To request approval, users can choose from available individuals based on your company's settings. Depending on your needs, you can opt to send the approval request to someone for review, even if they lack the necessary loan authority. In such instances, these individuals can offer recommendations for approval up the chain. Alternatively, you may directly send the request to an individual with the required loan authority to approve it. In order for a user to be selected as an approver, they have to be in office at the moment of the request, the system prevents the selection of a user which is marked as Out of Office.
Note: The approval request can only be opened and acted upon by the approver to whom it was sent. If the original approver is unable to act on it, no one else can. In such cases, the sender should cancel the request and submit a new one to a different approver.
To send an approval request, follow these steps:
- Navigate to the application dashboard.
- Click on "Approvals" within the left hand menu. This directs you to the approvals section.

- Click on the "Create New Approval Request" button i.e., the green plus button
 . Alternatively, click on the "Request Approval" button to the right of the orange banner.
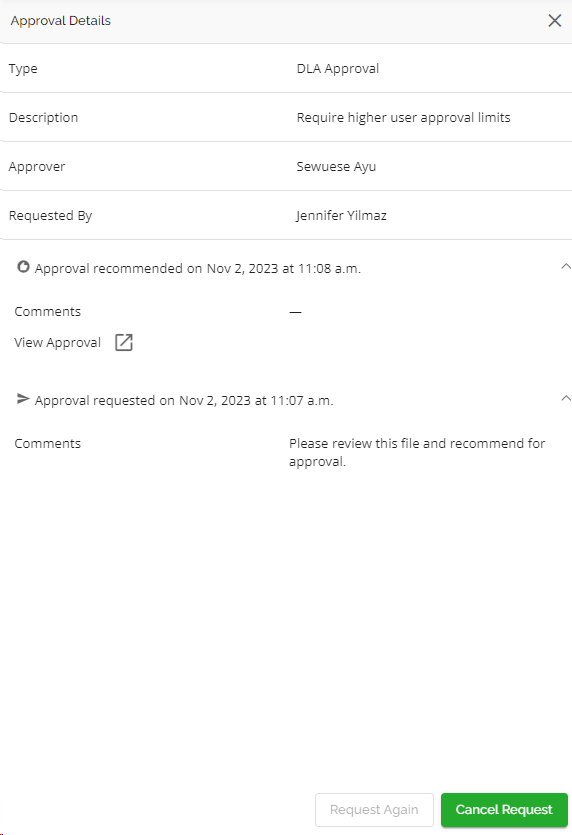
- This will open the "Approval Details" sidebar to the right of the screen:
- Select the "Type" of approval.

- Select the "Approver". This indicates who you are sending the approval request to.

You can select any user when sending a request, this includes users that do not have the required lending limit. To better understand this, refer to the Requestor to Recommender Workflow section. - Enter any relevant comments.

- Select the "Type" of approval.
- Once completed, click on the "Request Approval button". The orange banner indicating that DLA Approval is required will disappear from the top of the dashboard
When the request is approved, the following things will occur:
- You will receive an in-app notification that the request has been approved. This notification will not appear if you are in the deal when the approval is received.

- The notification bell will indicate that a new notification is received. You can navigate to the deal by clicking on the notification or by clicking on the deal card within the pipeline.
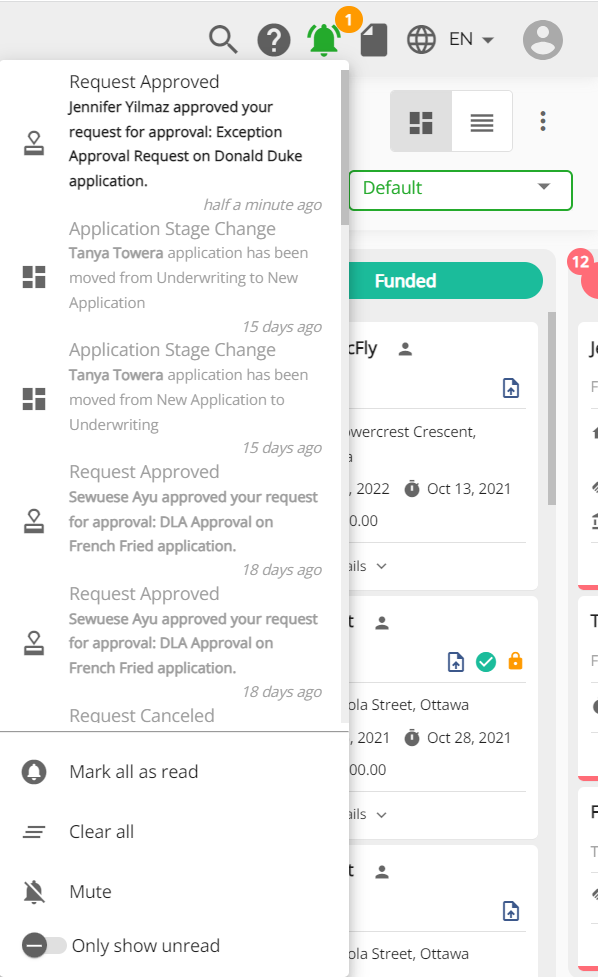
- The status column in line with the approval request will display a green checkmark.
Refer to the Actioning an Approval Request section for information on how to approve a request.
Custom Approval Requests
These approval requests are for situations that fall outside the scope of DLA, where a user may need to seek higher authority in order to proceed. Examples of such situations include exceptions for GDS or TDS, credit scores, location, and property type. Custom approval requests will only block the "Fund" decision and this will only occur if the risk warnings and associated tasks are set up. Custom approval requests are visible in the Manager Portal but require configuration by FundMore.ai's development team to trigger risk warnings. The risk warnings then need to be managed manually via tasks that the company can set up.
To ensure a smooth process, you can create a task that is linked to a specific stage that occurs in the beginning of the underwriting process. This will guarantee that any custom approval requests and their associated risk warnings are addressed early on. We recommend setting up your custom approvals in the Manager Portal under Approval Types. Afterward, simply send FundMore.ai a list of your custom approvals. Our development team will then create the necessary risk warnings, which will appear whenever a custom approval is required. Once that is done, create a task in the Manager Portal to trigger the user to address the risk warning.
Manager Portal Setup Example:

Dashboard Example:

Associated Task Example:

The system enforces a hard stop if there are outstanding tasks, serving as the primary control for custom approvals. Without configured tasks for reviewing risk warnings, there is no other control mechanism to prevent oversights.
Requestor to Recommender Workflow
When sending an approval request, we allow users to select any user. This includes users that do not have the required lending limit. This workflow assumes that an approval request exists on the deal. The workflow also assumes that the selected approver does not have the appropriate lending thus, the approve action is disabled on the request. Instead, the options available to the user are "Recommend for Approval", "Request Changes" or "Decline". The purpose of this feature is to streamline the Approval process so the responsibility can be shared with both managers and other members of the team.

To send an approval request, follow these steps:
- Navigate to the application dashboard.
- Click on "Approvals" within the left hand menu. This directs you to the approvals section.
- Click on the "Create New Approval Request" button i.e., the green plus button . Alternatively, click on the "Request Approval" button to the right of the orange banner.
- This will open the "Approval Details" sidebar to the right of the screen:
- Select the "Type" of approval.
- Select the "Approver". This indicates who you are sending the approval request to.
You can select any user when sending a request, this includes users that do not have the required lending limit. - Enter any relevant comments.
- Select the "Type" of approval.
- Once completed, click on the "Request Approval button".
The user has the option to "Recommend for Approval", "Request Changes" or "Decline". If the user chooses to recommend the deal for approval, they can select the "Recommend for Approval" option and move the application upstream. To do this, follow these steps:
- Navigate to the appropriate deal. This can be done from the email notification or by using the Approvals filter within the Pipeline View.
- Click on the link in the email notification
- Navigate to the application from Pipeline View

- Click on "Approvals" within the left hand menu. This directs you to the approvals section.
- Click on the link in the email notification
- Hover to the right of the Approval Type, the "Open details in sidebar" icon will appear.

- Click on the icon
 to open the "Approval Details" sidebar.
 - Click on the arrow next to the "Approve" button.

- Select the "Recommend for Approval" option. The system will automatically open a sidebar similar to that of a new approval request. The approval type will be prefilled with the same approval type as the original request.
- Select the "Approver" and enter any relevant comments.

- Once complete, click on the "Request Approval" button. If you wish to cancel the recommendation, click the "Cancel" button instead.

Once the new approval request is created, the status of the original request changes to Approval Recommended and a new request is created with the status of Pending.

On the original request, the approver can continue to recommend for approval, decline, request changes or approve actions if they have the right DLA. On the new request created, they only have the option to cancel.
In the details of the new request created there is a link to open the original request ![]() in the sidebar. Similarly, in the original approval is a link that opens the new request (i.e., the recommend for approval request)
in the sidebar. Similarly, in the original approval is a link that opens the new request (i.e., the recommend for approval request) ![]() in the sidebar. This allows for easy navigation for users.
in the sidebar. This allows for easy navigation for users.
The deal can be recommended for approval as many times as necessary or it can be sent directly to a user with the required DLA limits who can approve the deal. All actions are tracked within the application history. Refer to the Actioning an Approval Request section for information on how to approve a request.
If recommending a deal for approval up the chain, when the final approver responds with an "approved", "decline", or "request for changes", the notification is sent back to all the requesters in the approval chain, not just the user who made the last approval request.
Requestor to Requestor Workflow
The Requestor to Requestor workflow involves selecting yourself as an approver. By utilizing this feature, users are able to acknowledge that they recognize the exceptions on a file, and provide their rationale for approving the deal despite these exceptions. This ensures seamless documentation for audit purposes.
In this scenario, the options available to the user include "Approve", "Recommend for Approval", "Request Changes" or "Decline". 
The workflow is similar to that of an approval request. To proceed, follow these steps:
- Navigate to the application dashboard.
- Click on "Approvals" within the left hand menu. This directs you to the approvals section.

- Click on the "Create New Approval Request" button i.e., the green plus button .
- This will open the "Approval Details" sidebar to the right of the screen:
- Select the "Type" of approval.
- Select yourself as the "Approver".
- Enter any relevant comments.

- Select the "Type" of approval.
- Once completed, click on the "Request Approval button".
For this workflow, the user is able to create the approval request within the dashboard and approve it without having to leave the application. Simply select the approval from the list and click on the "Approve" button.

Everything is tracked within the application for easy validation by anyone in both the Approval section and in the history log.
| Approval Details | History Log |
 |
 |
Bulk Approval Requests
To enhance the efficiency of approval requests, users can now select multiple approval types and create all approvals in bulk. This feature streamlines the process, enabling users to request approvals from the same person or multiple individuals with the system handling the bulk of the workload.
Note: While approvals can be created/requested in bulk, each request within the group has to be actioned (i.e. accept, decline, etc.) separately.

Actioning an Approval Request
Once an approval request is sent, the user selected as the approver will instantly be notified of the request. The notifications they receive include:
- Email and in-app notifications: The email notification will include the underwriter's recommendation and the reason for their decision.
- Approval Counter
 : A number icon will appear beside the approval button in the left hand menu.
 - Approval Filter (Pipeline View): A number icon will appear next to the approval filter at the top of the Pipeline View.

- As soon as someone is requesting an approval from a user, that user will start seeing that deal in their own queue without needing to be assigned to the application.
The user has the option to "Approve" "Recommend for Approval", "Request Changes" or "Decline". The "Recommend for Approval" workflow is covered in the Requestor to Recommender Workflow section. This section will cover the other three options. To approve a request, follow these steps:
Note: The approval request can only be opened and acted upon by the approver to whom it was sent. If the original approver is unable to act on it, no one else can. In such cases, the sender should cancel the request and submit a new one to a different approver. Also, while approvals can be created/requested in bulk, each request within the group has to be actioned (i.e. accept, decline, etc.) separately.
- Navigate to the appropriate deal. This can be done from the email notification or by using the Approvals filter within the Pipeline View.
- Click on the link in the email notification
- Navigate to the application from Pipeline View
- Click on "Approvals" within the left hand menu. This directs you to the approvals section.

- Click on the link in the email notification
- Hover to the right of the Approval Type, the "Open details in sidebar" icon will appear.
- Click on the icon to open the "Approval Details" sidebar.
- Click on the "Approve" button.

- Enter any relevant comments in the pop-up that appears:

- Once complete, click on the "Approve" button.
Once approved, the status column for the request will update to a green checkmark with the Approvals section. The underwriter can then proceed with the conditional approval.

If you wish to request changes, the workflow is similar. Simply click on the "Request Changes" button. A pop-up will appear where you can enter any relevant comments. Once complete, click on the "Request Changes" button.
 The status column of the request will be updated and the approval requestor will be notified. Once the necessary changes have been made, you can proceed with approving the deal.

The "Request Changes" feature makes the collaboration between the underwriter and the approver, easy, quick and fully auditable.
The workflow to decline an approval request is similar. Simply click on the "Decline" button. A pop-up will appear where you can enter any relevant comments e.g. the reason for declining.
Once complete, click on the "Decline as Requested" button.
The status column for the request will be updated and the requestor will be notified.
Note: A decision on an approval request can be modified. To do so, navigate to the "Approval Details" sidebar and select the appropriate option.
Additional Notes on Approval Requests
Any action a user chooses to make (e.g., Decline, Request Changes or Approve), as well as any comments they enter, will get tracked within the approval request for the entire lifetime of the deal.

All actions on approvals are also in the Application History, and the comments and decisions will automatically be captured in the Application Notes. Additionally, approval actions trigger webhooks which a company can subscribe to for building custom workflows internally.

Furthermore, the DLA approval functionality will take into account the loan amount at which approval was given. As such, if the loan amount increases above the value it was when approval was received, the system will identify that and invalidate the old approval, forcing the user to require a new one. The system will also show the 'DLA Required' banner again to the user, block conditionally approve functionality and funding ability, until the approval is received again at the new level.
DLA Setting (Tenant Specific)
We have included a tenant specific setting to prevent approval requests to be sent to people without the correct DLA approval limits. Users who do not have the DLA approval limits will not be selectable from the dropdown if this setting is turned on.
By default, this tenant setting will be switched off meaning that DLA approvals can go to anyone regardless of their DLA. To turn it on, lenders need to navigate to the Setting section of the Manager Portal and turn on the setting from the Automations section.
If multiple approval types are selected and among them is a DLA, the tenant setting will be enforced.

When a DLA request is approved, the requestor gets notified and they can proceed with the deal without being blocked by the system. However, managers can configure if approvals should block the conditional approval action or not.

By default, unresolved approvals only block funding the application. If extra blocking is enabled, the user will be prevented from conditionally approving the deal when their lending authority is exceeded.

Conditional Approval for Applications over the Underwriter’s Lending Limits
This section details the conditional approval workflow for applications over the underwriter's lending limits i.e., applications that require DLA approval.
Step 1:
This process begins when an underwriter is assigned an application where the loan amount requested exceeds their approval limits. Such applications can easily be identified by the orange banner above the dashboard signaling that DLA approval is required.
This prompts the underwriter to send an approval request to a user with the appropriate approval limits.
Step 2:
The underwriter sends an approval request. To do so, it is important to understand the DLA workflow. Refer to the DLA Approval Workflow section for this step.
Step 3:
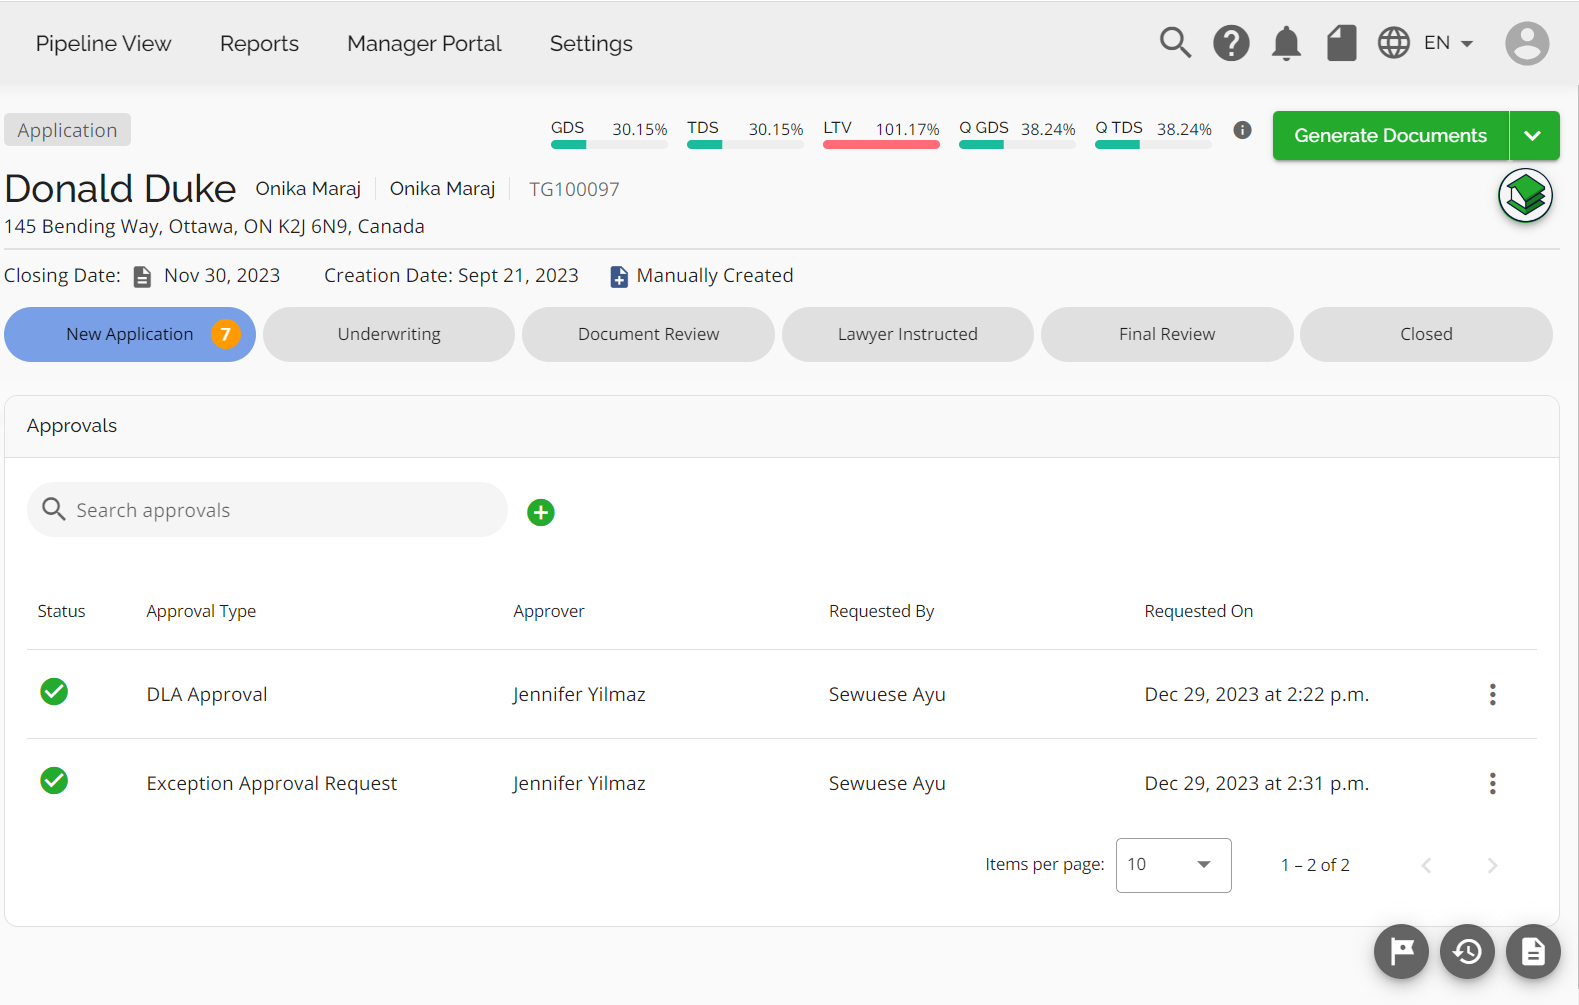
The approval request is reviewed by the appropriate user and approved. To learn more about this process, refer to the Actioning an Approval Request section. The underwriter will be notified when their recommendation has been approved or denied. The notifications they receive include:
- Email notification: The email notification will include the manager or approver's decision and any comments or reasons for their decision.
- In-app notification : The number counter next to the notification bell will increase. This signals to the underwriter that a decision has been made on their request by the manager or approver.

When within the approvals section of the application, users can easily see at a glance all approvals requested on the deal as well as their status and a full history of the actions performed on that request. A green checkmark next to the approval type column signifies a request that has been approved.

Step 4:
If the request is approved, the underwriter can proceed with the conditional approval process detailed below in the Conditional Approval for Applications within the Underwriter's Lending Limits section.
When there are changes to a deal that has been set as Conditionally Approved, the system will not check for DLA (Delegated Lending Authority) if any changes to the deal are made. If the Conditional Approval status is removed, then DLA (if applicable) will be required. For instance, if a file transitions from Conditionally Approved to Pending, and the loan amount exceeds the user’s authorized Lending Limit, the DLA banner will re-appear.
Conditional Approval for Applications within the Underwriter's Lending Limits
This section details the conditional approval workflow for applications within the underwriter's lending limits i.e., applications that do not require DLA approval.
Step 1:
This process begins when an underwriter is assigned an application within their approval limits. There will be no orange banner above the dashboard signaling that DLA approval is required thus, and the underwriter will not be restricted from performing any actions related to decisioning the application.
Step 2:
The underwriter reviews the application and makes the necessary changes. These include editing the liabilities, adding notes, selecting a product, adding condition, and generating and saving the documents that need to be added to the commitment package. Once the underwriter completes the changes to the application, they are ready to proceed to a conditional approval.
Step 3:
To mark the application as conditionally approved, follow these steps:
- Navigate to the menu in the left hand side of the application dashboard.

- Click on the ellipsis next to the "Decline" button. This will open a dropdown menu:

- Select the "Mark as Conditionally Approved" option.
- A pop up will appear where you need to complete the "Mark as Conditionally Approved" process. The path contains three sections: Team, Documents and Notes.

- Select an underwriter within the Team section. The list will populate with users from all roles. Simply scroll through the list to find the appropriate user. Click "Next" once selected.
- Select the documents in the Documents section. These are the documents you would like to include in the Commitment Package. To simplify process of sending documents back to the POS, we have implemented the ability to multi-select between all saved documents. If a document template is marked as “Commitment Package”, any generated or saved documents from that template will show up in the list of documents when conditionally approving the deal. If multiple documents are selected, they will be automatically combined into a single PDF and sent back to the POS. Additionally, if the underwriter has saved multiple versions of the same document, there is sort functionality available to assist them to select the most appropriate version. To use the sort functionality, hover to the right of the "Version Name" or "Saved Date" column headers. An arrow will appear
and you can use to sort in either ascending or descending order. The default sort is by date in descending order. This means that the most recently modified documents are grouped together at the top of the page.
Select the appropriate documents and click "Next" once completed.
Note: Currently, POS systems only accept one document when sending it back for conditional approval. This is a workaround to that limitation. - Enter any notes you wish to go back to the broker via the POS system.
- Once completed, click on the "Mark as Conditionally Approved" button.


After an application has been conditionally approved, the following things will occur:
- The decision and commitment package will be sent back to the broker via the POS system.
- The status of the application will be updated to "Conditionally Approved" at the top of the dashboard. If you hover over the status, you can view the notes associated with the approval and the date it was marked as Conditionally Approved.
- A history log will be created to track the decision and any comments entered. This information will also be documented in the application notes.

Note: You are able to pull approval notes into documents if needed. This would be relevant for anyone creating or managing document templates in your system.
Committed and Awaiting Docs Flags
Note: This is tenant specific and may not be applicable to your environment.
We have included flags for Committed and Awaiting Docs as part of the Conditional Approval process. To mark a deal as committed or awaiting docs, follow these steps:
- Open the application you wish to action.
- Click on the "More Actions Ellipsis" located in the left-hand menu next to the Decline button.
- Select the appropriate option i.e., “Mark as Committed” or “Mark as Awaiting Docs”.

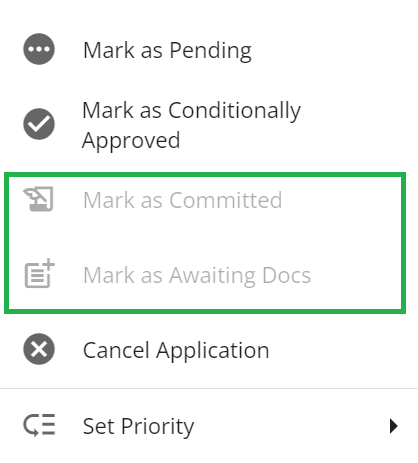
These flags will remain inactive until the application reaches a stage where they are eligible to be applied.
The Committed flag can only be applied once a file is the Deal Acceptance stage and a Conditional Approval has been issued.


The Awaiting Docs flag can only be applied once the Committed flag has been applied.

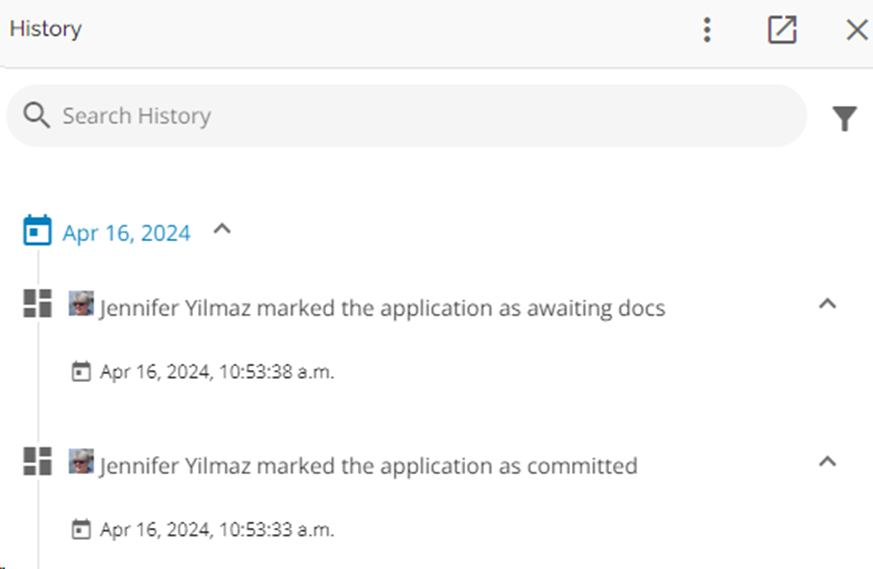
When the flags are applied, they will appear at the top of the dashboard to the right of the Conditional Approval notation and a history entry will be created. Click on this link to watch a video demonstration of this functionality: Committed and Awaiting Docs Flags.

Mark as Declined Workflow
If you wish to decline an application, follow these steps:
- Navigate to the menu in the left hand side of the application dashboard.

- Click on the "Decline" button.

- A confirmation pop up will appear:
- Select a reason for declining the application and provide any relevant comments. Note, there are no restrictions on the number of characters when adding comments.
- Click on the "Decline" button.

After an application has been declined, the following things will occur:
- You will receive an in-app notification that your deal has been declined.
- The system will automatically lock the application and an orange bar will appear above the dashboard indicating that the application is locked.
- The color of the "Decline" button will change to red, and the text will change to "Declined".
- The application will move to the "Declined" stage.

- The application status will update to "Declined" at the top of the dashboard, next to how the file was ingested.
- The decline reason, date, and stage the file was in when declined will populate beneath the "Fund" and "Declined" buttons.

- A history log will be created with any relevant information e.g., who declined the application, when it was declined, the decline reason, etc.

- The system will automatically add an application note referring to the decline decision.

You can update the decline date if you have the permission to decline a file. However, you cannot "re-decline" a file. This means that if you unlock the file, you cannot click on the "Decline" button again, nor can you update the decline reason or comments. The original decline date and reason will remain in the left-hand menu of the application dashboard, and the "Declined" status will remain at the top of the dashboard. The reason being that the decline decision is sent back through the POS system. Therefore, until a new decision is processed, the status will remain the same.
Note: We recommend that anytime a user is reconsidering an application that already had a decision go through the POS (i.e. conditionally approve, decline, etc.), they apply the Pending status to advise the broker via the POS they are reconsidering.
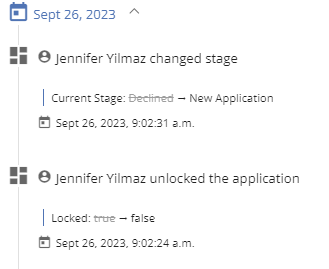
Here is an example of what is described above. In this case, we have an unlocked application that was previously declined but remains in the "Declined" stage as the stage is not changed by the user.

If there was a need to re-decision the application i.e., decline it again, you would need to move it back to a different stage . To do so, follow these steps:
- Navigate to the application dashboard.
- Unlock the application. This is permission based i.e., only users with the relevant permissions can unlock an application.
There are two ways to do this:
- Click on the "Unlock Application" button on the right side of the orange banner above the dashboard.
- Click on the ellipsis beside the "Cancelled" button and select the "Unlock Application" option.
- A confirmation pop up will appear:

- Select a reason for unlocking the application and provide any relevant comments.
- After unlocking the application, you need to move it back to the appropriate stage. You can achieve this by either clicking on the relevant stage at the top of the dashboard or by navigating to the Pipeline and dragging the application tile to the corresponding stage.
When a new stage is selected, you can proceed with re-decisioning the application. It is important to note that the transition of an application to the declined stage is tracked in the application history. When necessary, lenders can use the decline date for reports. The decline date might differ from the moment the lender moves the deal to decline in various cases, such as verbal communication of the decision before the deal moved into FundMore or delayed updates by the lender when the broker cancels.
Automatically Decline based on Subject Property Province
We have implemented an automatic workflow designed to streamline the application process by declining applications where the primary property falls outside of the company’s supported regions. As this functionality is tenant specific, the lender must request that FundMore enable it. Here is how it works:
Upon ingestion, the system will check the province of the subject property against a predefined list of supported regions. If an application lists a subject property located in a region where the company’s services are not available, the system will automatically decline the deal. For example, if the company only accepts applications from Ontario and British Columbia, any application with a subject property in other provinces will be rejected upon ingestion.
Following this decision, a decline reason will be added to the deal i.e., “Unsupported region”, and a tenant drafted response will be sent back to the Broker to notify them of the outcome. An example of such a response is: "Thank you for your submission. We regret to inform you that we currently do not accept applications outside of Ontario."
Note: If this setting is not enabled, the system will not automatically decline any deals based on subject property region. To better understand this feature, click on this link to watch a video demonstration.
Automatically Decline if broker is Blocked
We have implemented an automatic workflow designed to streamline the application process by declining applications where the broker is marked as Blocked in the Manager Portal. As this functionality is a tenant setting, the lender must request that FundMore enable it. Here is how it works:
Upon ingestion, the system will check the broker against those entered in Broker Management in the Manager Portal. If there is a match to a broker in the Manager Portal that is marked as Blocked, the system will automatically decline the application and send an email notification to the broker. The application will ingest but be marked as declined, will be locked, and will appear in the Decline stage within the pipeline.
Following this decision, a decline reason will be added to the deal i.e., “Blocked Broker”, and a tenant drafted response will be sent back to the Broker to notify them of the outcome.
Note: If this setting is not enabled, the system will not automatically decline any deals if the broker is blocked.
Mark as Cancelled Workflow
There is an option to cancel an application, which functions similarly to declining it. However, canceling an application specifically indicates that it has been cancelled, rather than declined. If you wish to cancel an application, follow these steps:
- Navigate to the menu in the left hand side of the application dashboard.
- Click on the ellipsis next to the "Decline" button. This will open a dropdown menu:

- Select the "Cancel Application" option.
- A confirmation pop up will appear:

- Select a reason for cancelling the application and provide any relevant comments. Note, there are no restrictions on the number of characters when adding comments.
- Click on the "Cancel Application" button.
After an application has been cancelled, the following things will occur:
- You will receive an in-app notification that your deal has been cancelled.
- The system will automatically lock the application and an orange bar will appear above the dashboard indicating that the application is locked.
- The colour of the "Decline" button will change to red, and the text will change to "Cancelled".
- The application will move to the "Declined" stage.

- The application status will update to "Cancelled" at the top of the dashboard, next to how the file was ingested.
- The cancel reason, date, and stage the file was in when cancelled will populate beneath the "Fund" and "Cancelled" buttons.
- A history log will be created with any relevant information e.g., who cancelled the application, when it was cancelled, the cancel reason, etc.

- The system will automatically add an application note referring to the cancellation.

The decision to cancel an application can be reversed if necessary. To do so, follow these steps:
- Navigate to the application dashboard.
- Unlock the application. This is permission based i.e., only users with the relevant permissions can unlock an application.
There are two ways to do this:
- Click on the "Unlock Application" button on the right side of the orange banner above the dashboard.
- Click on the ellipsis beside the "Cancelled" button and select the "Unlock Application" option.
- A confirmation pop up will appear:
- Select a reason for unlocking the application and provide any relevant comments.
- After unlocking the application, you need to move it back to the appropriate stage. You can achieve this by either clicking on the relevant stage at the top of the dashboard or by navigating to the Pipeline and dragging the application tile to the corresponding stage.
When a new stage is selected, the cancellation decision is reversed. The "Cancelled" button reverts to a greyed out "Decline" button. Additionally, a history log is created to indicate that the application was unlocked and the stage was changed..
The status at the top of the dashboard will remain unchanged until you make another decision on the file. The reason being that the decline, pend, conditionally approved, and cancelled decisions are sent back through the POS system. Therefore, until a new decision is processed, the status will remain the same. 
Mark as Funded Workflow
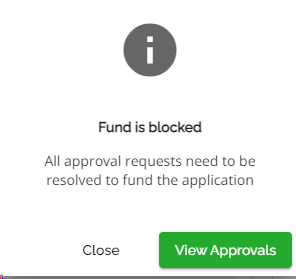
Once an application has been funded by the lender it is ready to move to the Funded stage. It should be noted that the action of marking a file as funded is blocked by default if there are any unresolved approvals. If there are unresolved approvals, the user will get an error message advising them.
These will need to be resolved before they can move the file to the Funded stage. In addition to this, it is important to make notes of the following:
- If the application is within the underwriter's loan authority and they are not required to obtain DLA approval and they have not approved the file, the Funder will be presented with the DLA banner when the file is assigned to them. If they try to fund, they will get the "Fund is blocked" warning. They must obtain DLA approval before they can fund.
- If the application is not within the underwriter's loan authority they have to obtain DLA before they can approve. Once approved, the Funder will not be presented with the DLA banner when the file is assigned to them and they can fund as needed without obtaining DLA approval.
Essentially, the system requires an approval (DLA or conditional) before the file can be funded regardless of who requests it. This requirement is in conjunction with resolving any unresolved approvals. An unresolved approval can be one that has been requested but not yet approved or one that has not yet been requested.
Roles and Approval Requirements for Funding:
- Underwriters have lending limits. If the loan amount is within their lending authority and they did not obtain DLA, the Funder must get DLA approval before funding.
- Funders do not have lending limits. They will need to obtain DLA approval if the underwriter did not get one. If the underwriter obtained DLA approval, the Funder will not need to.
Please ensure that DLA approval is obtained when necessary to avoid funding issues.
To mark an application as funded, follow these steps:
- Navigate to the menu in the left hand side of the application dashboard.
- Click on the "Fund" button.

- A confirmation pop up will appear:
- Click on the "Fund" button.

The following will happen when a file is marked as funded:
- The system will automatically lock the application and an orange bar will appear above the dashboard indicating that the application is locked.
- The colour of the "Fund" button will change to gray and the text will change to "Funded".
|
- The application will move to the "Funded" stage.
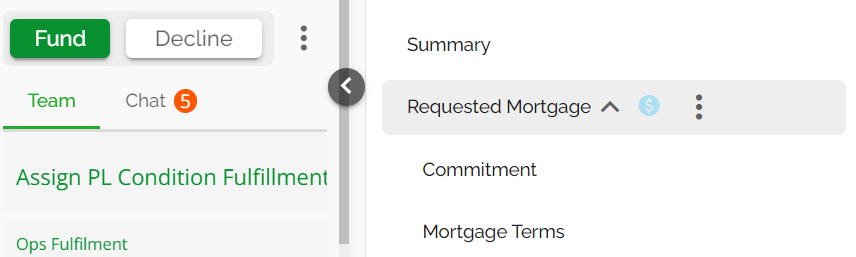
Note: The system blocks Funding until all active mortgages have the status “Funds Disbursed” applied. This is with regards to a tenant specific feature in the Requested Mortgages tab of the Loan Details widget, and as such may not apply in your environment. If this feature is enabled and any product on the file does not show this status, the Fund button will be disabled, and the user cannot fund the deal. In this case, if a user hovers over the greyed out Fund button, a message will be displayed indicating that "Not all products have the Funds Disbursed status”.
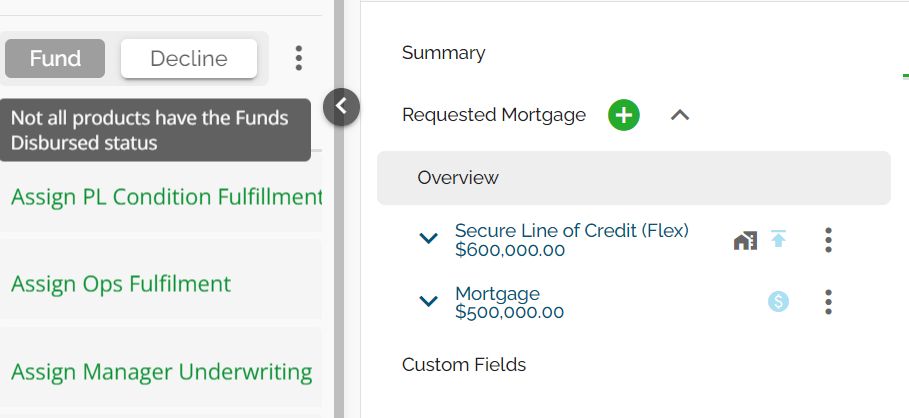
Once the status is updated to Funds Disbursed, the Fund button will turn green. With the button enabled, the user can proceed to fund the deal.