Table of Contents
Requesting a Mortgage Insurance Quote
Canadian Mortgage and Housing Corporation
Other Features for Insurance Submissions
Introduction

The functionality for submitting and managing default insurance requests is contained within the Insurance tab located in the Loan Details Widget. The Insurance tab allows you to easily request a mortgage insurance quote from the insurance provider and keeps track of all the relevant information in the system. Additionally, you are able view all communications from the insurer, including the quote number, status, insurer messages, and insurer responses, within the tab. The insurance status and the number of times the request has been resubmitted to the insurer will also appear on the application dashboard, helping lenders identify any potential bottlenecks in the processing of a deal.
Furthermore, each time an insurance request is submitted, a history log is created. This information tracked in this log includes the date and time of the request, the user who made the request, the insurer, the quote number, the advance type requested, the inspection flag if applicable, the insurance indicator, and the comments entered during the submission.
Users have the option to view the insurer's response in a separate window. This feature allows underwriters to review the response alongside the deal and make any necessary changes easily if needed.


Users also have the option to download the Insurance Certificate (Certifax) that is generated for Sagen and Canada Guaranty.

Requesting a Mortgage Insurance Quote
Sagen
We have implemented the ability to request default mortgage insurance from Sagen. When a request is created, all the relevant data will be pulled directly from the deal and sent over to Sagen for confirmation. The responses to your request will automatically be updated with the system. This includes any updates to the status, and lenders can easily see any conditions requested by insurers.
Request an MI Quote - To submit an MI Quote request to Sagen, follow these steps:
- Navigate to the Insurance tab within the Loan Details widget.
- Click on the Edit Icon
found in the top left corner of the widget.
- Click on the Request MI Quote icon
. This icon is only visible if the widget is in edit mode.
- A drop down menu menu will appear showing a list of insurance providers:

- Select the provider you would like to submit a request to i.e., Sagen.
- The "Request MI Quote" pop-up window will appear:

- Within the pop-up, you will be required to complete the following steps:
- Review (only if information is missing)
- Confirm Request
- Comments
- Response
Review
The Review step only populates when there are fields within the application that are missing. The missing fields are indicated in red and a warning message will display at the bottom of the screen. 
You are required to populate the fields before you can continue the process of requesting a quote. To populate the missing fields, click on the inline ellipsis to the right of the warning. A pop up will appear allowing you to navigate back to the area within the application that the error message applies to. Make the required corrections and navigate back to the Request MI Quote icon to start the process again.
 The Review stage will display a message notifying you the application is compliant with the selected insurer and you can now move to the next step. To move to the next step, click on the ‘Next’ button. Once all missing fields have been addressed, or if there are no missing fields, you will be directed to the Confirm Request Step.
Confirm Request Step
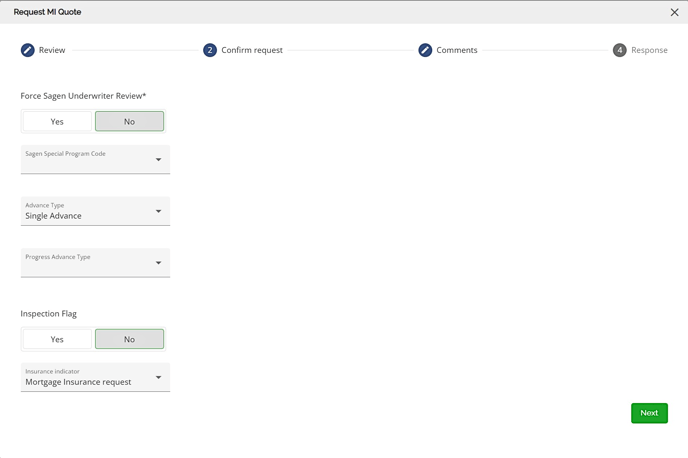
The Confirm Request step indicates the application is compliant with the selected insurer. This step includes the following fields:
Force Sagen Underwriter Review* - This field is mandatory and is set to 'No' by default. It is used to bypass the automatic approval process and provides the ability to request for an underwriter to review the insurance file.
Sagen Special Program Code - Click on the arrow to select your program/product for the application.
Advance Type - This field defaults to the ‘Single Advance’ option. Click on the arrow to select ‘Multiple Advance’ if applicable.
Progress Advance Type - Click on the arrow to select the appropriate advance type for the loan. The options include Builder, Contractor, Self-Build, & Prefabricated Homes.
Inspection Flag - This field defaults to “No”. It is only required if Multiple Advance is selected in the Advance Type field. Select ‘Yes’ to place an inspection flag on the file in which case Sagen will arrange the inspection. Select ‘No’ if no inspection is required or if the lender will arrange the inspections.
Insurance Indicator - This field defaults to the ‘Insurance Request’ option. Click on the arrow to select the ‘Low Ratio’ option.
Once the fields are populated, click the ‘Next’ button to move to the next step.
Comments Step
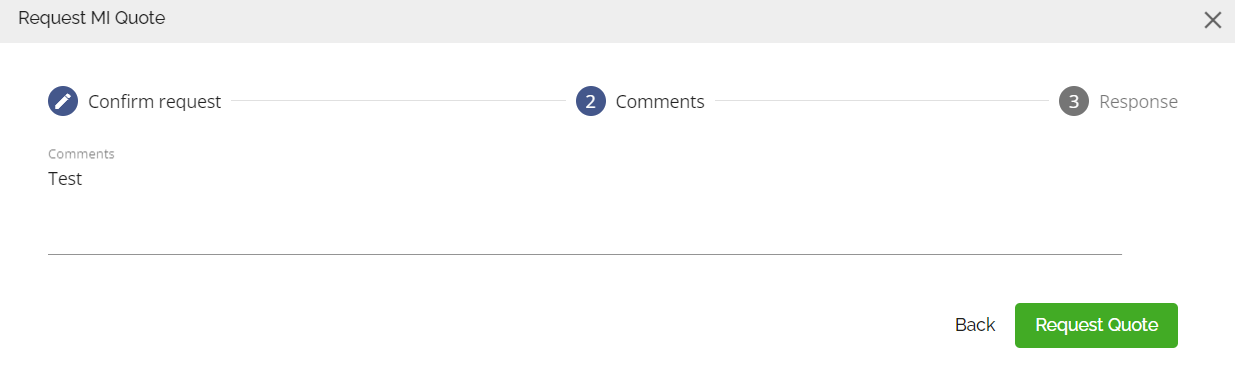
The Comments section allows you to write comments regarding the request for the application.
Note: The maximum number of characters allowed in this field is 600.
Once completed, click on the ‘Request Quote’ button to submit the request.
Response

After submitting the request, a message will appear in the Response section confirming that the request was successfully submitted and is now being processed by the insurer. To close the pop-up and go back to the Insurance tab, click on the Close button located at the bottom right of the screen.
View the Insurance Tab for Insurer Status
Once the request is submitted, it will appear in the Insurance tab list and the Insurer Status column will display ‘Submitted’.

When the status of the request is changed by the insurer, you will receive a notification via the notification icon found in the top right menu of the screen, and the 'Quote #' column will populate with a number.

Options within the Inline Ellipsis
When the Insurance tab is not in edit mode, the inline ellipsis will have one option i.e., "View Response".

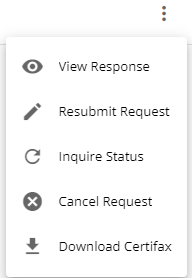
When the Insurance tab is in edit mode, the inline ellipsis will have five options to choose from: "View Response", “Resubmit Request”, “Inquire Status”, “Cancel Request”, and “Download Certifax”.
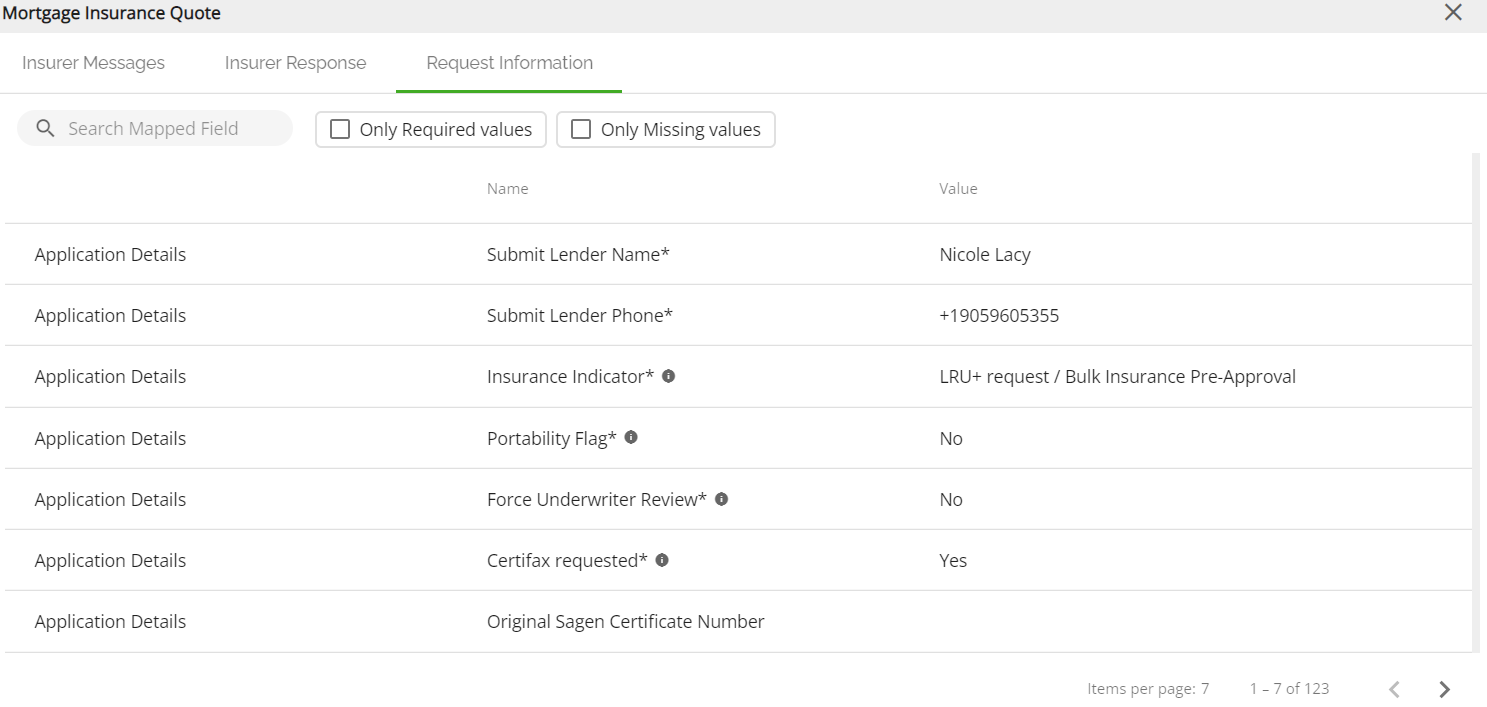
“View Response” - The Mortgage Insurance Quote pop-up screen will appear with three tabs: Insurer Messages, Insurer Response and Request Information.
- Insurer Messages - This tab displays the messages from the Insurer and the status of the request. The search bar can be used to find specific data within the tab.
- Insurer Response - This tab displays important information from the insurer regarding the quote including the reference number (which is the generated Quote # displayed in the insurance tab), the insured amount, and premium amount. The search bar can be used to find specific fields and the column can be sorted by ascending and descending values.
Note: These values do not populate automatically in the application and are for reference purposes only.
- Request Information - This tab displays all the fields from the application that were submitted for the Mortgage Insurance Quote. The search bar can be used to find specific fields and the column can be sorted by ascending and descending values. In addition to that, you can filter the data by ‘Only Required Values’ and Only ‘Missing Values’.

“Resubmit Request” - This will open up the Request MI Quote pop up enabling you to resubmit your request to the insurer. When you resubmit a request, the Quote number (i.e., Reference number) from the insurer will remain the same. The Insurer Messages and Insurer Response from the initial submission will be removed from the ‘Review Response’ pop-up screen.
“Inquire Status” - This will update the Insurance Status, if applicable.
“Cancel Request” - This will send a notification to the insurer, advising them that the original request is cancelled and your Insurer Response will update to Cancel.
“Download Certifax” - Users have the ability to download the Insurance Certificate whenever it is needed. Once the certificate is received and approved, it will be permanently stored within the file. Users can easily access and download the certificate from the list of available actions for the insurance quote.
Canada Guaranty
We have implemented the ability to request default mortgage insurance from Canada Guaranty (CG). When a request is created, all the relevant data will be pulled directly from the deal and sent over to CG for confirmation. Special programs, Low/High Ratio as well as other fields, can be manually adjusted before requesting insurance. The responses to your request will automatically be updated with the system. This includes any updates to the status, and lenders can easily see any conditions requested by insurers.
Request a MI Quote - To submit a MI Quote request to Canada Guaranty, follow these steps:
- Navigate to the Insurance tab within the Loan Details widget.
- Click on the Edit Icon
- Click on the Request MI Quote icon
- A drop down menu menu will appear showing a list of insurance providers:
- Select the provider you would like to submit a request to i.e., Canada Guaranty.
- The "Request MI Quote" pop-up window will appear:

- Within the pop-up, you will be required to complete the following steps:
- Review (only if information is missing)
- Confirm Request
- Comments
- Response
Review
The Review step only populates when there are fields within the application that are missing. The missing fields are indicated in red and a warning message will display at the bottom of the screen.
You are required to populate the fields before you can continue the process of requesting a quote. To populate the missing fields, click on the inline ellipsis to the right of the warning. A pop up will appear allowing you to navigate back to the area within the application that the error message applies to. Make the required corrections and navigate back to the Request MI Quote icon to start the process again.
 The Review stage will display a message notifying you the application is compliant with the selected insurer and you can now move to the next step. To move to the next step, click on the ‘Next’ button. Once all missing fields have been addressed, or if there are no missing fields, you will be directed to the Confirm Request Step.
Confirm Request Step

The Confirm Request step indicates the application is compliant with the selected insurer. This step includes the following fields:
Force Canada Guaranty Underwriter Review* - This field is mandatory and is set to 'No' by default. It is used to bypass the automatic approval process and provides the ability to request for an underwriter to review the insurance file.
Insurance Indicator - This field defaults to the ‘Insurance’ option. Click on the arrow to select the ‘Low Ratio Uninsured’ option.
Special Program Code - Click on the arrow to select your program/product for the application.
Progress Advance Type - Select "Yes" or "No". If yes, click on the arrow to select the appropriate advance type. The options include Contractor, Home Builder (Residential) & Self-Built.
Progress Inspection Flag - Select ‘Yes’ to place an inspection flag on the file in which case Canada Guaranty will arrange the inspection. Select ‘No’ if no inspection is required or if the lender will arrange the inspections.
Once the fields are populated, click the ‘Next’ button to move to the next step.
Comments Step
The Comments section allows you to write comments regarding the request for the application.
Note: The maximum number of characters allowed in this field is 650.
Once completed, click on the ‘Request Quote’ button to submit the request.
Response

After submitting the request, a message will appear in the Response section confirming that the request was successfully submitted and is now being processed by the insurer. To close the pop-up and go back to the Insurance tab, click on the Close button located at the bottom right of the screen.
View the Insurance Tab for Insurer Status
Once the request is submitted, it will appear in the Insurance tab list and the Insurer Status column will display "Referred to Underwriter". Additionally, the 'Quote #' column will populate with a number.

When the status of the request is changed by the insurer, you will receive a notification via the notification icon found in the top right menu of the screen.

Options within the Inline Ellipsis
When the Insurance tab is not in edit mode, the inline ellipsis will have one option i.e., "View Response".
When the Insurance tab is in edit mode, the inline ellipsis will have five options to choose from: "View Response", “Resubmit Request”, “Inquire Status”, “Cancel Request”, and “Download Certifax”.
“View Response” - The Mortgage Insurance Quote pop-up screen will appear with three tabs: Insurer Messages, Insurer Response and Request Information.
- Insurer Messages - This tab displays the messages from the Insurer and the status of the request. The search bar can be used to find specific data within the tab.

- Insurer Response - This tab displays important information from the insurer regarding the quote including the reference number (which is the generated Quote # displayed in the insurance tab), the insured amount, and premium amount. The search bar can be used to find specific fields and the column can be sorted by ascending and descending values.
Note: These values do not populate automatically in the application and are for reference purposes only.
- Request Information - This tab displays all the fields from the application that were submitted for the Mortgage Insurance Quote. The search bar can be used to find specific fields and the column can be sorted by ascending and descending values. In addition to that, you can filter the data by ‘Only Required Values’ and Only ‘Missing Values’.

“Resubmit Request” - This will open up the Request MI Quote pop up enabling you to resubmit your request to the insurer. When you resubmit a request, the Quote number (i.e., Reference number) from the insurer will remain the same. The Insurer Messages and Insurer Response from the initial submission will be removed from the ‘Review Response’ pop-up screen.
“Inquire Status” - This will update the Insurance Status, if applicable.
“Cancel Request” - This will send a notification to the insurer, advising them that the original request is cancelled and your Insurer Response will update to Cancel.
“Download Certifax” - Users have the ability to download the Insurance Certificate whenever it is needed. Once the certificate is received and approved, it will be permanently stored within the file. Users can easily access and download the certificate from the list of available actions for the insurance quote.
Canadian Mortgage and Housing Corporation (CMHC)
We have implemented the ability to request a mortgage insurance quote from CMHC. When a request is created, all the relevant data will be pulled directly from the deal and sent over to CMHC for confirmation. The responses to your request will automatically be updated with the system. This includes any updates to the status, and lenders can easily see any conditions requested by insurers.
Request a MI Quote - To submit an MI Quote request to CMHC, follow these steps:
- Navigate to the Insurance tab within the Loan Details widget.
- Click on the Edit Icon
- Click on the Request MI Quote icon
- A drop down menu menu will appear showing a list of insurance providers:

- Select the provider you would like to submit a request to i.e., CMHC.
- The "Request MI Quote" pop-up window will appear:

- Within the pop-up, you will be required to complete the following
- Banking Info
- Confirm Request
- Comments
- Review
- Results
Banking Information
This section allows you to input the primary applicant’s banking information. Once all the fields are completed click next to move to the next step.
Note: There are no required fields in this section.
Confirm Request
Within this section, you are able to input any additional information about the request.
Processing Option * - This is a required field. The options include "Submit For Insurance", "Submit for LR Loan Assessment" and "Submit LR for Underwriter Review".
Application Type * - This is a required field. Select the appropriate option for your application.
Do improvements need to be carried out? - Select one of the options to indicate if improvements are being carried out or required to the property as a condition of insurance. This field defaults to ‘No’.
Request CMHC Underwriter Review - Select one of the options to indicate if you would like the request to be referred to a CMHC Residential Underwriter. When ‘Yes’ is selected, an automatic referral to a CMHC Residential Underwriter will be generated. Select ‘ No’ if you would like to bypass this option. This field defaults to ‘No’.
Is additional financing being used by the borrower in addition to this loan? - This identifies if additional financing has been used by the borrower to complete the transaction in addition to this loan. This field defaults to ‘No’.
CMHC Eco Plus Indicator - This field indicates if the subject property meets CMHC’s Eco Plus criteria. This field defaults to ‘No’.
Previously Insured CMHC Application Number - Enter if applicable.
Product Tracker Identifier - Enter if applicable.
First Nation Number For Loan Insurance: - Enter if applicable.
Once you have completed this section, click ‘Next’ to proceed to the next step.
Comments
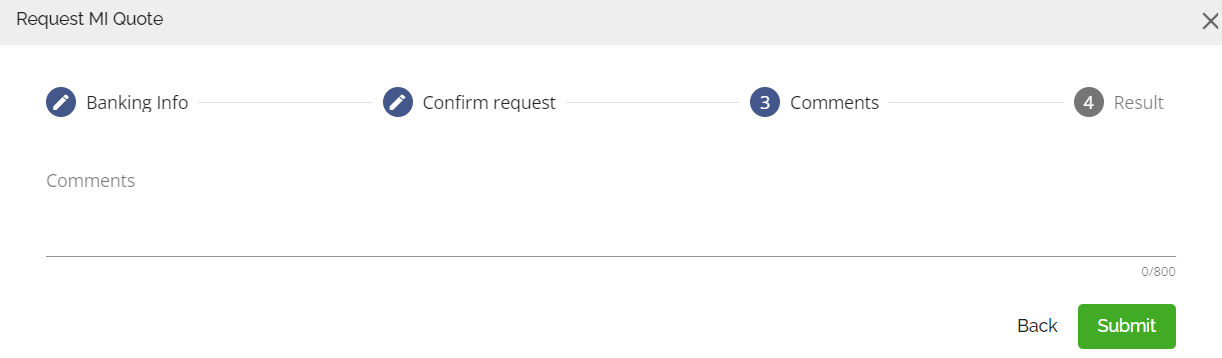
The Comments section allows you to write comments regarding the request for the application.
Note: The maximum number of characters allowed in this field is 800.
Once completed, click on the ‘Submit’ button to complete the request.
Result
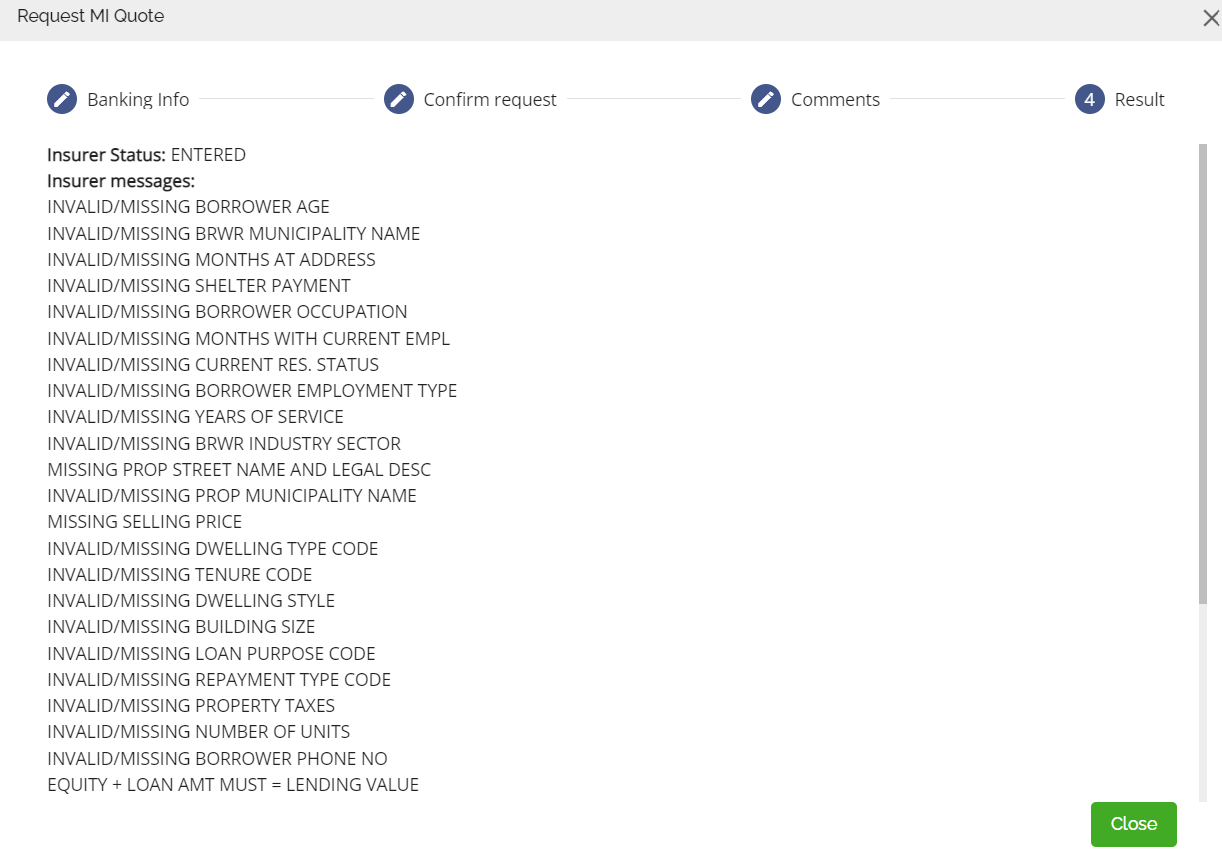
When the quote is submitted, the Result section will display the Insurer Status and Insurer Messages. The insurer messages will list all the invalid or missing fields within the application. Click the ‘Close’ to exit the popup and return to the ‘Insurance’ tab.
View the Insurance tab for Insurer Status
Once the request is submitted, it will appear in the Insurance tab list and the Insurer Status column will display "ENTERED". Additionally, the 'Quote #' column will populate with a number.

When the status of the request is changed by the insurer, you will receive a notification via the notification icon found in the top right menu of the screen.

Options within the Inline Ellipsis
When the Insurance tab is not in edit mode, the inline ellipsis will have one option i.e., "View Response".
When the Insurance tab is in edit mode, the inline ellipsis will have five options to choose from: "View Response", “Resubmit Request”, “Inquire Status”, “Cancel Request”, and “Download Certifax”.
“View Response” - The Mortgage Insurance Quote pop-up screen will appear with the Insurer Status and Insurer Messages:
“Resubmit Request” - This will open up the Request MI Quote pop up enabling you to resubmit your request to the insurer.When you resubmit a request, the Quote number (i.e., Reference number) from the insurer will remain the same. The Insurer Messages and Insurer Response from the initial submission will be removed from the ‘Review Response’ pop-up screen.
“Inquire Status” - This will update the Insurance Status, if applicable.
“Cancel Request” - This will send a notification to the insurer, advising them that the original request is cancelled and your Insurer Response will update to Cancel.
“Download Certifax” - Users have the ability to download the Insurance Certificate whenever it is needed. Once the certificate is received and approved, it will be permanently stored within the file. Users can easily access and download the certificate from the list of available actions for the insurance quote.
Note: CMHC is disabling the certificate so this may not be available going forward.
Automation for Insurance
Note: This is a tenant specific feature. To enable this feature, please submit a request.
Automation included:
- Insurer and Insurance Account number automatically populate in the Requested Mortgage tab once Insurance request is approved. Note: Insurance Premium and Insurance Amount only update for Sagen & CG, not for CMHC. The premium amount from CMHC is available as a message from CMHC in the approval payload.
- For LTV > 80%, "Insurance Paid By" field automatically populates to "Borrower" and "Include Premium in Mortgage" checkmark defaults to yes.
- For LTV < 80%, "Insurance Paid By" field automatically populates to Lender and "Include Premium in Mortgage" is unchecked. There is no insurance premium.
- We remove the warning message ("The selected program has no plan fitting the rate") on Low Ratio files (<80%).
- We have included a LRU product to the drop down list in the "Insurance Premium Program" field within the Requested Mortgage tab. This product has no insurance premiums associated with it so when selected, there will be no warning.
Note: This automation feature is designed to work only when a product is selected that has an Insurance flag indicated. This means that the Insured Feature must be selected in the product for the automation to function properly.

The steps to follow for this automation to function correctly are:
High Ratio
- Apply your product before submitting to the insurer.
- Submit your request to the Insurer.
- Once approved, navigate back to the Requested Mortgage tab where you will see that the following values auto populate (Insurer, Insurance Account Number, Include Premium in Mortgage, and Insurance Paid By). Note: Insurance Premium and Insurance Amount only update for Sagen & CG, not for CMHC. The premium amount from CMHC is available as a message from CMHC in the approval payload. On any CMHC approvals you should validate the Insurance Premium and Insurance Amount against the Insurer approval to ensure there are no changes. Update these fields if necessary.
- You should validate the Insurance Premium and Insurance Amount against the Insurer approval to ensure there are no changes. Update these fields if necessary.
- Select the appropriate Insurance Premium Program.
If there is an LTV change as a result of an increase or decrease in the Loan Amount and Down Payment, the Insurance Premium and Insurance Amount will update automatically if the tier changes i.e., 95% LTV to 90% LTV. In such a case, resubmission to the insurer may be required.
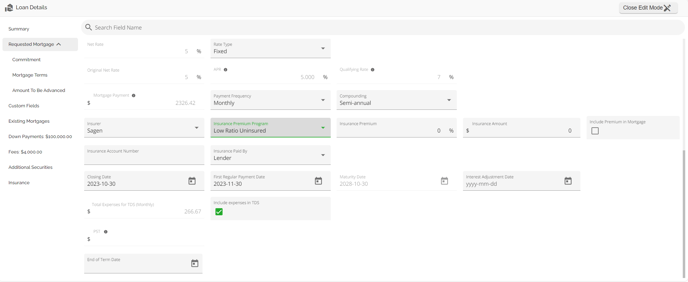
Low Ratio
- Apply your product before submitting to the insurer.
- Submit to the request to the Insurer.
- Once approved, navigate back to the Requested Mortgage tab where you will see that the following values auto populate (Insurer, Insurance Account Number, Include Premium in Mortgage, and Insurance Paid By).
- Select the appropriate Insurance Premium Program.
By selecting the New Low Ratio Uninsured Program, the Insurance Premium and Insurance Amount will default to zero (0), the "Include Premium in Mortgage" checkbox will be unchecked and the Insurance Paid By field will populate with Lender.
If there is an LTV change as a result of an increase or decrease in the Loan Amount and Down Payment, the Insurance Premium and Insurance Amount will update automatically if the tier changes i.e., 95% LTV to 90% LTV.
Approved Insurance Automation Update
Most fields auto populate at insurance approval including the Insurance Paid By and Include Premium in Mortgage. Note: Insurance Premium and Insurance Amount only update for Sagen & CG, not for CMHC. The premium amount from CMHC is available as a message from CMHC in the approval payload. On any CMHC approvals you should validate the Insurance Premium and Insurance Amount against the Insurer approval to ensure there are no changes. Update these fields if necessary.
At ingestion, the Include Premium in mortgage checkbox will come through from the POS checked on High Ratio and unchecked on Low Ratio. This should hold at insurance approval as well as update if there are any LTV changes.
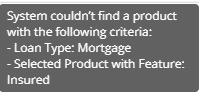
Auto select Mortgage when requesting an Insurance Quote
We have included functionality for the system to recognize qualifying products being sent for a mortgage insurance quote. The product must identify with an insured feature and the mortgage type must be mortgage as opposed to Secured Line of Credit, and only one product per application can meet these requirements. If there is no match or multiple products with the same requirements the system will provide a warning and block the insurance request.
Other Features for Insurance Submissions
Filter out properties marked as sold
Sagen and Canada Guaranty have an internal calculation for GDS/TDS. If a property is marked as sold in FundMore but its mortgages are still sent to the insurer as obligations, it can cause a discrepancy in the calculations. To ensure our debt servicing calculations match, we filter out those mortgages.
Source of Business
We have included a field called “Source of Business” which is sent to all insurers (i.e., Sagen, CG and CMHC). Previously when sending an application to the insurer, we set that field as ‘Broker’ by default. We no longer send the default to the insurers. Instead, we will send what the underwriter selects in the Source of Business field within the Summary Tab of the Loan Details widget.
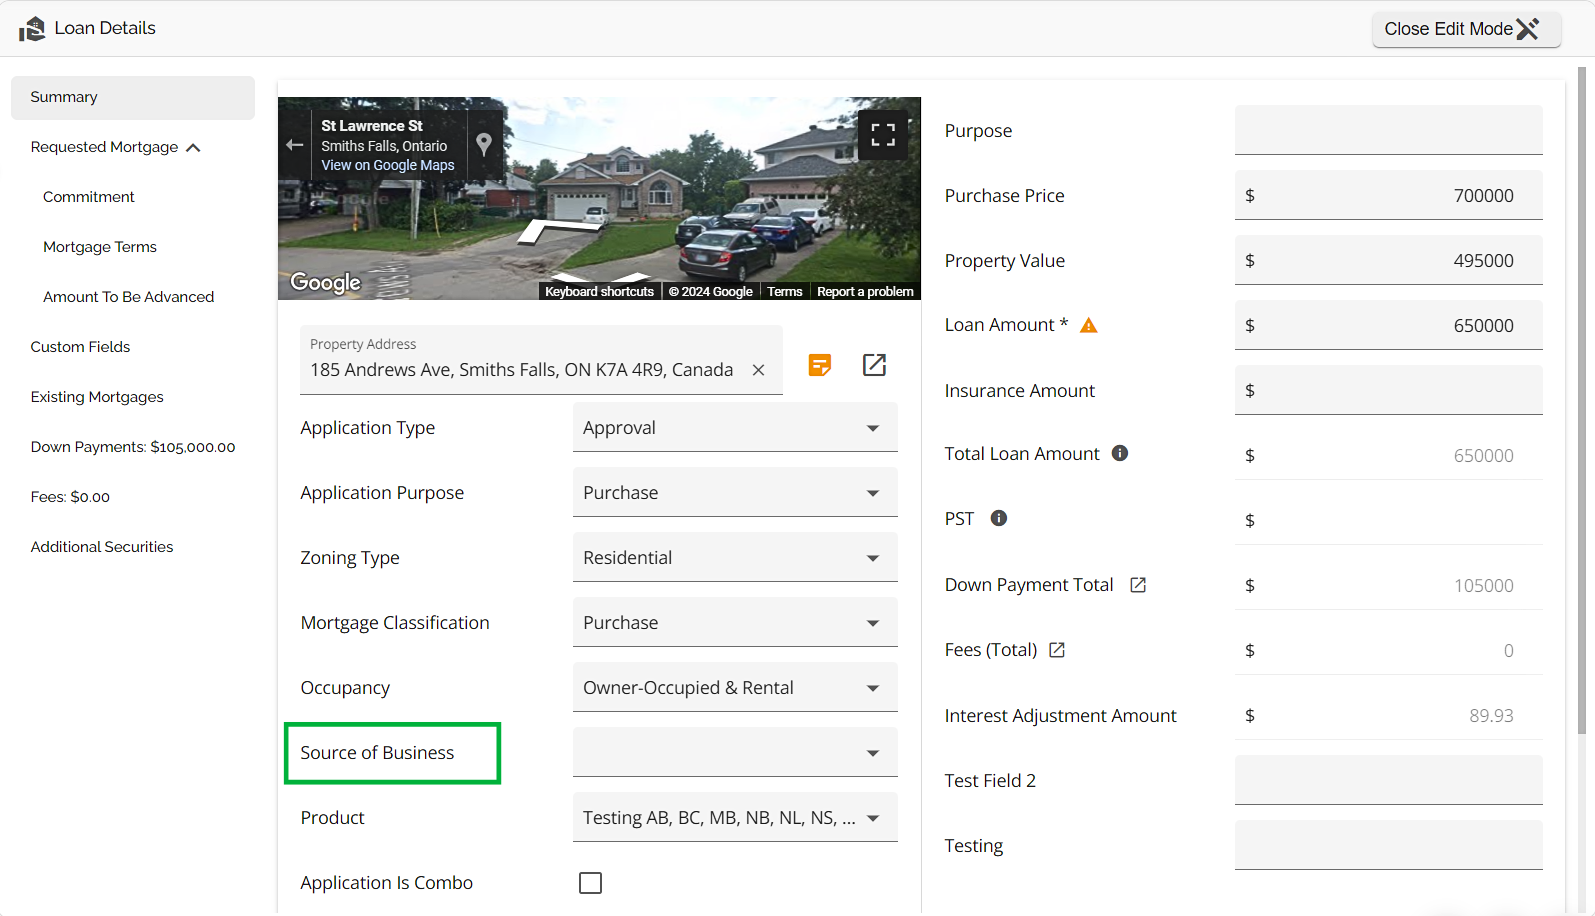
The options available for selection are:

These are not editable in Custom Fields. Instead, if any edits are required to the options, a request must be sent into FundMore to update in the backend.