Table of Contents
MMS (Mobile Mortgage Specialist) Commissions E2
Important!! Please Read First
The order to follow when setting up your products is counter intuitive to how the Manager Portal displays the sections. The sections are displayed as follows:

This would make you think you create your Products first, then your Rates, then your Credit Tiers. However, you should create your Rates first, Credit Tiers next, and Products last. As such, this guide is written in the order you should configure this section of the Manager Portal in.
Rates Management
The Rate Management feature allows users to establish interest rates that correspond with their mortgage deals, products, and company guidelines. This tool is primarily used for maintaining your rate sheets, which can then be linked to various products. This centralizes rate updates, allowing administrators to modify rates in one location and simultaneously apply those changes to all linked products. However, it is important to note that Rate Management does not keep a historical record of rates. If maintaining a rate history is necessary, consider updating rates directly within the products' rate matrix, as this method preserves a historical record of the rate sheets.
To find the ‘Rate Management’ section, follow these steps:
- Select ‘Manager Portal’ from the top menu.
- Navigate to the ‘Products’ section within the left sidebar.
- Select ‘Rates’.
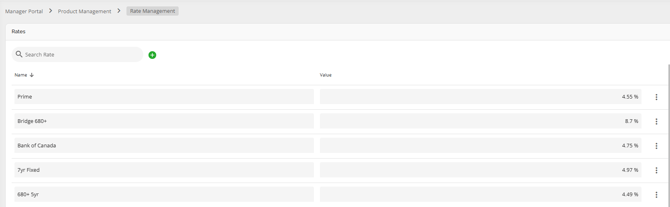
Search Box - Located at the top left corner of the section. In the search box, you can enter text/keywords related to previously created rates. All rates matching the search criteria will appear in a list view.
‘Add New Rate’ Button - Selecting this button will allow the user to create a new rate. A drop-down will appear wherein you can assign the new rate a name and percentage value.
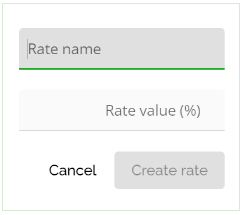
When you have completed all the fields, select the ‘Create rate’ button. To cancel the creation of a rate, you can click the ‘Cancel’ button.
Inline Ellipsis - Clicking the ellipsis located at the far right of each rate gives you the option to delete that rate.

Name - It is the name associated with the percentage rate. These are interest rates applied to different applications, typically based on product guidelines. An example of a rate name could be Prime.
Value - This value is entered as a percentage. This percentage is between 0-100, and is associated with the rate you are creating. Rate values can be set to a maximum of two decimal places.
Sorting the 'Rates' List - You can sort the columns in ascending or descending order. Locate the list header (found on the top of the rate list) and hover over the desired column header. An ‘Up’ arrow or ‘Down’ arrow will appear. Click on this arrow to sort. ‘Up’ arrow for ascending order, and ‘Down’ arrow for descending order.


Editing a Rate
You can easily edit a rate by finding the field you wish to change. Click in the field that you would like to adjust, and update the text as necessary. You will note that as soon as you click into the field, the line below that field turns green, this is an indicator that you are in the process of editing.

Credit Tiers Management
The ‘Credit Tiers Management’ section enables the user to enter tiers tied to credit scores associated with their products and company guidelines. To find the ‘Credit Tier Management’ section, follow these steps:
- Select ‘Manager Portal’ from the top menu.
- Navigate to the ‘Products’ section within the left sidebar.
- Select ‘Credit Tiers’.
Note: When setting your ranges, the values should not overlap otherwise it will cause unpredictability within the system.
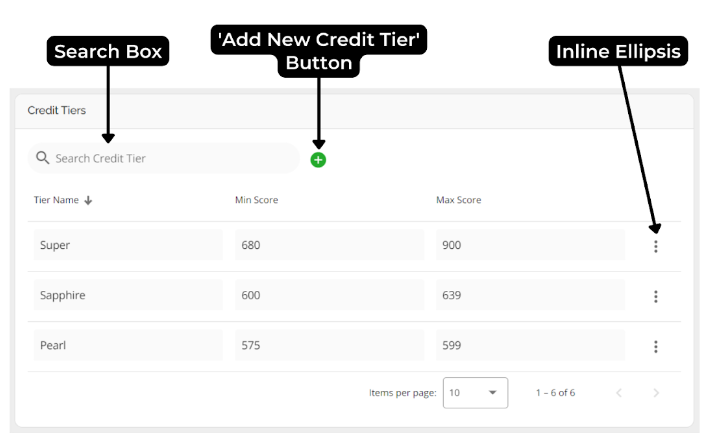
Search Box - Located at the top left corner of the section. In the search box, you are able to enter text/keywords related to the previously created credit tiers. All credit tiers with the search criteria in them will appear in a list below.
‘Add New Credit Tier’ Button - Selecting this button will open a pop-up window wherein you can define the parameters for a new credit tier.

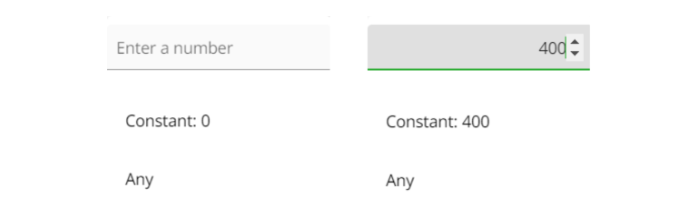
When completing the minimum and maximum credit scores, you will have to enter either a numeric number and select it as a constant or choose the ‘Any’ option.
When you have completed all the fields, select the ‘Create credit tier’ button. If you wish to leave without creating a credit tier, you can click the ‘Cancel’ button.
For example:
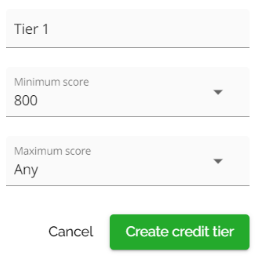
Based on these selections, a new credit tier named ‘Tier 1’ will be created wherein any applicant with a credit score of 800 or above would meet the criteria.
Inline Ellipsis - Upon clicking the ellipsis for a given credit tier, you will be given the option to delete that tier.

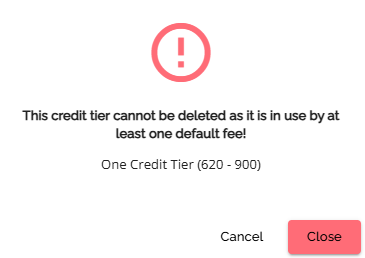
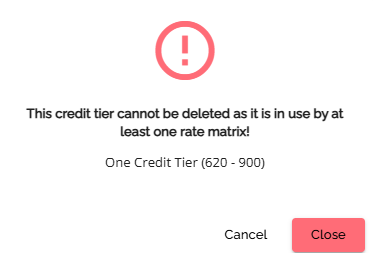
Note: If a credit tier is actively tied to a rate matrix or a default fee, the user will get a pop-up that prevents them from deleting the product. The user will need to update the rate matrix or default fee associated with the credit tier in order to delete the credit tier.
Tier Name - This is the name associated with the credit tier.
Minimum Score - This is the minimum credit score which can be associated with the Credit Tier. It can be set to any number from 0 to 900 or you can select ‘Any’ which defines any score below the maximum as relevant to that tier.
Maximum Score - This is the maximum credit score which can be associated with the Credit Tier. It can be set to any number from 0 to 900 or you can select ‘Any’ which would make any score above the minimum relevant to that tier.
Sorting the 'Credit Tiers' List - You can sort the columns in ascending or descending order. Locate the list header (found on the top of the Credit Tier list) and hover over the desired column header. An ‘Up’ arrow or ‘Down’ arrow will appear. Click on this arrow to sort. ‘Up’ arrow for ascending order, and ‘Down’ arrow for descending order.

Editing a Credit Tier
Credit Tiers can be edited inline. Once you click into a field, the line below that field turns green. This is an indicator that you are in the process of editing.

Product Management
The ‘Products’ section of the Manager Portal is where you can set up and manage your company’s products. Products are generally set up after the rates and credit tiers have been created as they go on to use the different rates and credit tiers as part of their setup. To find the ‘Products’ section:
- Select ‘Manager Portal’ from the top menu.
- In the Manager Portal, select the ‘Products’ option from the left hand sidebar.
Note: It is best practice to toggle the ‘Active’ switch off for the product you’re setting up or editing and then toggle it on once you’re finished editing. Keep your product inactive until you are absolutely sure it is set up the way you want it to function. Once the Active button is toggled on the Product will be available to users in the UI.

Search Box - Located at the top left corner of the section. In the search box, you are able to enter text/keywords related to the previously created products. All products with the search text/keywords in them will appear in a list below.
Inline Ellipsis - This will open up a drop-down menu with the options to edit or delete the product.

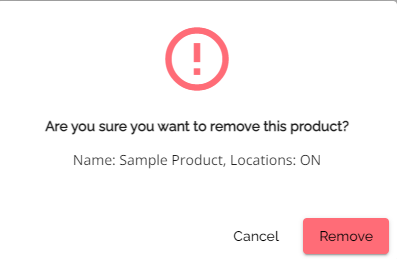
Click the ‘Edit’ option in the drop-down menu to edit, all changes made to the product will be saved in real time. To delete the product, click on the ‘Delete’ option. A warning will appear asking if you are sure you want to delete the product. If you are certain, click ‘Remove’ and your product will be deleted.
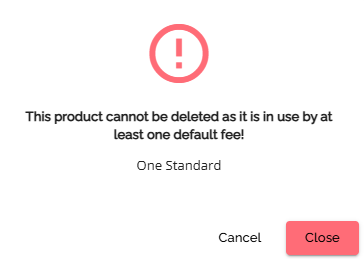
Note: If a product is actively tied to other configurations a warning pop-up will appear which means you will need to make adjustments to those configurations before you can delete the product.
Name - The name given to the product within your company. This name will appear in the drop-down for the ‘Product’ field in the ‘Loan Details’ widget within the Application Dashboard.
Name (FR) - The French version of the name above.
Locations - In this menu, you can select the provinces the product can be used within. This may be appropriate if you segment your pricing by province.
Note: The province indicator on the product set up is simply to differentiate between the products because your pricing differs by province. There is no functionality built in for the system to recognize that the product location matches the property location.
It is the responsibility of the user creating/selecting the product to ensure they are selecting the correct location.
Active - Toggle button to activate or deactivate the product. The toggle defaults to inactive. Toggling right changes the product to its active state and toggling left changes the product to its inactive state.
Edge - Identifies a given product as a version of another product with an alternative pricing strategy. For example, an edge product might offer the option for your borrowers to choose a lower interest rate with the addition of a lender fee.
Created On - This column stores the date that a given product was created on.
Updated On - This column stores the date that a given product was last updated on.
Sorting the 'Products' List - Columns can be sorted by ascending or descending order by clicking on the arrow to the right of the heading title. When the arrow is facing upwards the list is sorted in ascending order. When it is facing downwards, the list is sorted in descending order.


Creating a New Product
‘Add New Product’ Button - Select this button to create a product.

A product data entry form will open up enabling you to input all the data necessary to create your product. This form is broken up into 4 sections or tabs = Summary, Default Values, Rate Matrix, & Commissions.
‘Summary’ Tab

Note: The fields in the Summary Tab might differ for each tenant.
Active - Toggle button to activate or deactivate the product. The toggle defaults to inactive. Toggling right changes the product to its active state and toggling left changes the product to its inactive state.
Product Name - The name given to the product within your company. This field will appear as a header for a column in the Products list.
Product Name (FR) - The name of the product in French
External ID - This is a field wherein the user can input the ID within their LOS platform that is associated with the product. Mapping this ID with the identical formatting that is used in your LOS platform is essential for proper categorization upon application ingestion. This connects to the lender’s mapping of the product in their banking system. It is not connected to the products in the POS systems.
Location - Select the provinces that the product can be used within. This is a multi-select field.
Features - These are optional specifications about the features of your product. The options for this field are Combo, Conventional, Edge, Fixed, High Ratio, Insurable, Line of Credit, Loan, Mortgage, Quick Close, Renewal, and Variable. This is a multi-select field.
Users are able to filter at the product level by feature within the UI.

Source of Business - If your organization has more than one source of business and segments your products based on source of business you can use this field to drive segmentation.
Activate Module - Selecting the ‘Construction or Flip Module’ checkboxes will include the ‘Construction’ or ‘Flip’ widgets on the application dashboard for files of these product types. Very specialized and likely does not apply to most lenders.
Rate Hold (days): Specifies the number of days during which a specific rate offered to a borrower will be guaranteed by the lender, allowing the borrower time to finalize the mortgage application process without the risk of rate changes.
Notes - Input text field to enter any associated notes for the product. This can be utilized to keep a record of any reference material needed for the user to review prior to selecting the product.
‘Default Values’ Tab
Default values are any values you want the system to auto apply on a deal once you select the product. If you set a default value in your product set up, the system will set the default value if no other value was already set within the application. You are able to have multiple defaults. If values were already set, then the fields need to be manually updated in the UI. Applying the product will not update these values if they do not match the product.
This tab stores the default values that an application will be populated with when it is assigned a given product. If an application already has data entered for certain fields prior to assigning the product, the values in the application will not be changed. The default values from the product will only be applied if the field is blank, preventing any intentional deviations for defaults from being overwritten. If the field was populated with data that doesn’t match the product guidelines, warnings for this can be managed in the ‘Rate Matrix’ tab.
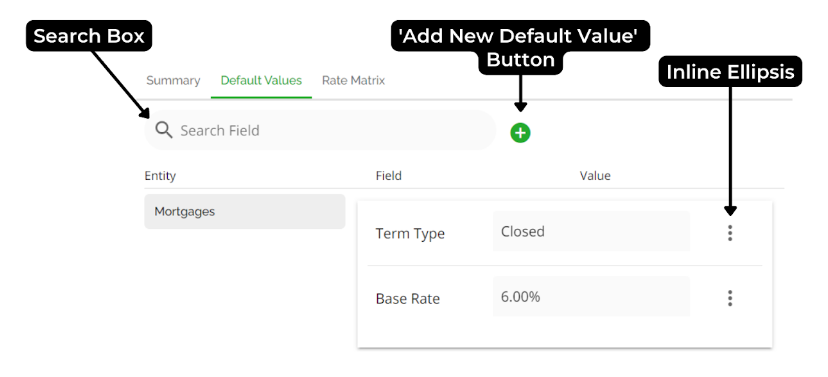
Search Box - Located on the top left corner of the section. In the search box, you are able to enter text/keywords related to the previously added fields. All fields with the search criteria in them will appear in a list view

‘Add New Default Value’ Button - Select this button to set up a new default value.


Table Name* - Used to select which table they are adding the default value to. Today there is only one table available for selection and that is Mortgages.
Field Name* - Used to select which field to set a default value for. There is large list of options available to choose from for this field.
|
Fields |
||
|
Action to be Taken |
Interest Adjustment Date |
Prepayment Type |
|
Add Premium Surcharge |
Is Blended Amortization |
Previously Insured |
|
Amortization |
Is Lender Liability |
Product ID |
|
Amount To Be Advanced |
Lender |
Product Member Number |
|
Balloon Amount |
Linked Product |
Program Code |
|
Base Rate (%) |
Loan # |
PST (%) |
|
Blended Rate (%) |
Loan Amount ($) |
Purchase Value ($) |
|
Borrower |
Loan Type |
Purpose |
|
Borrowing Limit |
Mark As |
Rate Hold |
|
Buydown (%) |
Maturity Date |
Rate Type |
|
Closing Date |
Max Prepayment Amount |
Refund Destination |
|
Compounding |
Monthly Payment ($) |
Registration Number |
|
Condition of Financing Date |
Mortgage Balance ($) |
Repayment Type |
|
Construction Cash |
Mortgage Number |
Source of Funds |
|
Construction Cost |
Mortgage Type |
Term |
|
Deadline |
Negative Amortization Rate (%) |
Term Type |
|
Discount (%) |
Original MI Number |
Transfer Adjustment |
|
FI Type |
Original MI Provider |
|
|
First Regular Payment Date |
Original Net Rate (%) |
|
|
Funding Date |
Pay From |
|
|
Holdback |
Payment Amount |
|
|
Include Premium in Mortgage |
Payment Frequency |
|
|
Insurance Account Number |
Payoff & Paydown |
|
|
Insurance Amount ($) |
Pay Out Balance ($) |
|
|
Insurance Paid By |
Penalty Refund Amount |
|
|
Insurance Premium (%) |
Prepayment Amount |
|
|
Insurance Premium Program % |
Prepayment Amount in Payments |
|
|
Insurer |
Prepayment Penalty Period |
|
Value - Specify the value to assign to the field when the product is assigned to an application.
Note: The rate matrix will override any original net rate you have set up as a default value. Therefore, it is recommended that you DO NOT set a default value for the original net rate.
You should only select or set a default value for Term if you are only offering 1 term. As the selection is single select, when applying the product, the system will override your term with what you have set up in Default Values.
Inline Ellipsis - Upon clicking the ellipsis for a given default value, you will be given the option to delete that value.
Entity Column - The tables stored in the ‘Default Value’ tab are stored under the ‘Entity’ header as tabs that you can click to open. Currently ‘Mortgages’ is the only table that is offered.
Field Column - The fields for existing default values are listed in this column.
Value Column - The default values for a given field are listed in this column.
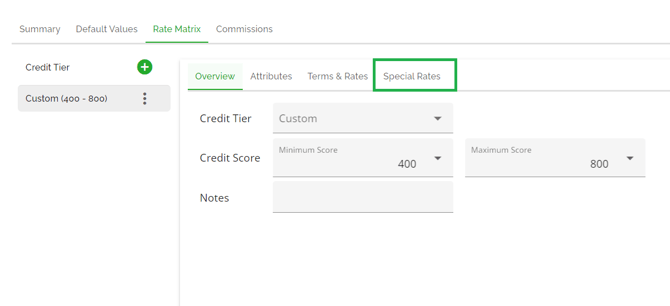
‘Rate Matrix’ Tab

The ‘Rate Matrix’ tab is used to convert your company’s product guidelines into parameters for the product. Multiple credit tiers can be set up for a single product and will appear on the left hand side under the ‘Credit Tier’ header. Each credit tier can be assigned unique attributes or acceptable ranges for specific fields within the four tabs shown on the right hand side of the screen.
‘Add Credit Tier’ Button - Select this button to create a new credit tier to your rate matrix. This tier can be added from the existing tiers created in the ‘Credit Tiers’ or set to ‘Custom’ in the ‘Credit Tier’ field. If you select ‘Custom’ you will need to set the minimum and maximum credit scores required for this tier.

Once you’re finished with your specifications, click the ‘Add Rate Matrix’ button to add the credit tier to the list on the left hand side.
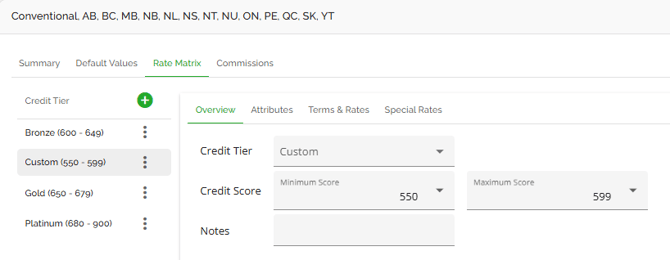
‘Overview’ Tab

Credit Tier - This is the name assigned to a specific credit tier. Some lenders use a series of numbers or nouns to indicate the different tiers. For example: Bronze, Silver, Gold, and Diamond.
Credit Score - Allows you to select the upper and lower bounds for credit scores that should match into this tier. You can select numbers anywhere between 300 - 900 or “Any”.
Notes - Allows you to add in notes you want the user to see regarding the credit tier.
‘Attributes’ Tab

Within this tab, attributes are set for specific values of a given credit tier. Upon assigning the product, these attributes are displayed in the ‘Rate Matrix’ tab of the ‘FundMore Score’ widget. Attribute passes, fails, & unknowns will show in the FundMore Score Rate Matrix tab as risk warnings:
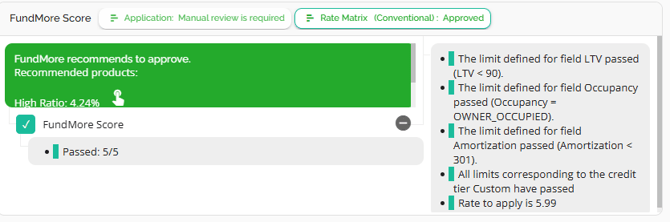
Once the user addresses all the warnings in the Rate Matrix tab all the attributes will show as passes and they should be able to apply their product without issue. The same attributes will be displayed when selecting the product.

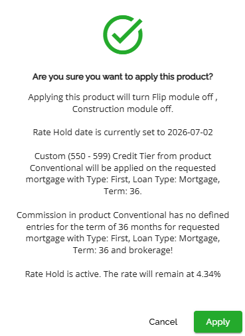
A warning pop-up is also displayed when assigning a product to an application that outlines the product’s criteria and an option to cancel or confirm that you wish to apply the product.
Search Box - In the search box, you are able to enter text/keywords related to the previously created attributes. All attributes with the search criteria in them will appear in a list below.
‘Add New Attribute’ Button - Select this button to create a new attribute. When selecting this button a drop down menu will appear where you will set up your new attribute.

Field - This is the field (or target) upon which the attribute is based. There is a significant list of fields available to choose from providing lenders with flexibility in setting their attributes. Available fields include Age, Amortization, Application Purpose, Application Source, Firm Code, GDS, Insurer, LTV, Loan Amount, Loan Type, Occupancy, Property Type, Property Value, Purchase Price, QGDS, QTDS, & TDS.
If you manage your debt service ratios to qualifying rate instead of contract rate, you would use the QGDS/QTDS attributes to set up your product. If you use contract rate, you use GDS/TDS instead.
Operator - This is the operator that defines the relationship between the field and the value for a given attribute. Available operators include = (field must be equal to the value), < (field must be less than the value), > (field must be greater than the value), and Exists (value must exist). Depending on the Field chosen you operator options may include all options or only one option.
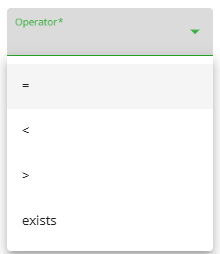
For example, when setting up the operator for “LTV” you have four options as shown below:

Note: There is no “less than or equal to” or “greater than or equal to” operator. The user must apply values that are slightly over or under to accommodate value requirements such as 80.01 or 79.99.
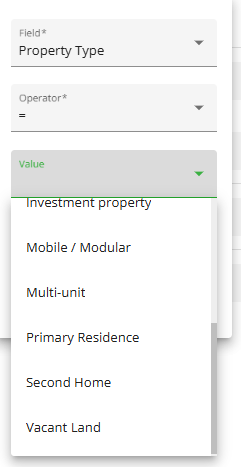
Value - This is the value selection associated with the Target field. This could be a drop down list or numeric value depending on the chosen field. For example, an attribute on property types would allow you to select from the property types drop down list to assign a value.
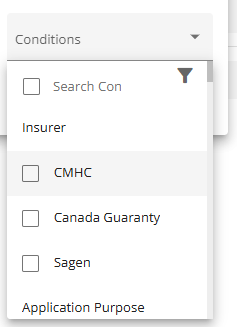
Conditions - These are additional criteria that must be met for a specific attribute, meaning they do not apply across the other attributes for a given credit tier.
Upon clicking the ‘Conditions’ field, a menu will pop up with a list of values and their respective fields. At the top of the ‘Conditions’ field you can also search for specific values or click the Filter icon to select categories to filter the list by. The field permits multi-select, but it should not be used to set up conditions that allow for a range of values within the same field. These kinds of conditions are best managed using grouped attributes which we will discuss in the next section. If you do use the multi-select function you can only select one value from each field. If you leave the condition blank it will allow all scenarios.
Here is an example of conditions being used to further specify attributes:

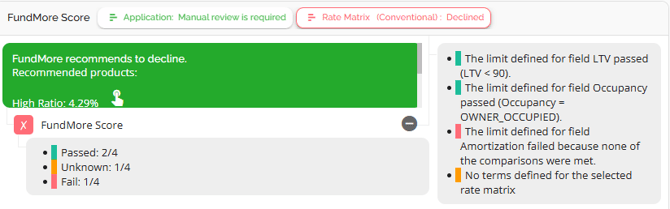
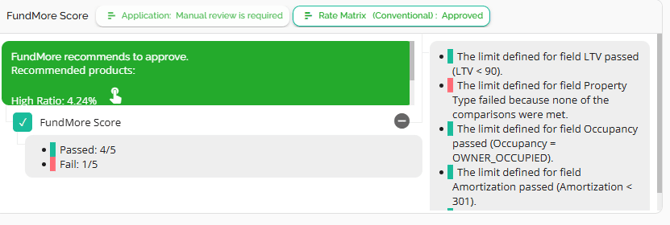
The Conditions are listed in the far right column and in this example they specify that when the Insurer is Canada Guaranty then the property type must be 'Primary Residence', but if it is equal to ‘CMHC’ then the property type must instead be ‘Investment property’. If an application fails to comply with product attributes, this is flagged in the ‘Rate Matrix’ tab of the ‘FundMore Score’ widget. In the example below, the property type was indicated as Primary Residence but the Insurer selected was CMHC. As you can see a risk warning appeared in the Rate Matrix Tab of the FundMore Score indicating a mismatch:
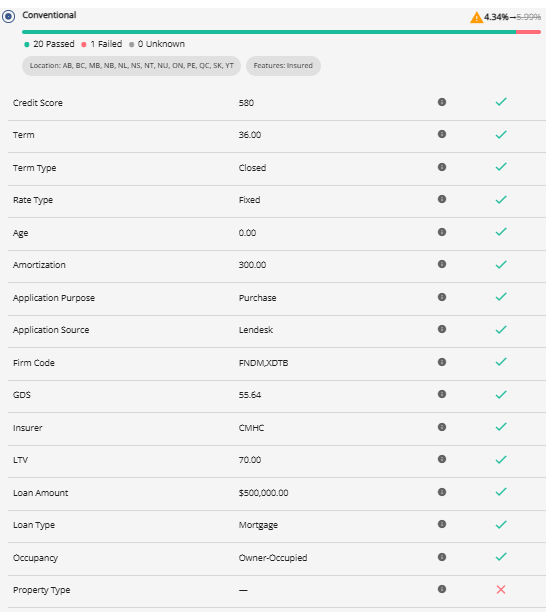
It will also appear in Attribute list in the Product selection:
Inline Ellipsis - Click on the ellipsis for a given attribute to access the option to delete the attribute or to add a grouped attribute.
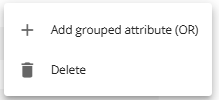
Add grouped attribute (OR) - Select this option to add an additional value that is acceptable for a given field. If we were to use this functionality with our previous example, this would be the result:
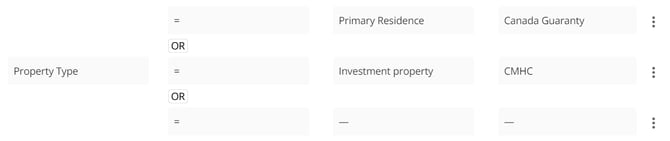
Here we would need to specify a third acceptable property type and we are also able to specify conditions if needed.
It should be noted that “OR” should not be used to set a range between two values. In order to define a range, the operators < > must be used in combination with AND (&). I.E. You want the LTV to fall between a range of 60% - 80%. The attributes should be configured like this:

‘Terms & Rates’ Tab

Search Box - In the search box, you are able to enter text/keywords related to the previously created rate matrix terms in this section listed. All rate matrix terms with the search text/keywords in them will appear in a list view.
‘Add New Term’ Button - Select the green plus button to create a new rate matrix term. When selecting this button a menu will appear where you can specify the details of rates associated with the new term.
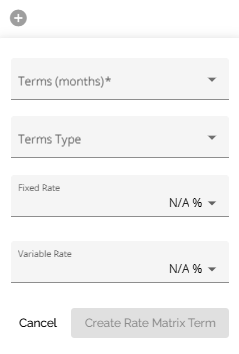
Terms (months) - The number of months associated with the rate you are setting up. You can select multiple term lengths within the drop-down menu, or just assign rates to a single term. If rates have already been defined for a given term length, it will be grayed out and unable to be selected by the user.
There is also the option to set up your product with no term selection. This will be applicable when setting up LOC products where there is typically no term attributed to the product. When no term is selected, the rates will automatically apply on deals that have that product selected but no term added.
Terms Type - The term type associated with the rate you are setting up. The options for this field are Open, Closed and Convertible.
Fixed Rate (%) - Specify the fixed rate associated with the term(s) selected. You are able to enter a custom value, select N/A, or use the current prime rate. To assign a custom value, type the desired rate in the top field and then select the ‘Custom’ option.

Variable Rate (%) - Specify the variable rate associated with the term entered. This is done in two segments. In the first segment, you are able to enter a custom value, select N/A, or use the current prime rate. This will add the variable rate to the list of rates.
Within the second segment, assign a numeric value to be added or subtracted to create the final variable rate. Use a negative number to indicate that the value should be subtracted from the value in the first segment. The variable rate which populates your application will change only when the values are updated (ex: Prime has been changed). You can use the up and down arrows to find your rate modifier but note that each click of the arrows counts as a rate change. So, if you were adjusting from 0.0 to 0.3 for example, that is 3 rate changes fof all files in that score band with that term. There will be a notification for each one! However, if you simply highlight the modifier amount and adjust it that way, that only counts as one rate change. Therefore only one notification for all files in that score band and term.

Note: We have added a toggle to support Negative Rate Modifier. This is a tenant setting that is disabled by default. If you wish to have this setting enabled, please contact the Client Success team.
This change adds support for “prime-minus” rates (like Prime − 0.50%). For tenants with this feature enabled, users will now see a simple +/− toggle when entering rate modifiers, making it easy to apply discounts as well as increases.

Active - Toggle button to activate or deactivate the term or rate. The toggle defaults to inactive. Toggling right changes the product to its active state and toggling left changes the product to its inactive state. In order to apply the rate, it needs to be activated.
Range - Specifies the start and end dates for which the mortgage term or rate is valid.
‘Special Rates’ Tab
The Special Rates tab enables lenders to create rate specials without having to edit their rate matrix.
This will allow lenders to create an additional rate matrix per credit tier and product. The Special rates tab has the same fields as the Terms & Rates tab.
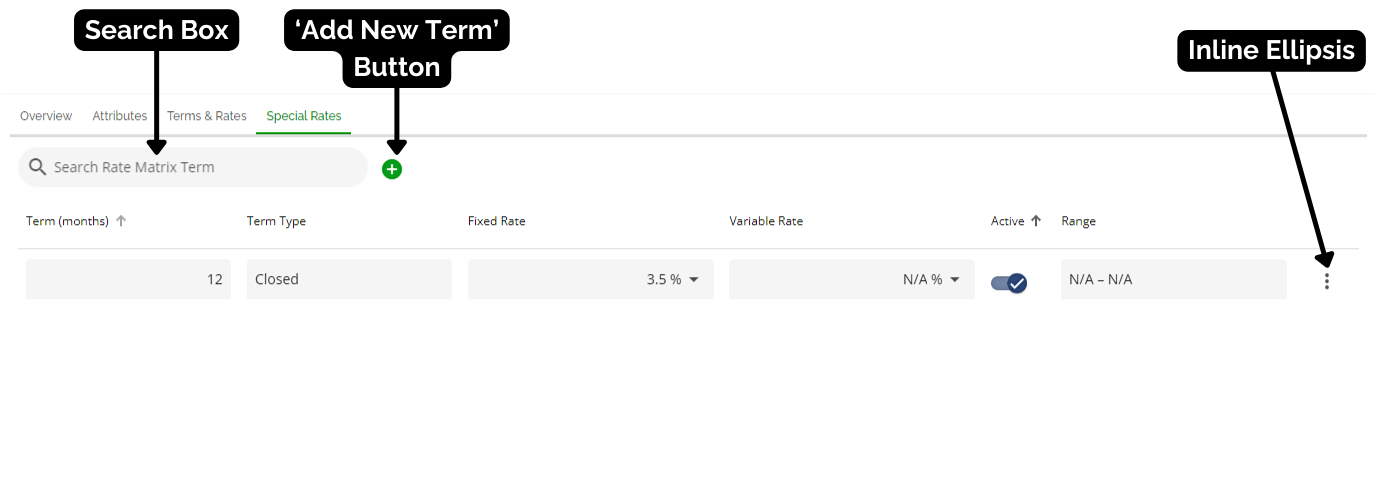
We have included two fields in both the ‘Terms & Rates’ tab and the ‘Special Rates’ tab - “Term Type” and “Range”. There are three options for the Term Type - Closed, Convertible, and Open. This allows lenders to set up rates in the same product for different term types and offer different specials between the different term types. Provides more flexibility. The Range field can be used to specify the date range. This allows users to set up rate cards and easily switch between them by specifying the necessary date ranges for each. You can use the Active toggle switch to turn rates and or special rates on or off. The system will pull from the active rate card based on the date ranges set as at the date the product is being applied. It is important to note the date ranges cannot overlap within the same tab (rate matrix or special rates). They can overlap between Rate Matrix and the Special Rates tabs. If there is a special rate set up that does overlap with a Rate Matrix rate the Special Rates will override and be the rate that is applied.
‘Commissions’ Tab
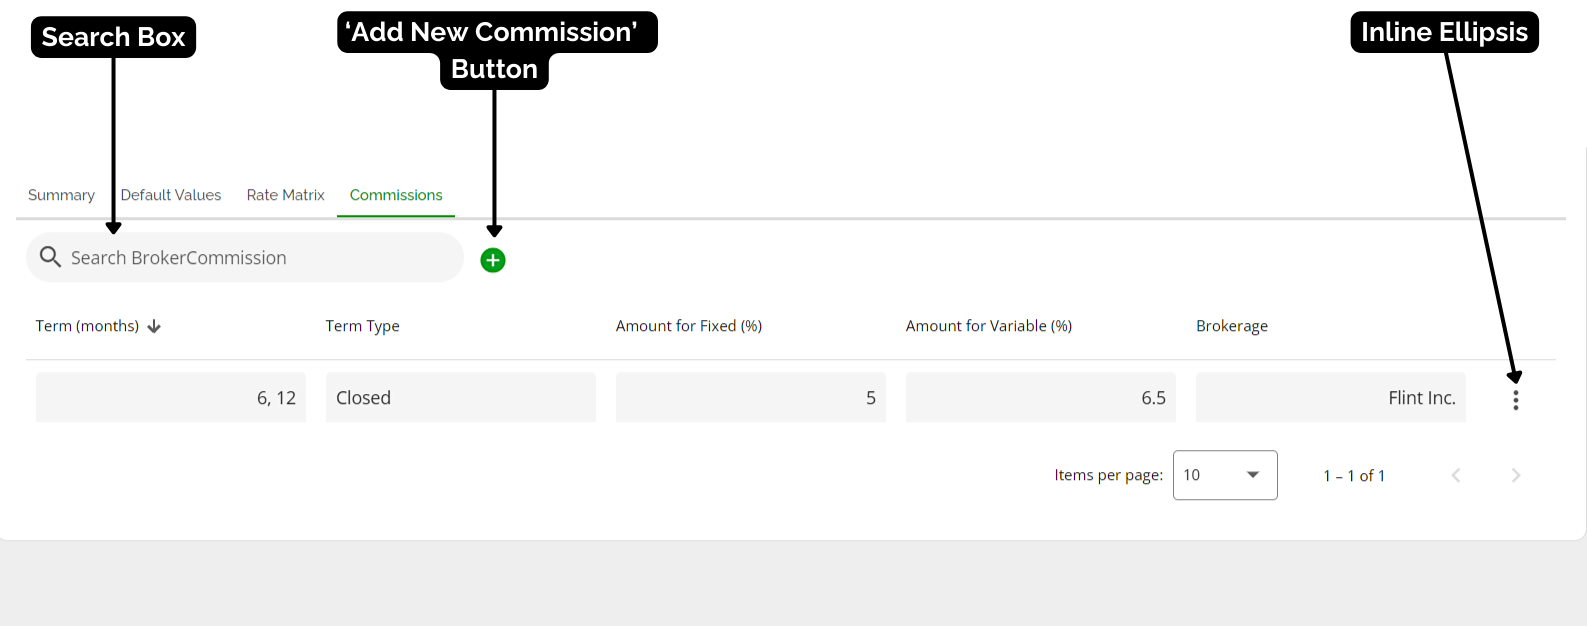
- Navigate to the Products section of the Manager Portal.
- Click on the inline ellipsis of the product you wish to add the commission to.
3. Select the Edit option.

4. Click on the 'Commisions' tab.
5. Click on the "Add New Commission" button and fill out the appropriate fields.

The Brokerage(s) entered need to match exactly the Brokerage as entered in Broker Management as that will match the Brokerage indicated on the relevant applications. The system will only apply the commission at the application level if the data here matches the data in the application.
Note: The Term (months) field is mandatory while the other fields are optional, but recommended.
6. Once completed, click on the Create Commission button to finalize the process.
To understand how the configuration in the Manager Portal carries through to the application level, refer to the 'Broker Commission' Tab of the Loan Details Widget PFG.
MMS (Mobile Mortgage Specialist) Commissions E2E
This is a tenant setting and defaults to disabled. Please contact Client Success if you wish to have this enabled.
- Add a new tab called "MMS Commissions" next to the existing “Commissions" tab in Product Management.

- Within the MMS Commissions tab, include a table with the following columns:
- Multi-select dropdown with available term month options.
- Single-select dropdown with the following options: Any, Closed, Open.
- Numeric input field.
- Numeric input field.
- Terms (Months)
- Term Type
- Amount for Fixed (%)
- Amount for Variable (%)
- Enable users to:
- Add, edit, and delete commission records.
- Search for specific commission entries.
- Add a new page called "MMS Flat Fees" below the "Credit Tier" page.
- Within the MMS Flat Fees page, include a table with the following columns:
- Free text field.
- Numeric input field.
- Type
- Amount ($)
- Prepopulate the table with the following default records:
- Bridge Loan – $250
- Port / Assumption – $500
- Shared Equity Programs – $500
- Enable users to:
- Add, edit, and delete records.
- Search for specific entries.
- When the Source of Business is Mobile, the Broker Commissions tab in Loan Details is renamed to MMS Commissions.
- Within the MMS Commissions tab, a radio button is displayed with the following options:
- Commission (%) (default selection)
- Flat Fee ($)
If Commission (%) is selected, users see the following fields:
- New Funds ($)
- Numeric field.
- Standard Commission (%)
- Source of Business – Mobile
- Product Name – Applied Product Name
- Term (Months) – Selected term
- Rate Type – Selected rate type
- Base Rate (%) – Applied base rate
- Pay to – MMS
- Original Standard Commission (%) – Displays the original commission amount set in Product Management, in case users modify the field.
- Numeric field.
- If the applied product has an MMS commission configured, and it matches the term months, term type, and rate type, this field is pre-populated.
- The field remains editable, allowing users to make changes.
- An info icon next to the label opens a popover showing commission details:
- Less Buydown (%)
- Read-only field.
- Calculated based on the buydown amount entered under the Mortgage Terms tab.
- Final Commission (%)
- Read-only field.
- Total ($)
- Read-only field, calculated automatically.
- Type of Flat Fee
- Disabled when Commission (%) is selected.
- When users reapply for a product or apply for a different one, the Standard Commission (%) will be reset and replaced with the commission set for the newly applied product.
- Currently, a confirmation popup appears when applying for a product. Reuse the existing commission-related message for MMS commissions as well.
- If a value was entered for New Funds ($), it will remain unchanged

- If Flat Fee ($) is selected, the following fields are disabled:
- New Funds ($)
- Standard Commission (%)
- Less Buydown (%)
- Final Commission (%)
- Type of Flat Fee
- Single-select dropdown.
- Displays the list of flat fees configured in MMS Flat Fees in the Manager Portal.
- Enabled when Flat Fee ($) is selected.
- Total ($)
- Read-only field, populated based on the selected Type of Flat Fee.
- When users reapply a product or apply a different product, the Type of Flat Fee will remain unchanged, as it is not controlled by the product like Commission (%)
When Flat Fee ($) is selected:
- The Buydown field under Mortgage Terms is cleared and disabled.
- The field displays an em dash (—) instead of a value.
- When hovering over the field, a tooltip appears with the message: "Buydown is not applied when commission is set as a flat fee."
- When a user modifies MMS commissions in Product Management, a Product Change warning icon should appear in the application next to the Product field.
- The behavior should mirror how broker commission changes trigger a Product Warning in applications.

-
Buydown field is disabled when Flat Fee ($) is selected

Important Notes regarding Products
- Once you are satisfied with your product being completed, go back to the ’Summary’ section and slide the ‘Active’ toggle to the right so that it is visible to users for selection in the UI.
- If you change a product in the Manager Portal, all applications with that product applied will get a “product has changed” warning. When the product is re-applied, the logic will trigger. If the credit tier changed for example, the fees and rate may be affected and updated. In the case of a reapply, the product itself will not change - it will be the same product with new rules.
- When the system detects N/A for a rate type and a term, it will still allow users to apply the product without blocking them. In this case the rate does not change and remains the same as what was originally submitted by the agent.
- When setting the rate for fixed and variable within a product, this will populate the Base Rate when the product is applied.
- Setting the rate here will affect the application when the user tries to apply the product. Particular to pricing, the system’s default is to use the FICO score from the applicant with the highest income regardless of score. However, there is the ability in application to tell the system if you would prefer to use the highest score for pricing regardless of income. This is the ‘FICO Score Override’ checkbox within the Stakeholder widget. If this is checked off for a given stakeholder, it will take the highest score between the primary borrower and that stakeholder as the main FICO score under consideration instead.
- Our system does not support tier based pricing based on LTV.
Block Stage Transition: When a Product is No Longer Applicable
Note: This is a tenant specific setting that defaults to disabled. If a tenant wishes to enable it, they need to submit a request to FundMore.
Changes to a product's attributes within the Manager Portal may occur after the product has already been assigned to an application, rendering it unsuitable for that particular application. Lenders may wish to implement a system check that alerts users when such changes occur. This check will happen at stage transition, letting users know that the product has changed and is no longer applicable.

When this happens, stage transition will be automatically blocked. A warning pop-up, as seen above, will notify the user of the inapplicability and specify which attribute no longer aligns. Users will then be prompted to either update the application to align with the product or select a more suitable product before proceeding. If no changes have occurred and the validation is successful, no message will appear, enabling the user to transition stages seamlessly
Block Stage Transition: Adjudication
Note: This is a tenant specific setting and may not apply in your environment.
The system will block an application from moving past the Adjudication stage if a deal has not been conditionally approved. This will occur both within the application dashboard and the Pipeline View.
In addition, marking an application as “Pending” after the adjudication stage will also prevent it from advancing further. In that instance, the application can still move forward but not backward.
Finally, if an application has progressed past the adjudication stage after being conditionally approved and is subsequently moved back to adjudication, you will notice the appearance of a "re-adjudication" icon at the top of the dashboard.

History Log
All activity or updates within the Products section of the Manager Portal are tracked in the history. To view the Manager Portal history logs, simply click on the “History” icon at the bottom of the screen. Any additions, deletions, or edits will be tracked within the history log identifying who made the change, what change was made and when.

