Table Of Contents
Document Template Management Main Page & List
Edit Or Delete Your Document Template
Template Editor Functionalities
Preview Section & Functionality
‘Publish’ Button and Drop Down Menu
Working With Document Templates and Viewing Final Version
Creating Templates from Existing Documents
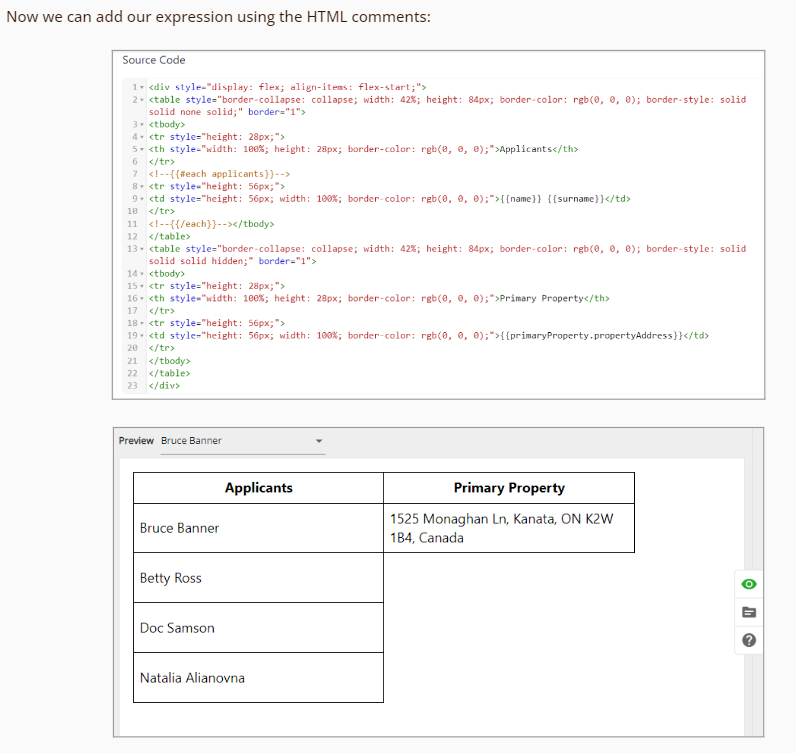
Creating a Document Using HTML Code
Code From An Alternative Source
Code Within The FundMore AI Platform
Handlebars as a Templating Language
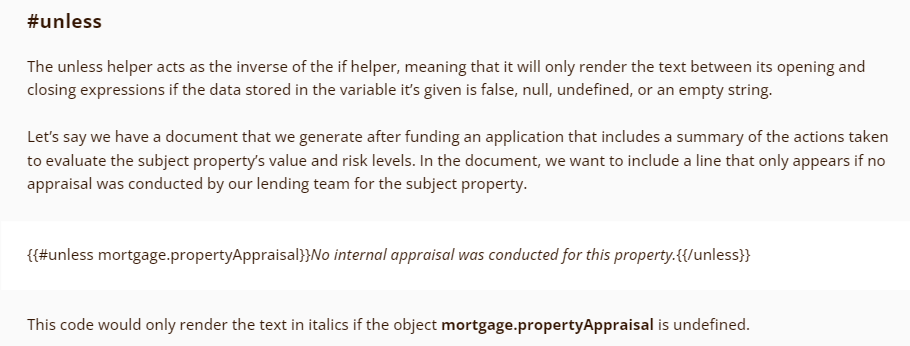
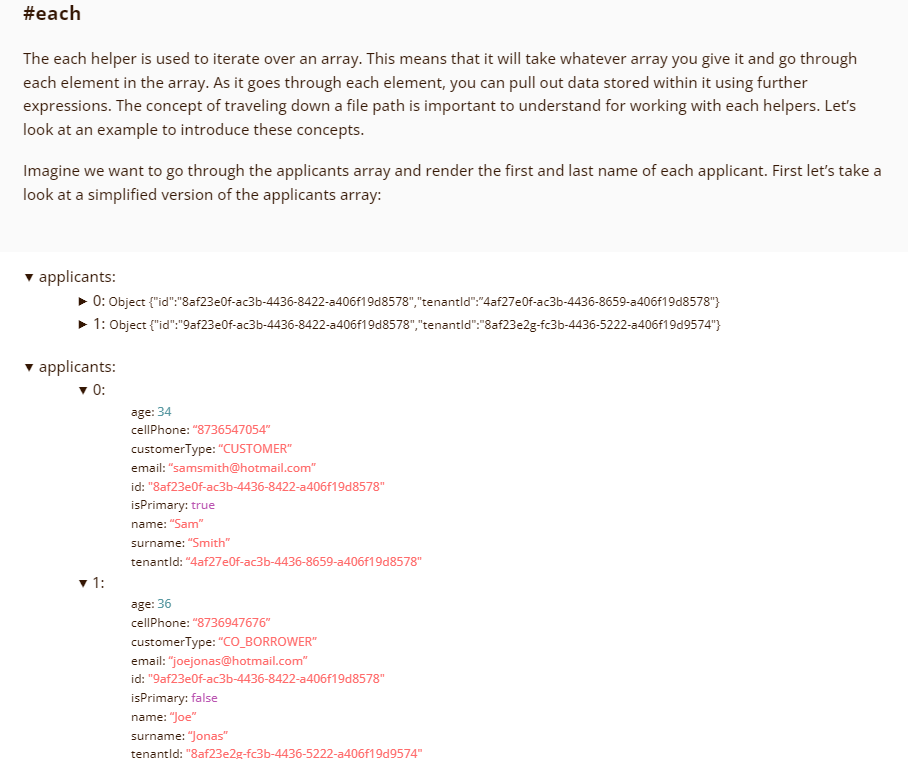
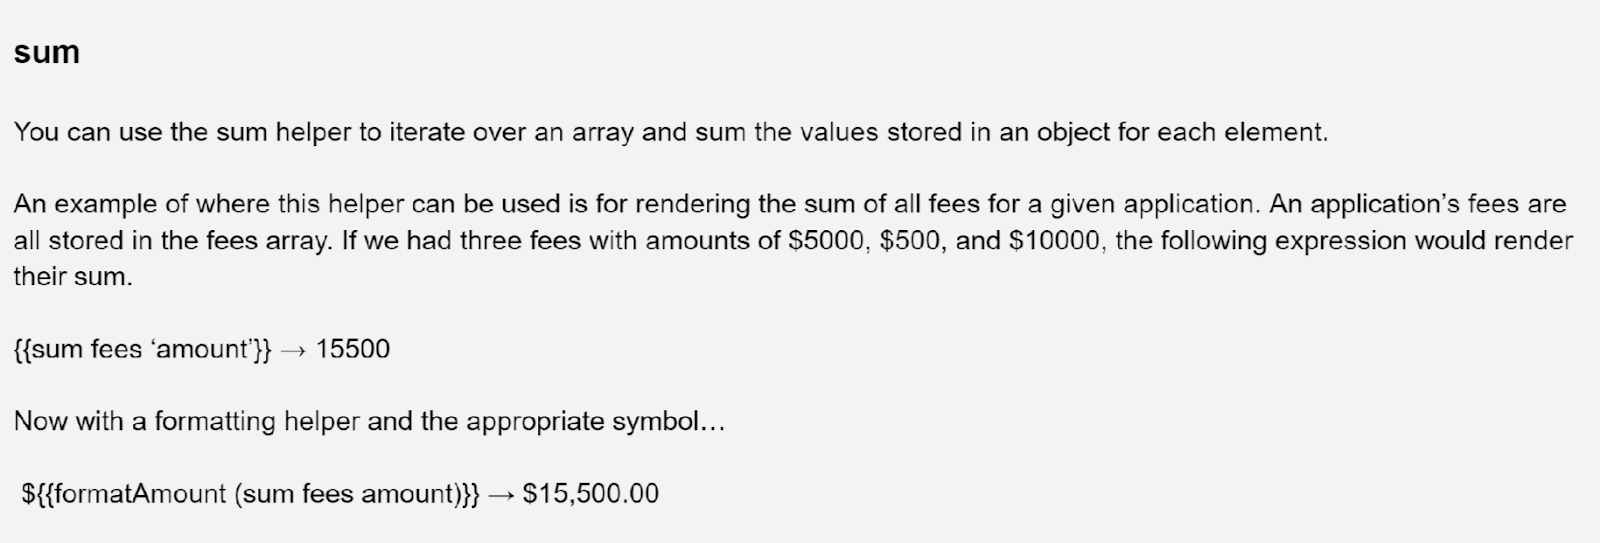
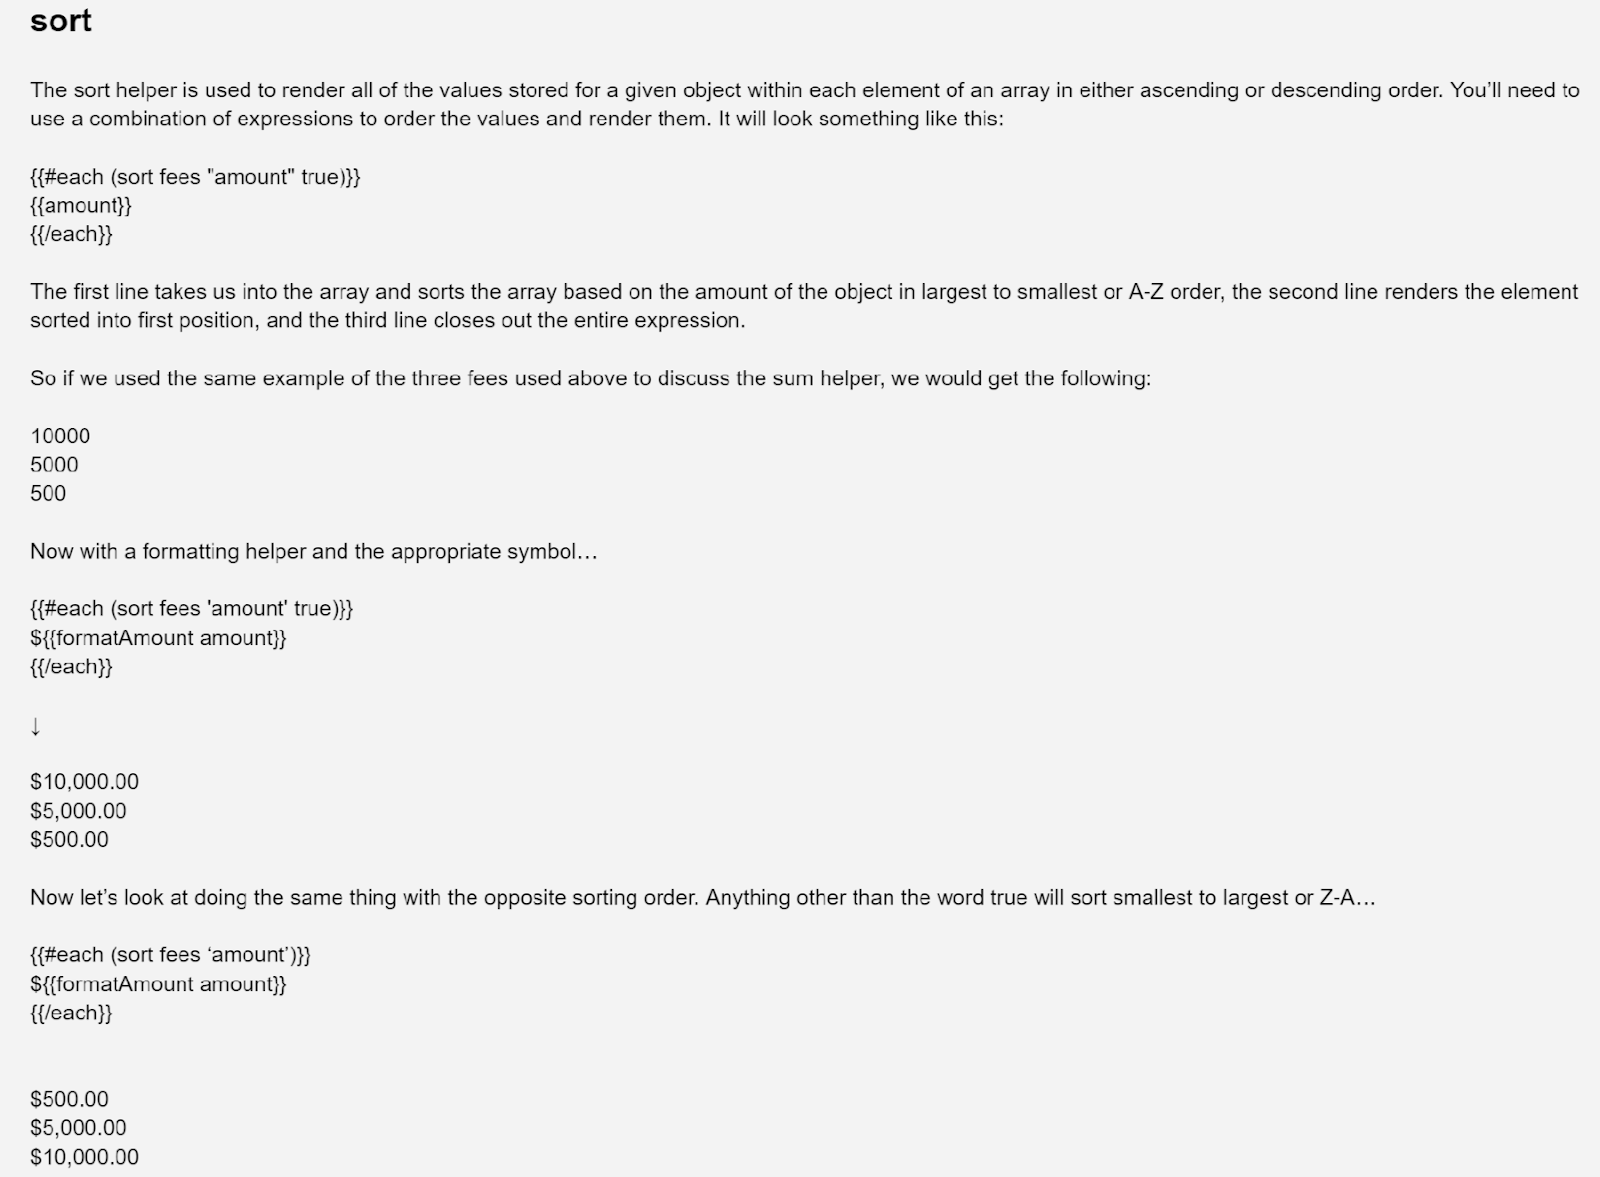
Conditional and Iterative Helpers
Finding Your Spot In Source Code Easily
Document Template Management Main Page & List
This section allows clients to manage their document templates and is ideally managed by a user with a technical background. To find the ‘Documents Management’ feature, first navigate to the Manager Portal. In the left hand sidebar, select the ‘Document Templates’ header.

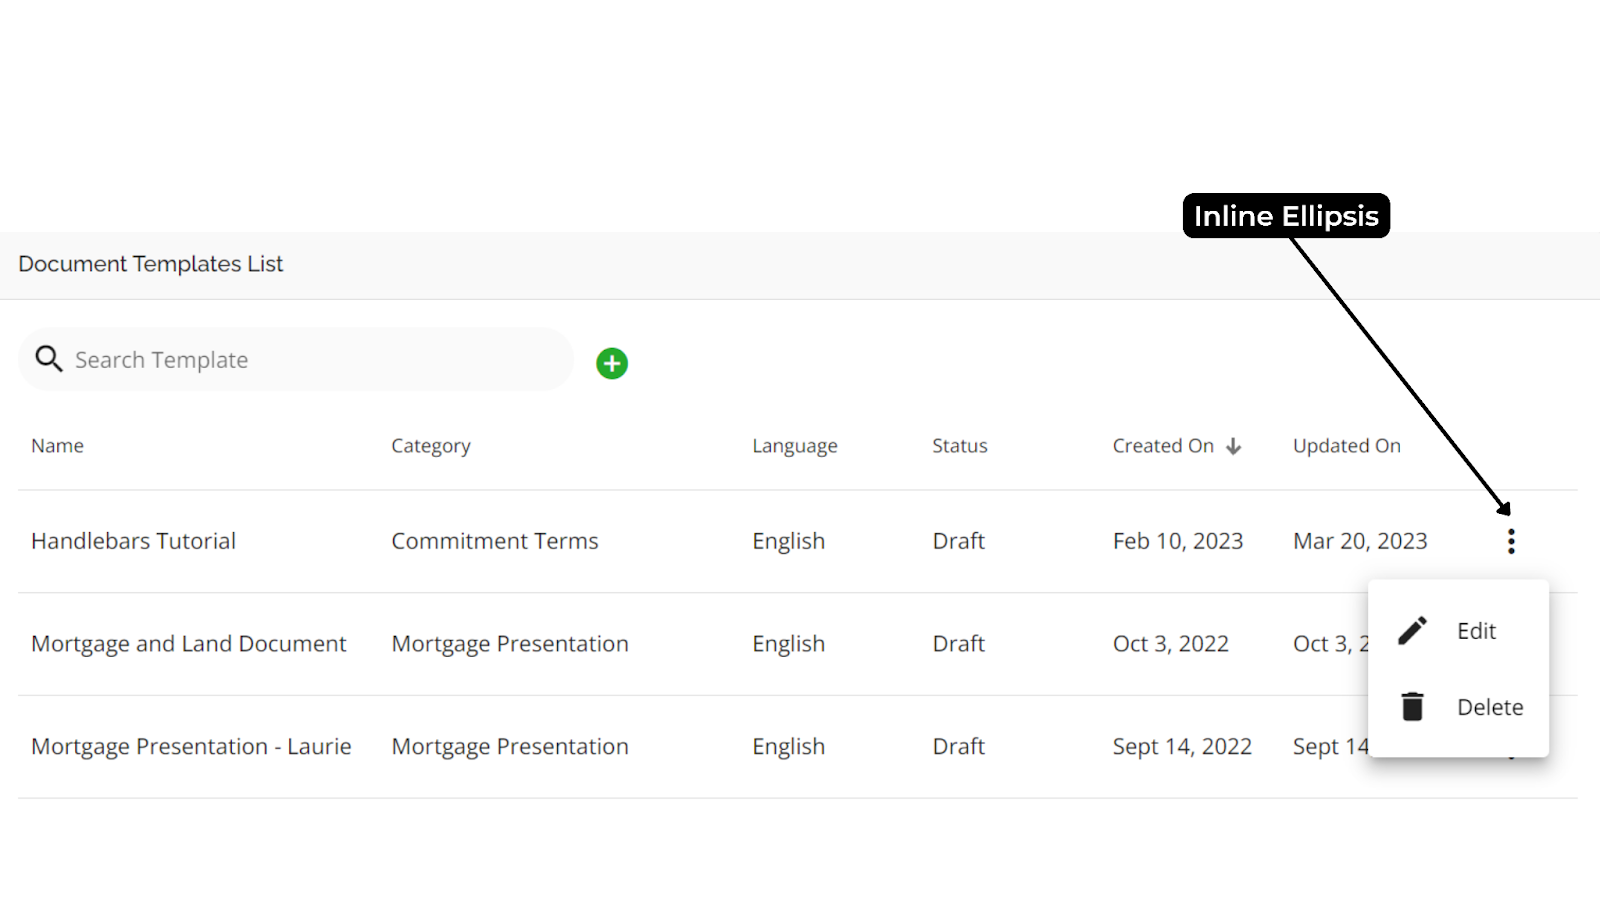
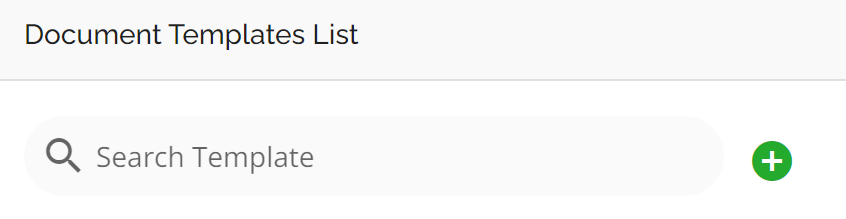
You will automatically be directed to the ‘Document Templates’ list where you are able to see all of the document templates created in your AI instance.
Note: Headers and Footers can not be edited by customers. They need to be sent to FundMore for addition to the system. This is relevant when documents are first being built and for any changes customers may make to their header and/or footer.
Edit Or Delete Your Document Template
To edit a document template, select the inline ellipsis to the right of the ‘Updated On’ date for the given document template. This ellipsis will provide you with the option to edit or delete a given document template.
Creating a Document Template
To create a new document template, complete the following steps:
- Select the green plus button to the right of the search box to open the ‘Add New Document Template’ drop down menu.
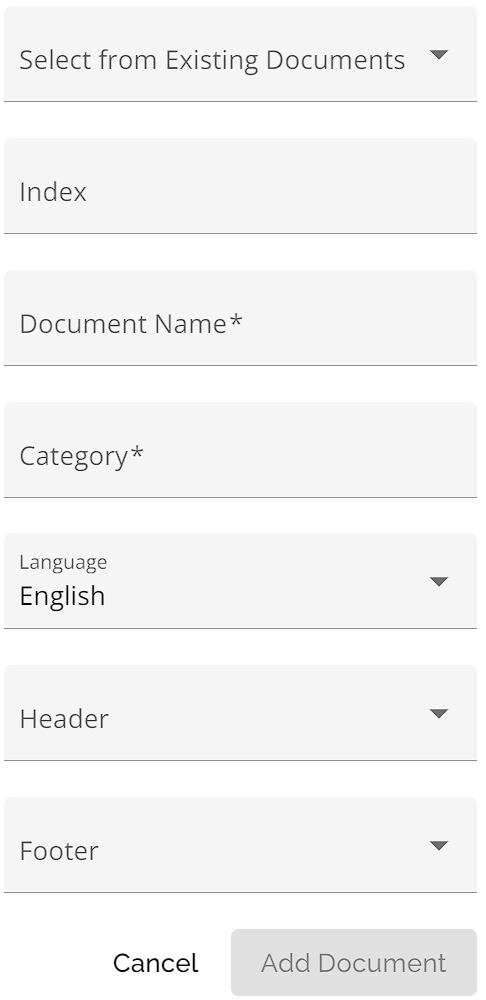
- In the drop down menu, you will set up your document. These settings can be changed later on in the Template Editor.
- Select an existing document template to use as a starting point or skip this selection to start a blank template.
- Give the document an index number. The document package that is sent out to the POS systems through the conditional approval process is ordered from smallest to largest index number.
- Name your document template.
- Select a category from the drop down selection or create a new one by typing within the ‘Category’ field.
- Select the language the document will be written in.
- Select the header and footer that will be appended to the document upon downloading or sending generated copies of the document.
Please note that page size and margin settings apply to all documents in your environment. These settings can be adjusted in the backend, for example: we can change the templates from letter page size to legal page size. But they will apply to all documents.
Template Editor
The document template editor can be utilized for creating document templates, making changes to existing document templates, creating multiple versions of document templates, and troubleshooting document generation issues.
Document Details Management

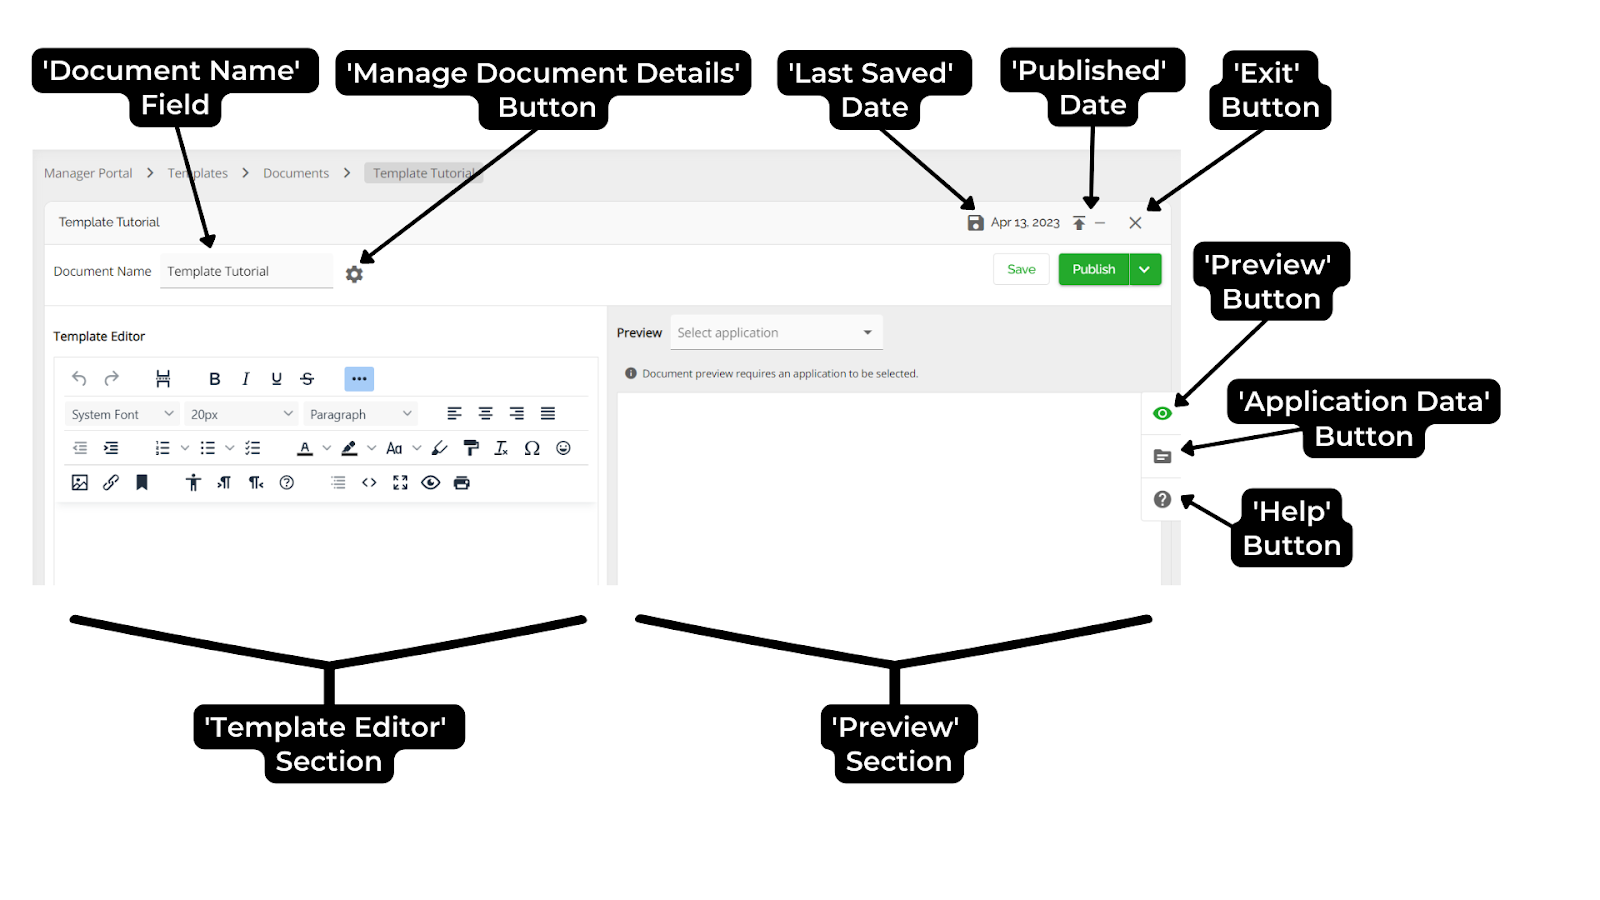
Select the cog beside the ‘Document Name’ field to open the ‘Document Management Details’ pop-up; any changes made in this pop-up will save automatically.

Overview
In the ‘Overview’ section, you can manage the settings chosen when the document template was created, including the document template’s name, index, category, language, headers, and footers.
Indexing Document Templates

The ‘Index’ field is a numeric field that allows the user to assign an order to a specific document within their commitment package. Any documents with index numbers specified will be received by POS systems in their assigned order, followed by any remaining documents selected for generation. To include a document in your standard commitment package, see the details below concerning our ‘Advanced Rules’ section.
Advanced Rules
To the right of the ‘Overview’ section is the ‘Advanced Rules’ section. This section allows you to select different parties that a given document can be addressed to.

The table below describes the purpose of each selection in the ‘Advanced Rules’ section.
|
Advanced Rule |
Description |
|
Commitment Package |
Checking off this box will include this document in the commitment package that can be sent back to a POS system. |
|
Lawyer Selection |
Checking off this box will allow the user to choose which lawyer within the Stakeholder Details widget to feature in the appropriate fields of a given document. |
|
Allow Multiple Lawyers |
Checking off this box will allow the user to select multiple lawyers to each have their own version of a given document. |
|
Property Selection |
Checking off this box will allow the user to select from the properties on a given application in order to feature that specific property on a given document. |
|
Stakeholder Selection |
Checking off this box will allow the user to select from the different stakeholders on a given application to feature their data on a given document. |
Note: Lawyer, Multiple Lawyers, Property all can be selected at the same time, but only one of the following can be selected at a time: Customer, Company, Co-Borrower, and Guarantor.
Template Editor Functionalities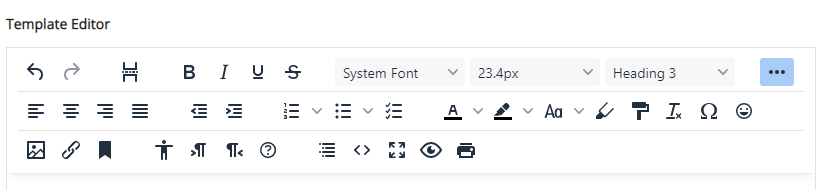
The Template Editor has a similar layout to Microsoft Word and each button’s functionality has been described in the table below
|
Button |
Name |
Functionality |
|
|
Undo |
Select this button to undo the last action taken in content of the editor body. |
|
|
Redo |
Select this button to redo the last action taken in content of the editor body. |
|
|
Insert Page Break |
Inserts a page break in the body of the editor. Select this button after placing the cursor in the body of content where you would like a page break to be. |
|
|
Bold |
Highlight text and/or click this function to bold text in the body of the editor. |
|
|
Italicize |
Highlight text and/or click this function to italicize text in the body of the editor. |
|
|
Underline |
Highlight text and/or click this function to underline text in the body of the editor. |
|
|
Strikethrough |
Highlight text and/or click this function to strike through text in the body of the editor. |
|
|
More Functionalities |
Click this button to view the additional functionalities for the body of the editor. |
|
|
Font Style |
Style of font associated with text being used, clicked on or highlighted in the body of the editor. |
|
|
Font Size |
Size of font name associated with text being used, clicked on or highlighted in the body of the editor. |
|
|
Font Type |
Click the downward facing arrow directly to the right of the Font Type (i.e. Paragraph, Heading 1, Heading 2, Heading 3, Preformatted… etc.) to choose a font style in a drop down list. |
|
|
Align Left |
Aligns the selected text with the left margin of the template. |
|
|
Align Center |
Aligns the selected text with the center margin of the template. |
|
|
Align Right |
Aligns the selected text with the right margin of the template. |
|
|
Justify |
Fully justifies the selected text. |
|
|
Decrease Indent |
Select this button to decrease the indent of your editor body content. |
|
|
Increase Indent |
Select this button to increase the indent of your editor body content. |
 |
Numbered List |
Click this function to create a numbered list in your editor body. |
|
|
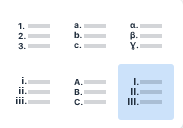
Numbered List Menu |
Click the downward facing arrow directly to the right of the Numbered List to choose a numbered list style in a drop down list. |
|
|
Bullet List |
Click this function to create a list in your editor body with bullet points. |
|
|
Bullet List Menu |
Click the downward facing arrow directly to the right of the Numbered List to choose a bullet list style in a drop down list. |
|
|
Checklist |
Click this function to create a checklist in your editor body with boxes that can be checked and unchecked. NOTE: This functionality is currently not able to carry over into downloaded documents; the checkboxes will turn into broken images upon downloading the document. |
|
|
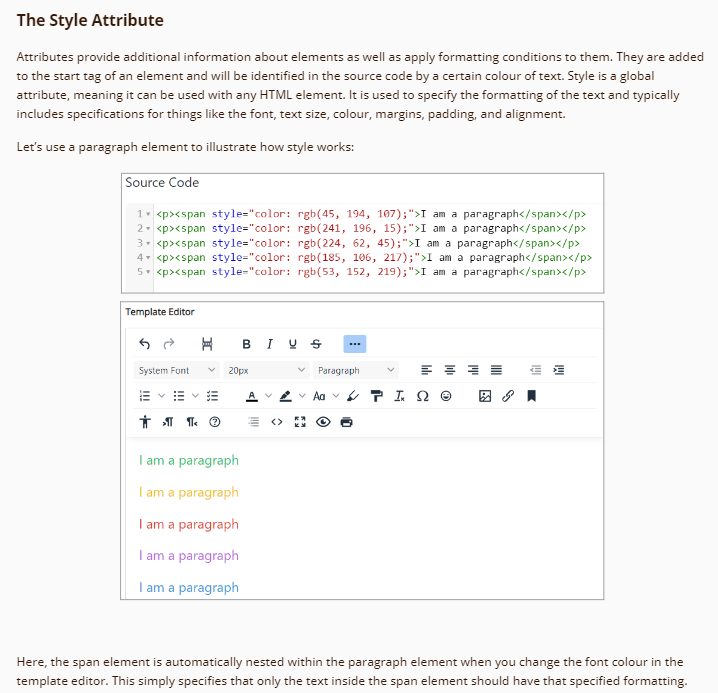
Text Colour |
Highlight text and/or click this function to change the color of the text. |
|
|
Text Colour Menu |
Click the downward facing arrow directly to the right of the Text Colour icon to choose a text color in a drop down list. |
|
|
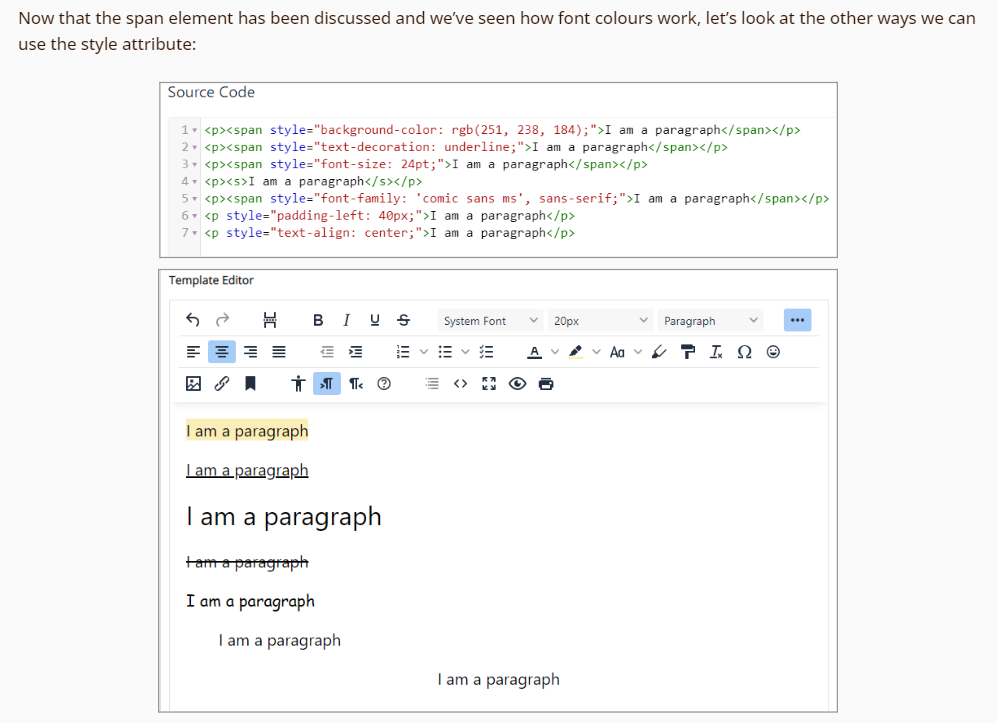
Highlight Colour |
Highlight text and/or click this function to change the background color of the text. |
|
|
Highlight Colour Menu |
Click the downward facing arrow directly to the right of the Highlight Colour icon to choose a background color in a drop down list. |
|
|
Capitalization |
Highlight text and/or click this function to capitalize selected text. |
|
|
Capitalization Menu |
Click the downward facing arrow directly to the right of the Capitalization icon to choose lowercase, uppercase or title case in a drop down list. |
|
|
Permanent Pen |
Select the permanent pen to type in a preset formatting. The default formatting is a bold red Arial font in size 12. To change the default formatting, right click within the template editor section and select Permanent Pen Properties. |
|
|
Format Painter |
Click and hover over areas to recreate the same formatting from one area to another. |
|
|
Clear Formatting |
Click this button to return selected text to the default font size, type, colour, and line spacing specifications. |
|
|
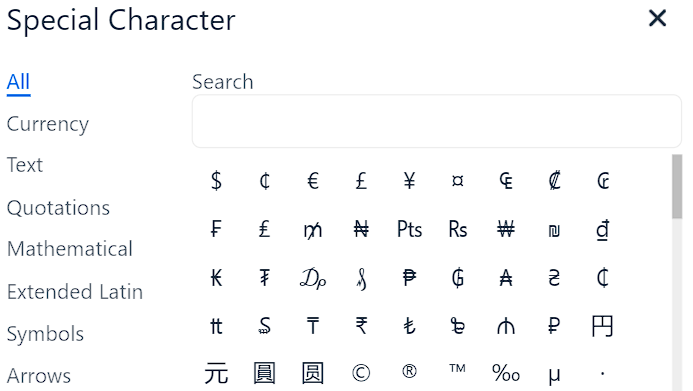
Special Character |
Click this button to insert a special character. |
|
|
Special Character Menu |
Navigate through this menu to find the special character you would like to insert. |
|
|
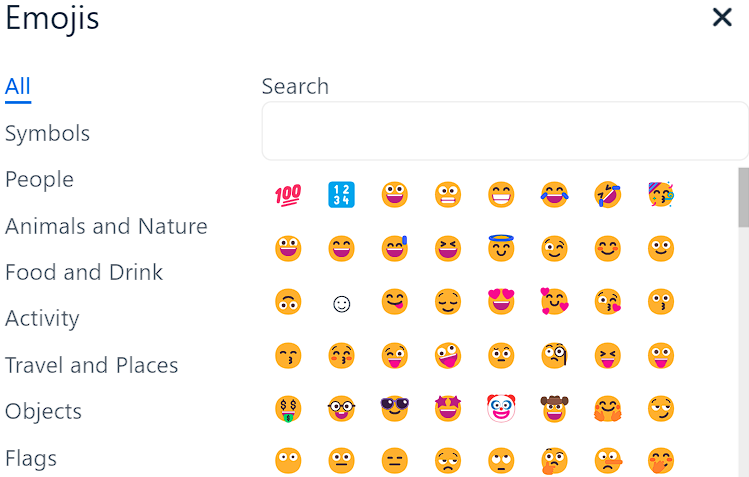
Emojis |
Click this button to insert an emoji. |
|
|
Emojis Menu |
Navigate through this menu to find the special characters you would like to insert. |
|
|
Insert Image |
In the body, place your cursor where you would like to insert an image - select insert image button and select image. |
|
|
Insert/Edit Link |
Highlight text and/or click this function to insert or edit hyperlink associated with the text. |
|
|
Anchor |
Click the anchor button to anchor and lock any content in the body where it is. |
|
Accessibility Checker |
Highlight text and/or click this function to review if the content is accessible to readers with vision impairments and what suggested edits could be made to make content more legible. |
|
|
Left to Right |
Highlight text and/or click this function to type left to right. |
|
|
Right to Left |
Highlight text and/or click this function to type right to left. |
|
|
Help |
The help section contains information on useful shortcuts, keyboard navigation, plugins, and the software version. |
|
|
|
Table of Contents |
Place the text cursor where you would like to create a table of contents and click this button. |
|
|
Source Code |
Click this button to show the source code of the content within the Template Editor. |
|
|
Full Screen |
Click this button to view the Template Editor in the body of the page and hide all other sections. |
|
Preview |
Click this button to view the Preview in a pop up. |
|
|
|
Click this button to print content in the Template Editor. |

Keyboard Shortcuts in the Template Editor
Being able to work efficiently on an online application most often includes using keyboard shortcuts. Select the ‘Help’ button to open a list of shortcuts as shown below.


Creating Tables in the Template Editor
In the body of the editor, highlight text where you would like the table to be created or write out text and highlight where you would like the table to be located. Once you have text highlighted, a small text menu bar will appear, select on the table icon on the far right. This will replace the text with a table.

Preview Section & Functionality
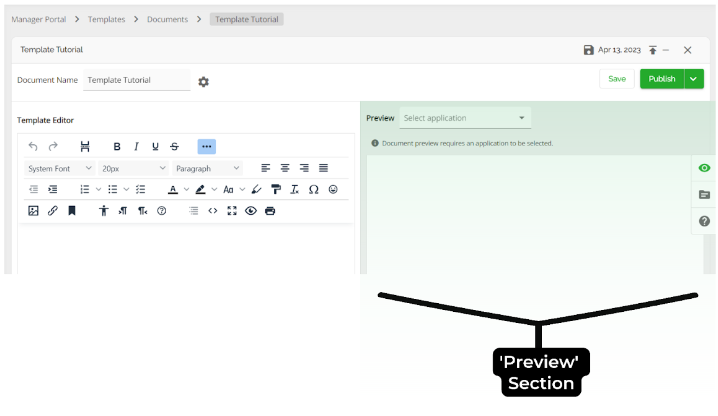
On the far right of the preview section, you will see a series of buttons in a sidebar - the first of these buttons is the ‘Preview’ button shown with an eye icon. The default layout of the template editor is to have the ‘Preview’ section open. This section will use a selected application to preview your document with rendered text for Handlebars expressions.

The ‘Application Data’ button is displayed with a folder icon. When this button is clicked, it will allow you to view the application data in the right panel. To minimize the application data window, click on the folder icon again.

To select an application, search for an applicant in the search box located at the top left of the preview section. The application data is arranged in alphabetical order and contains several types of data that will be discussed in detail within the ‘Handlebars’ section of this guide.


Saving Document Templates
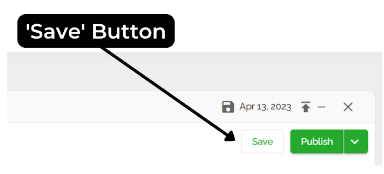
The ‘Save’ button allows you to regularly save any changes made to your document template. Document templates do not save automatically, and we therefore recommend saving them regularly as you work.

The ‘Last Saved’ date displays the date that you last saved this document template.
‘Publish’ Button and Drop Down Menu
The ‘Publish’ button allows you to publish the template, making it available to select in the ‘Generate Documents’ section of all applications.

When selecting the drop down arrow, you will be able to see the following options:
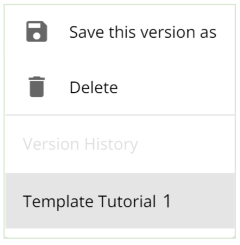
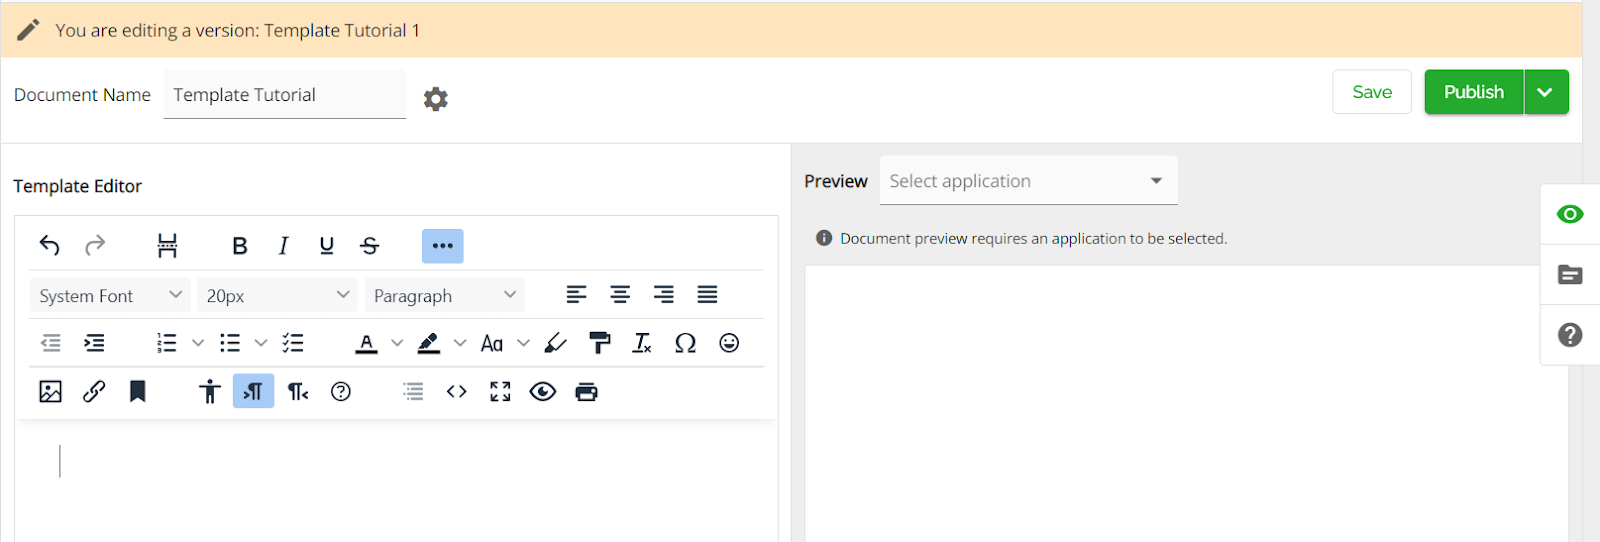
The ‘Save this version as’ button will open a pop-up wherein you can name the version and then select the ‘Save’ button. Once completed, you will be able to see the new version in the Version History at the bottom of the menu. Selecting a version in the history list will open this version to be edited. A light orange bar will appear above the document template to inform the user of which version they are currently editing.
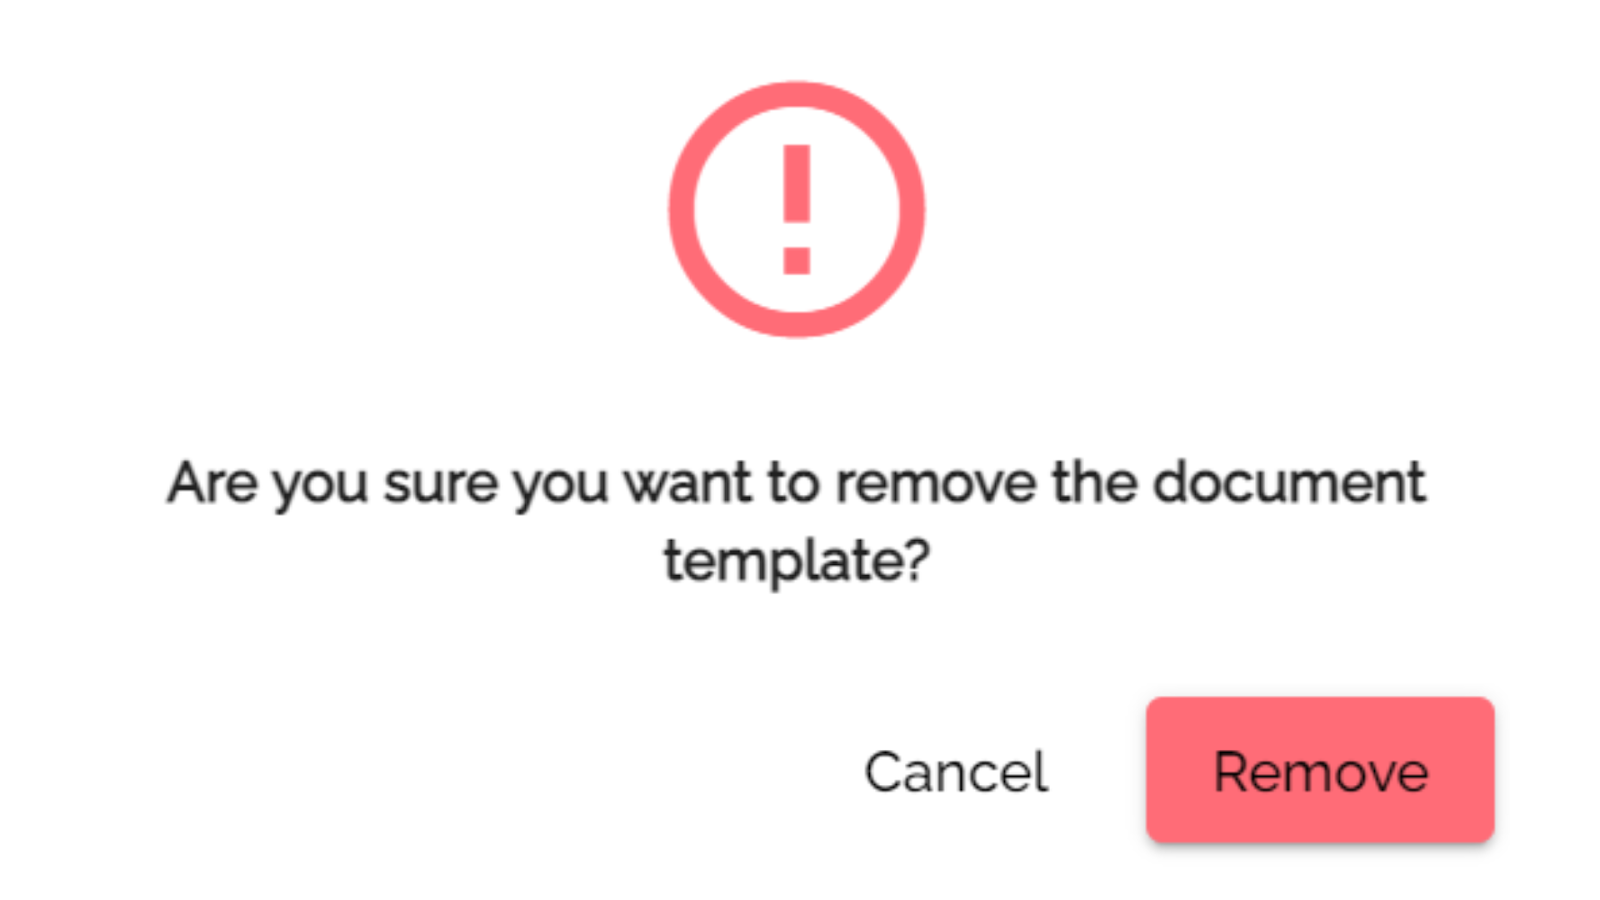
To delete a document template, select the ‘Delete’ button in the drop down menu. When selected, it will generate a warning pop-up where the user will confirm that they wish to delete the template.
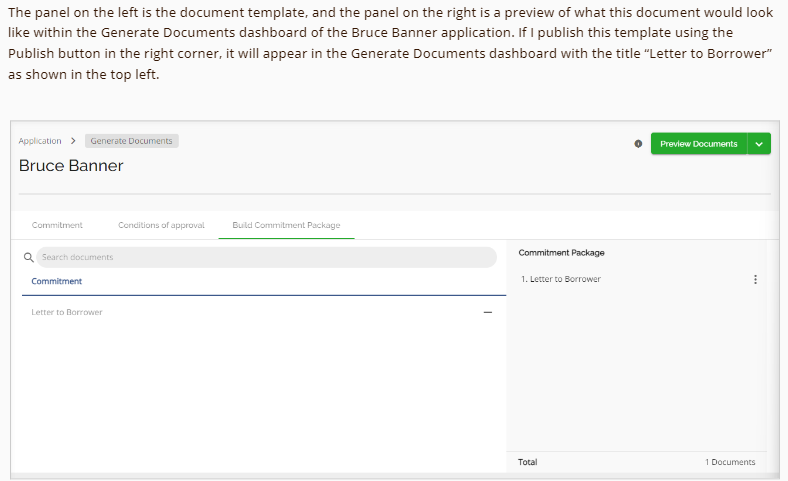
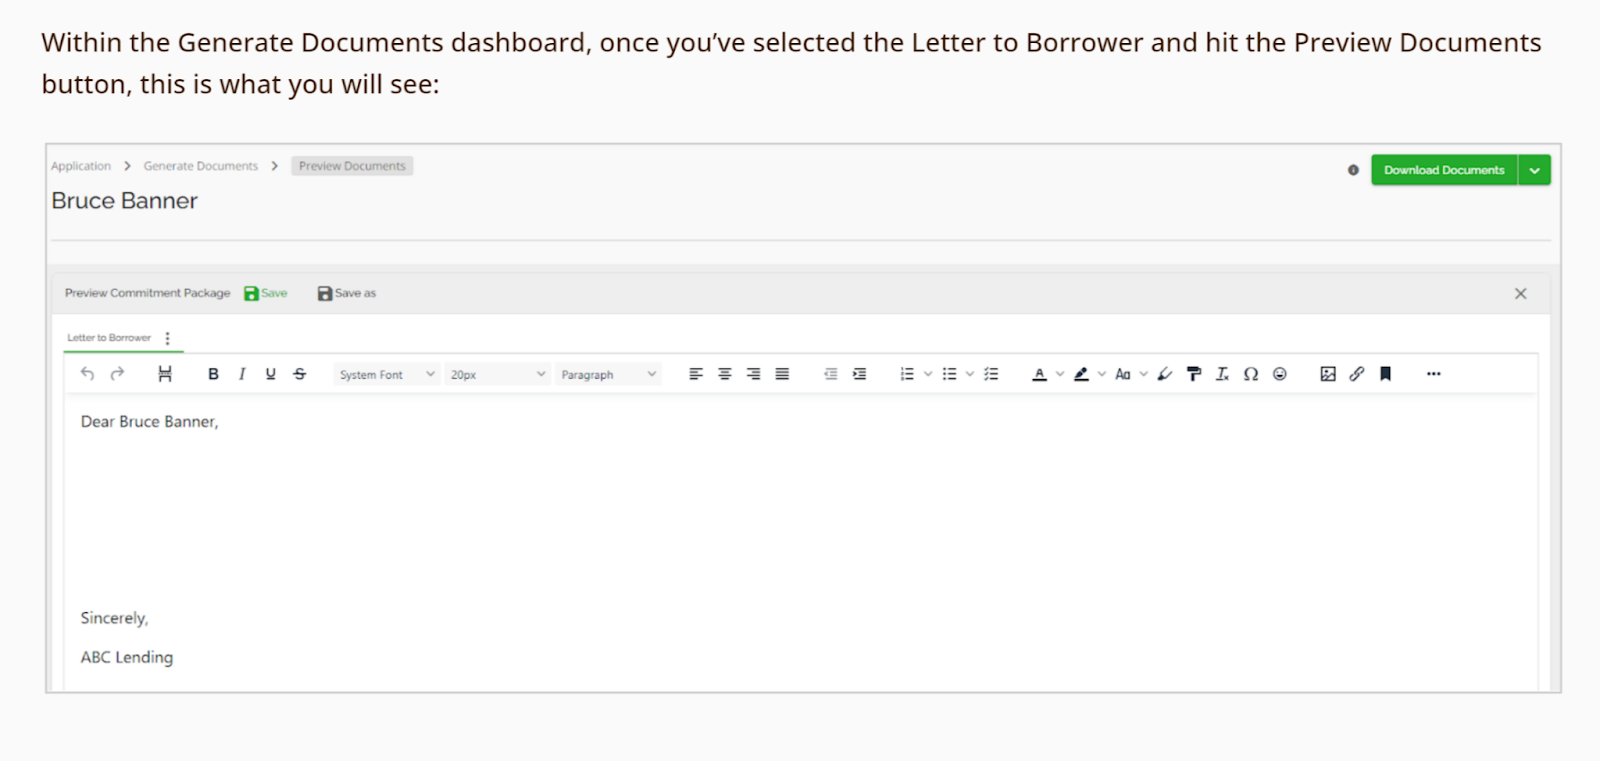
Working With Document Templates and Viewing Final Version
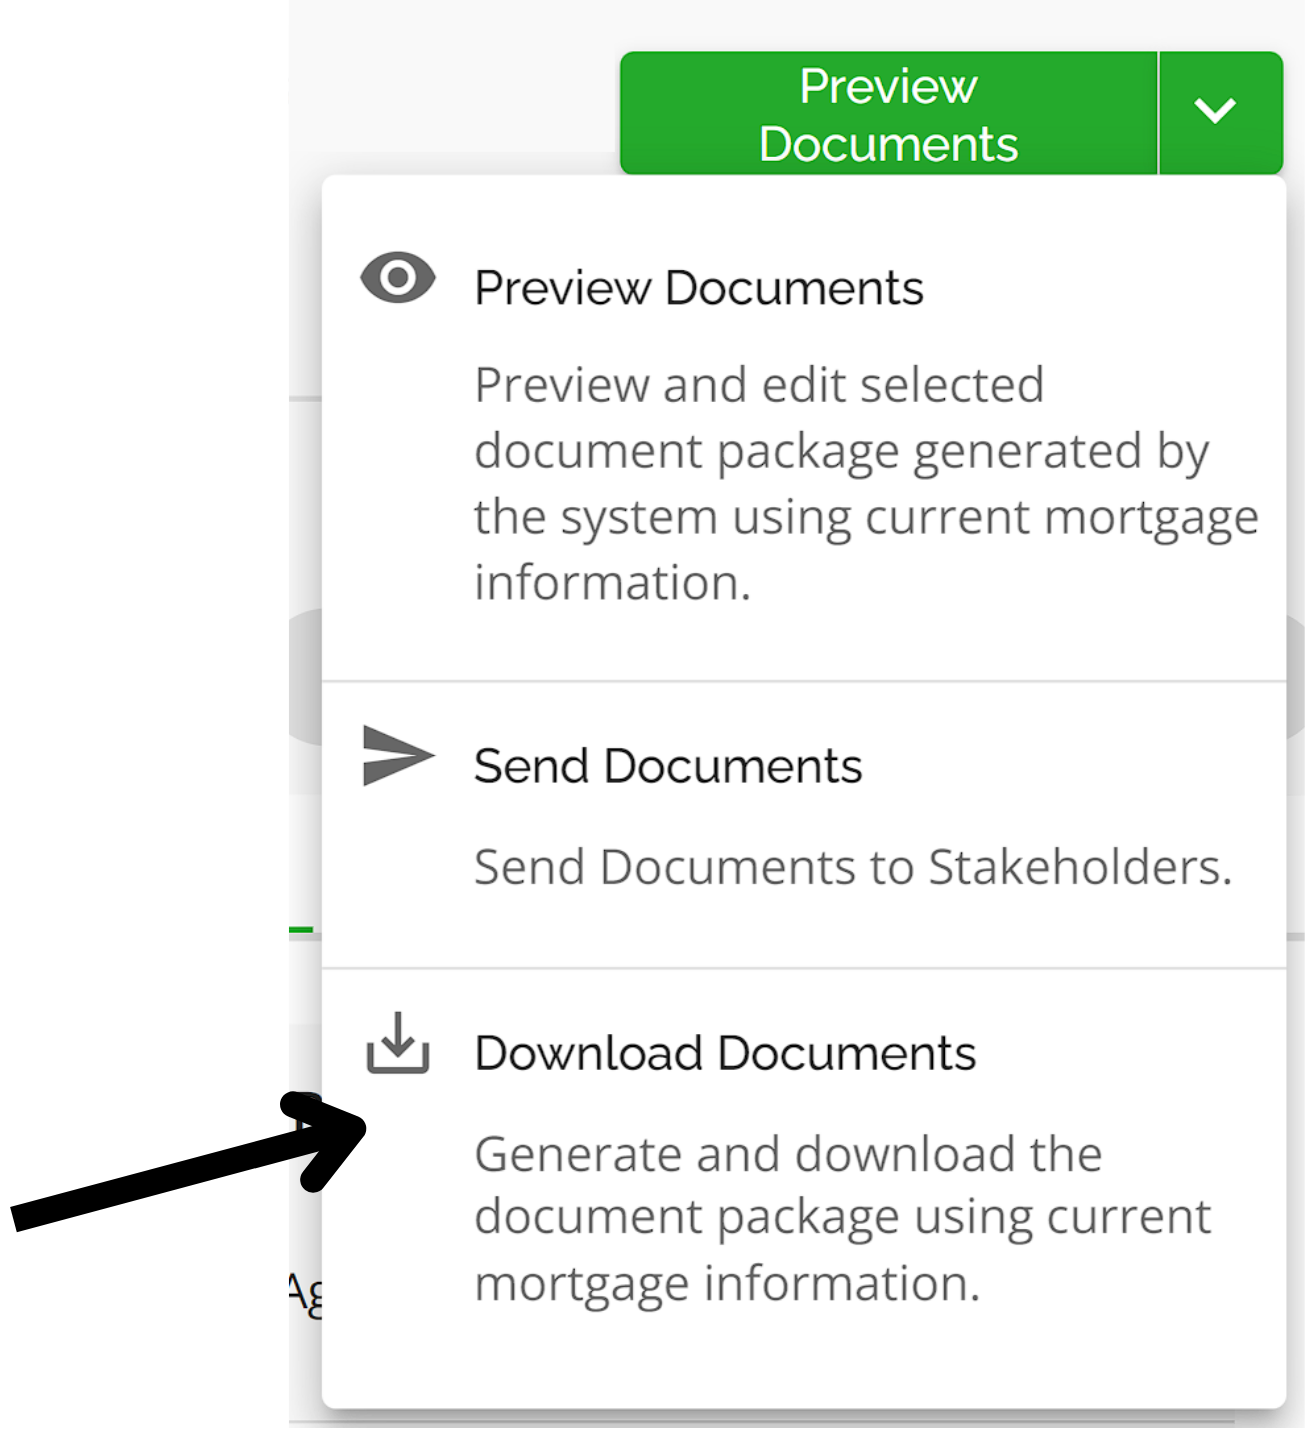
To preview the final look of the document generated by your template while you are still editing, start by saving your changes and publishing the document. Enter an application and select the ‘Generate Documents’ button. Next, select your document to be generated under the header ‘Build Commitment Package’ and select the ‘Download Documents’ option from the drop down menu to the right of the ‘Preview Documents’ button.
Creating Templates from Existing Documents
You can easily create document templates by copying and pasting content from already existing documents.
- Create a new document template or find the template you wish to add content to and use the inline ellipsis to open it in the template editor.
- Highlight the existing content that you wish to include in your document template.

- Copy the material that is highlighted:
- Windows: Control key + C
- Mac: Command key + C
- Place your cursor where you would like to paste the content and paste:
- Windows: Control key + V
- Mac: Command key + V
- You will receive a pop up asking if you would like to keep the existing formatting or remove it.

Note: If the formatting does not copy over as expected, it may be easiest to delete the content and paste again with the formatting removed and reformat the document as desired within the Template Editor.
Creating a Document Using HTML Code
Code From An Alternative Source
The same concept discussed above can be used to import source code for an existing document into a document template.
- In the document where the source code is located, copy the code that you would like to be in your document template.
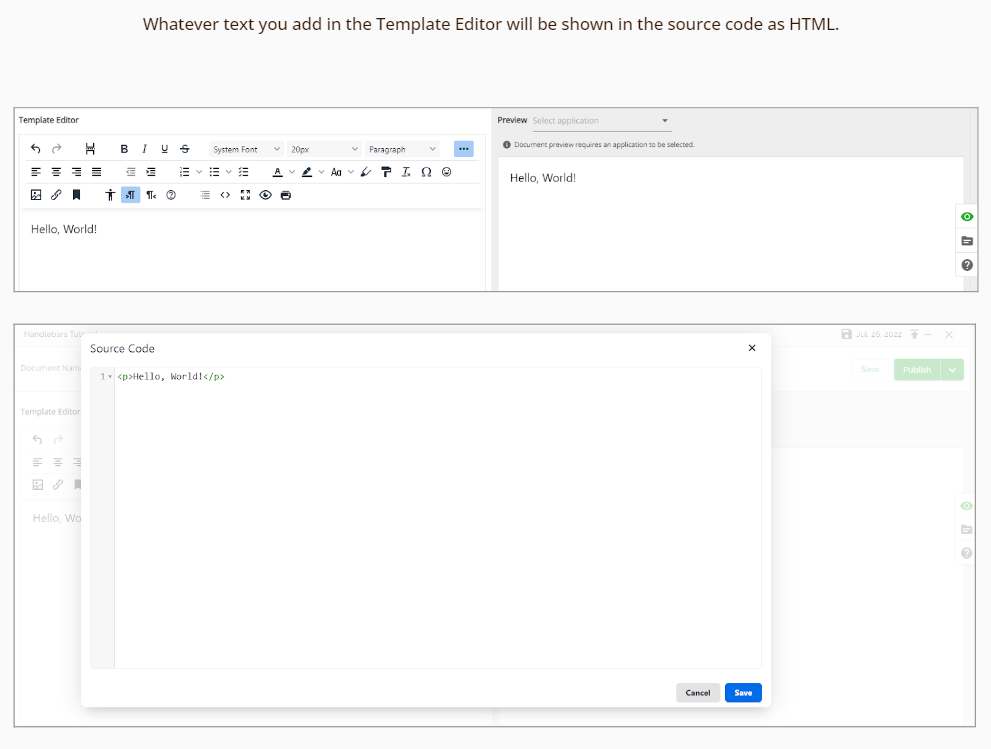
- Select the ‘Source Code’ button in the Template Editor Functions bar (< >).
- When the ‘Source Code’ page pops up, paste the code where you would like it to be placed within the document.
- Click the ‘Save’ button on the bottom right of the ‘Source Code’ pop-up.
- View in the ‘Preview’ section to ensure the document templated has updated as desired.

Code Within The FundMore AI Platform
Follow the below steps in copying and pasting source code to create a new document template with in the FundMore.ai Platform:
- Select the document template in the list you wish to change or create a new document template.
- Select the ‘Source Code’ button on the Template Editor bar (< >).
- When the ‘Source Code’ page pops up, highlight the code you want to copy and hit the ‘Copy code’ button.
Note: If you wish to copy the code for the entire document, simply click on the Copy code button without highlighting any of the text. - Click the ‘Cancel’ button on the bottom right of the popup to ensure that you aren’t saving any unintentional changes to the document you are copying from.
- Go back to the Document Template list and find the document you wish to change.
- Select the ‘Source Code’ button on the Template Editor Functions bar (< >).
- Paste the selection of copied code where you would like the change to be.
Note: To paste the entire document, first highlight all the text using Ctrl + A, then paste the copied content using Ctrl + V or by right-clicking and selecting Paste.
- Click the ‘Save’ button on the bottom right of the ‘Source Code’ pop-up.
- View in the ‘Preview’ section to ensure the document template has been updated as desired.
- Use the ‘Save’ button above the ‘Preview’ section to save the changes to the document template

Templating with Handlebars
Introduction
Handlebars is a templating language that allows us to create reusable templates that can be used to generate documents that populate with dynamic data. Handlebars templates are created using Handlebars syntax, which consists of double curly brackets and helper functions, along with some manipulation of HTML code. This syntax dictates how expressions can be used to render object data, perform logic and basic arithmetic, and iterate over arrays. When a Handlebars template is processed, the expressions are replaced with the corresponding data values, resulting in a final HTML document that can be served to the client.
In order to understand how Handlebars works, we first need to do some groundwork to cover things like the kinds of data we’ll be manipulating and how it is stored. Then we’ll discuss more complex components like syntax, helper functions, and working with HTML code.
Starting From The Data
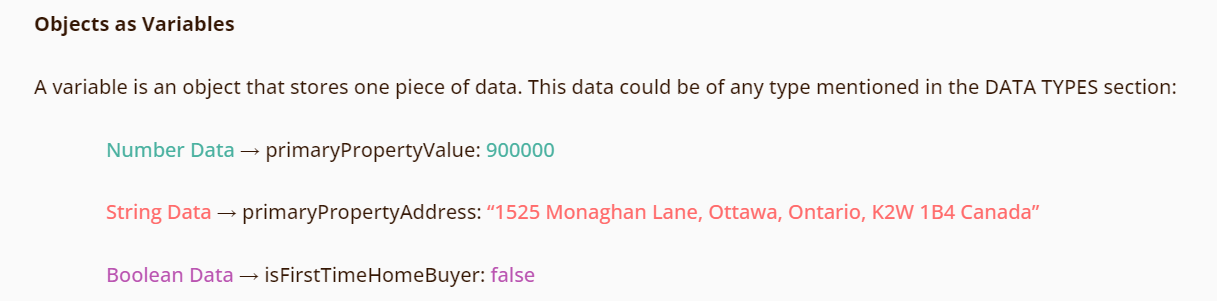
Data Types


Objects
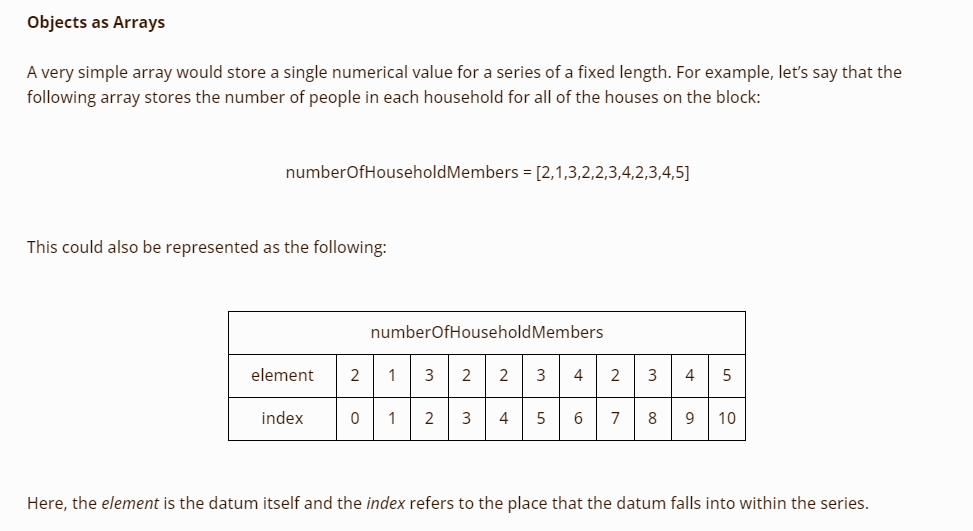
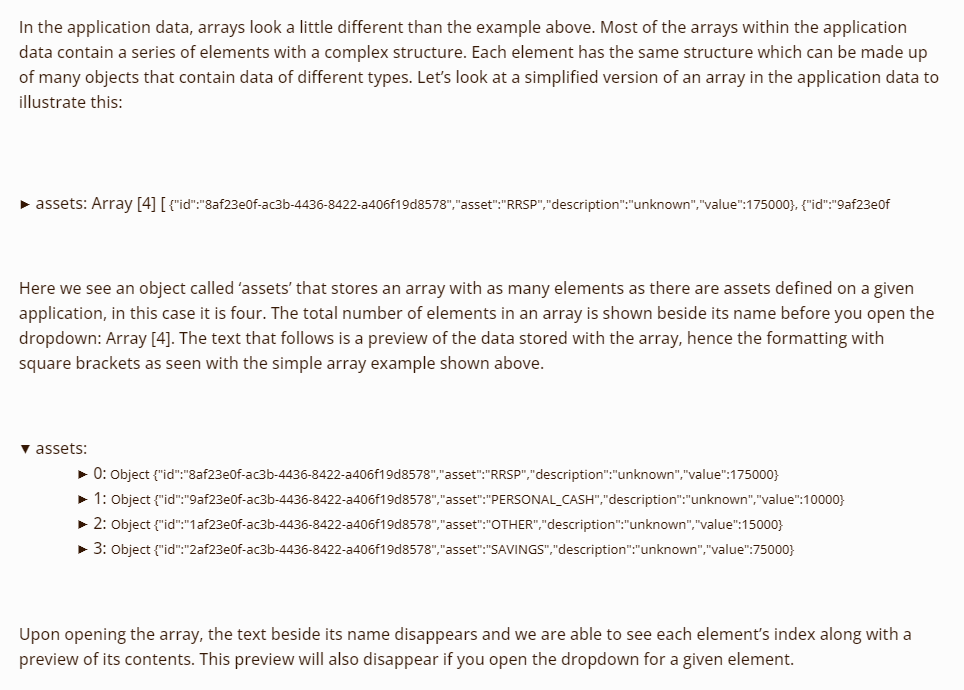


Application Data

Handlebars as a Templating Language
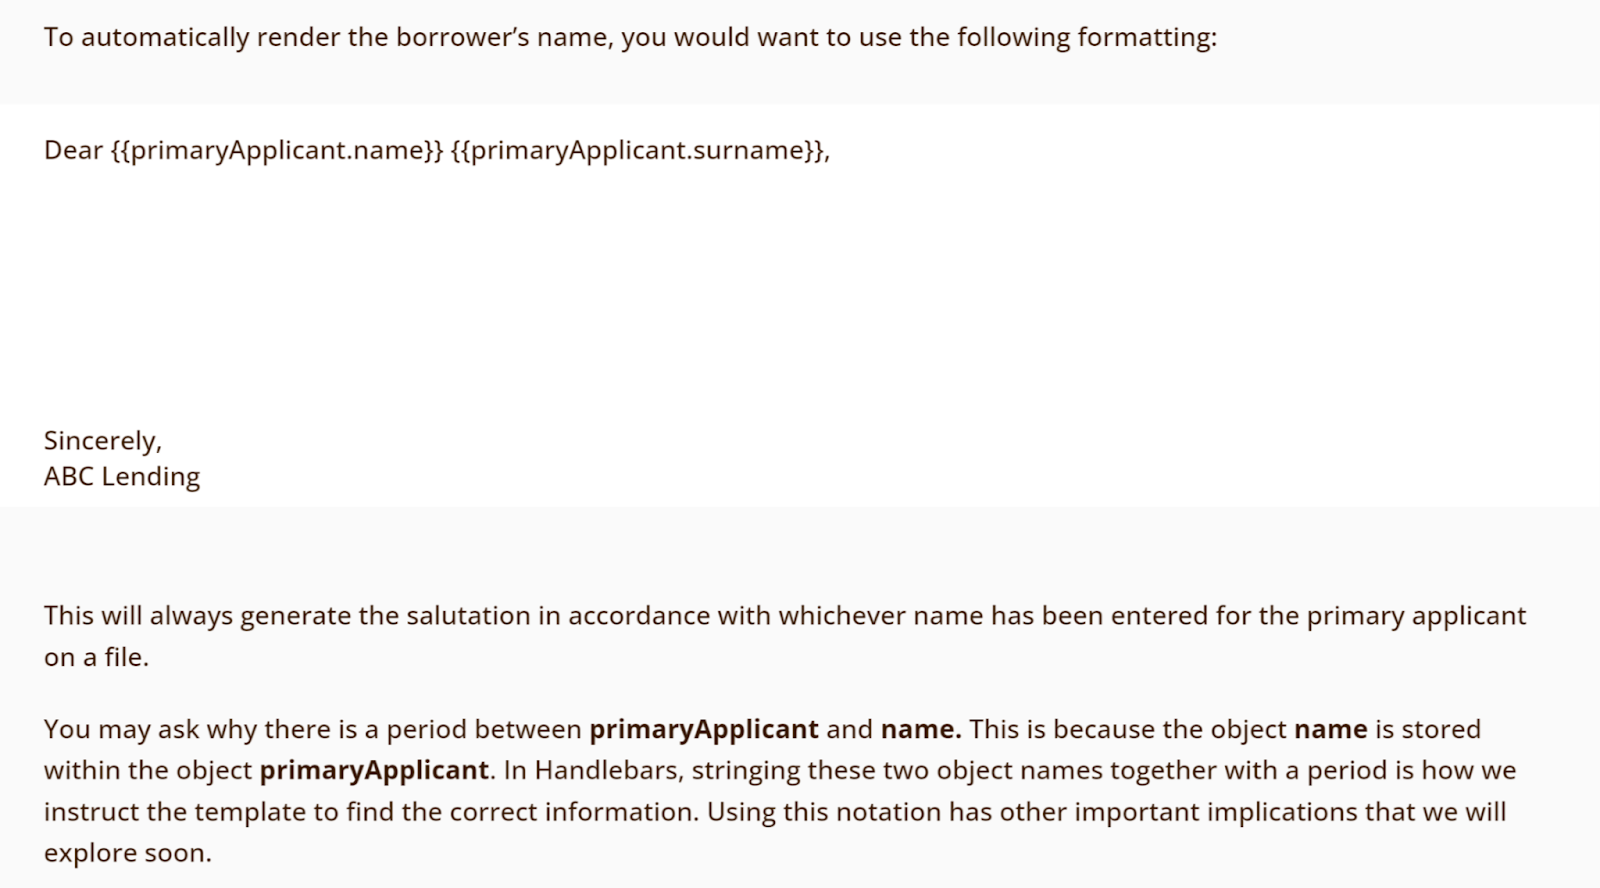
Expressions

What is a Helper?

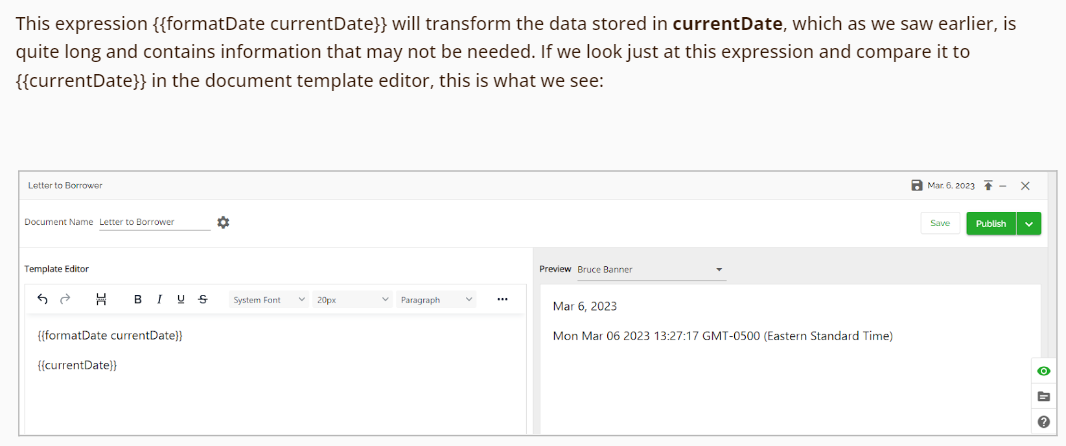
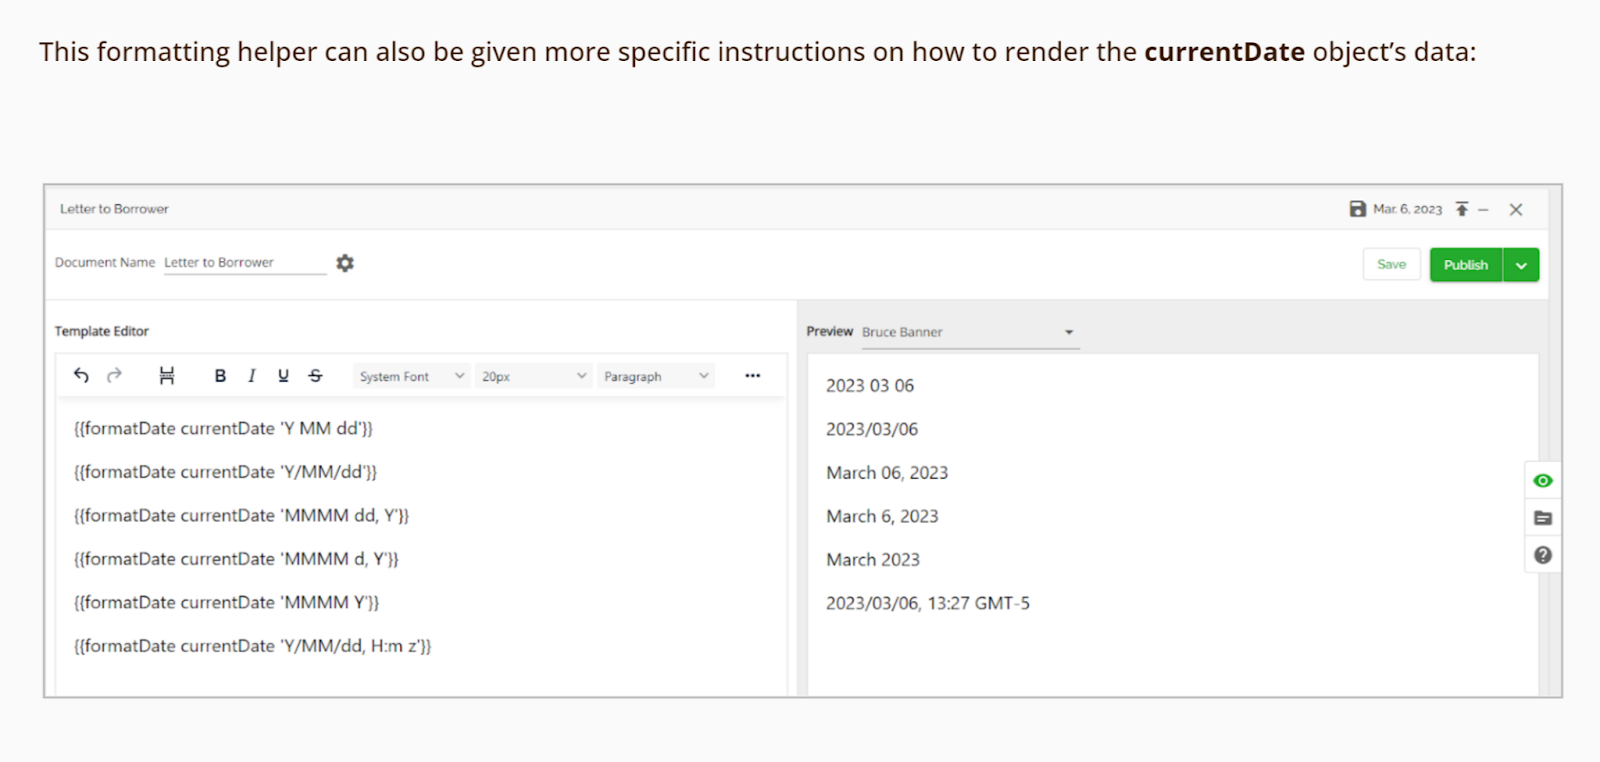
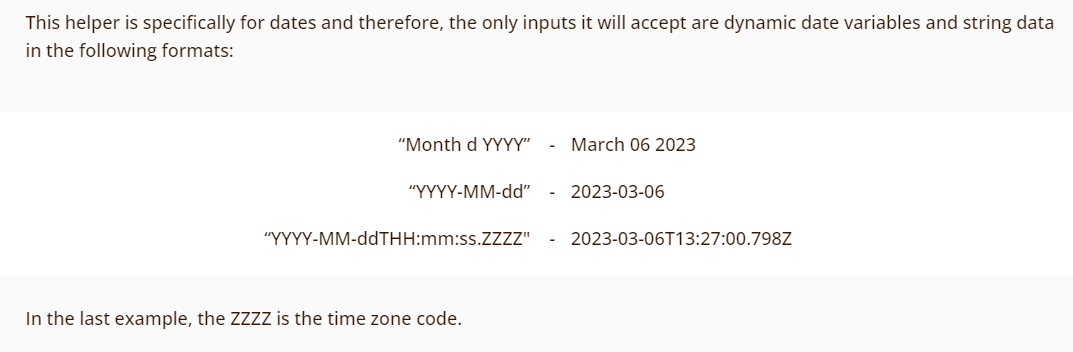
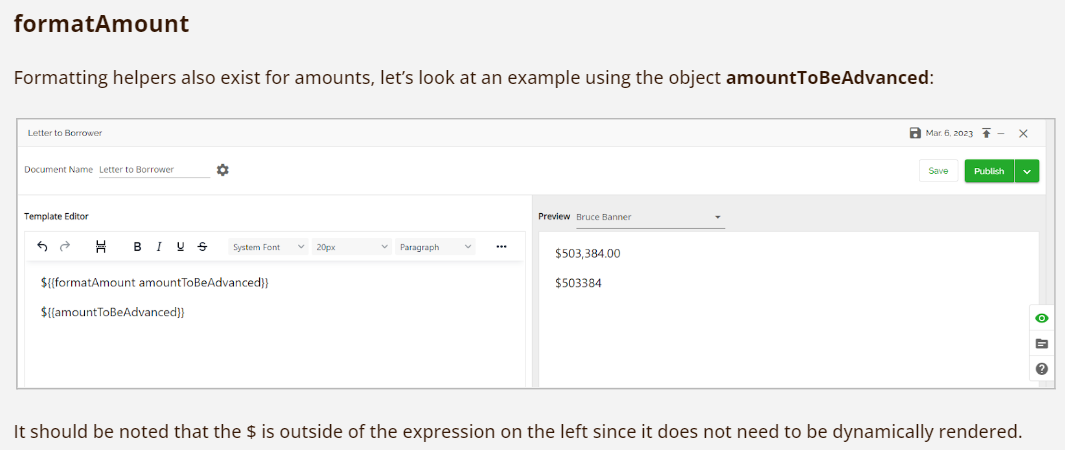
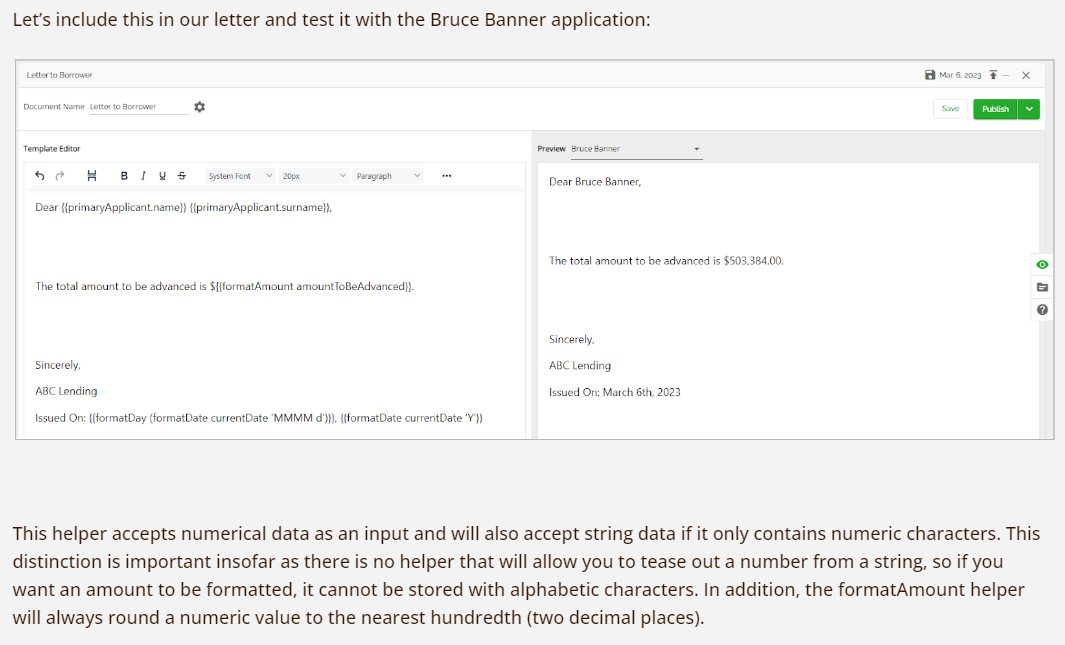
Formatting Helpers
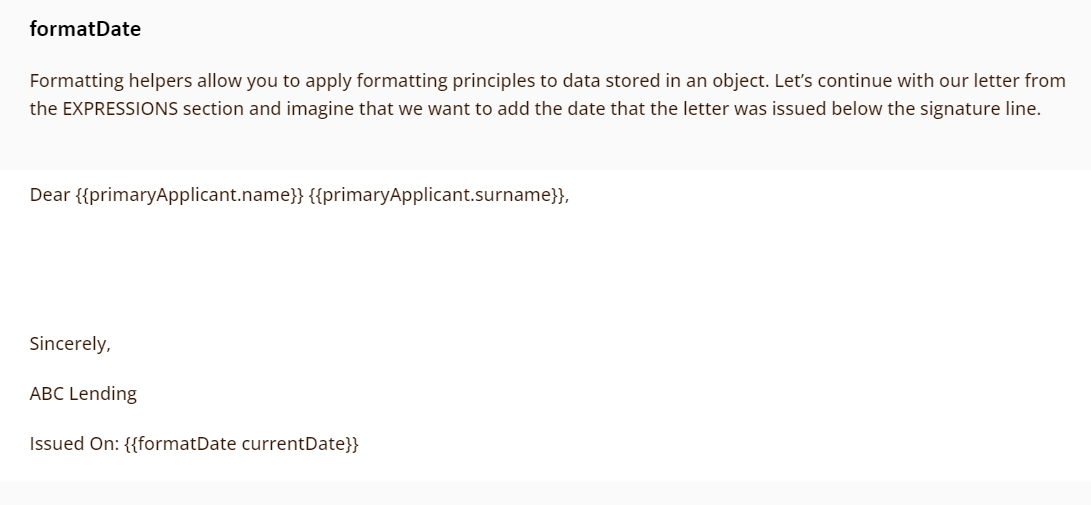


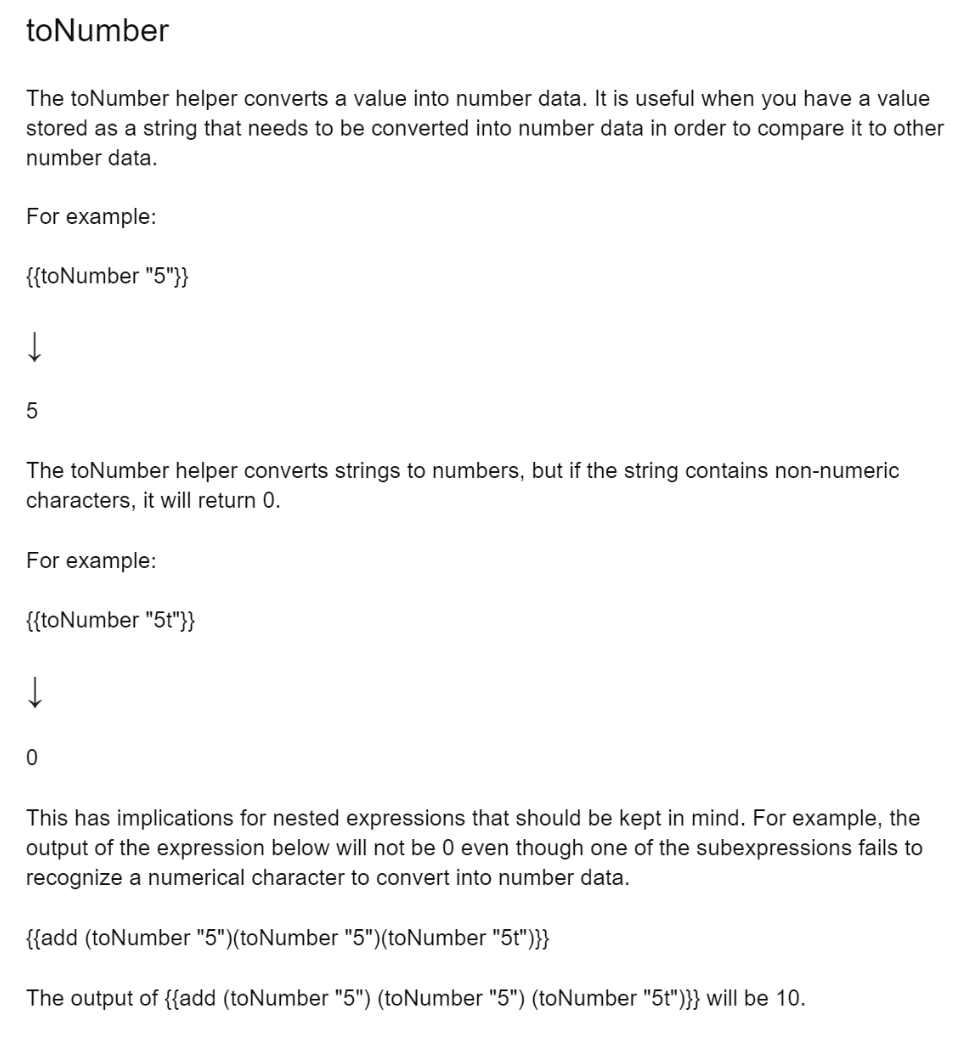
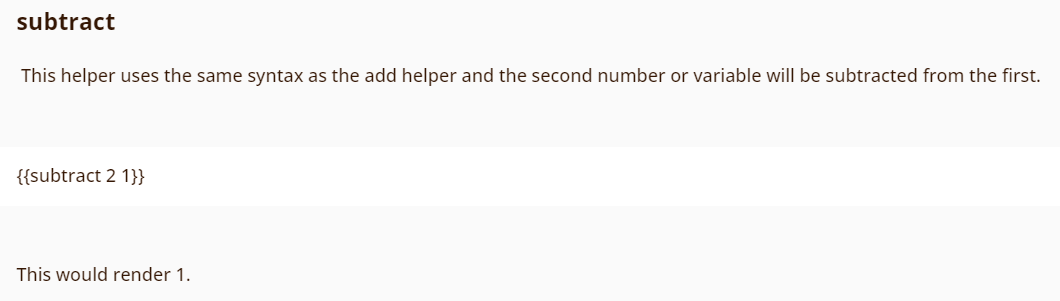
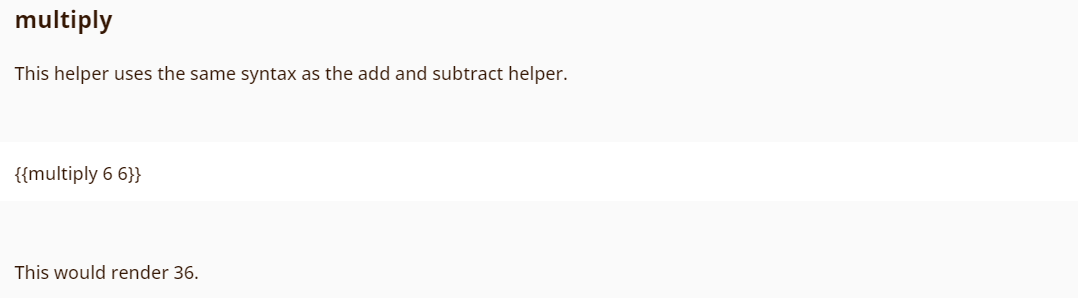
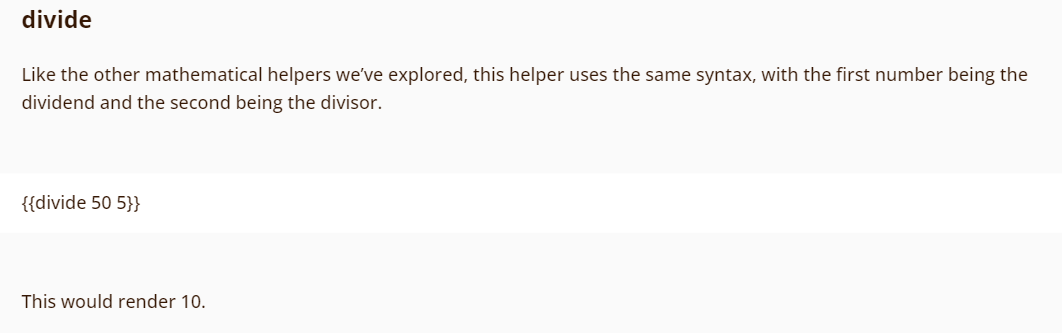
Mathematical Helpers

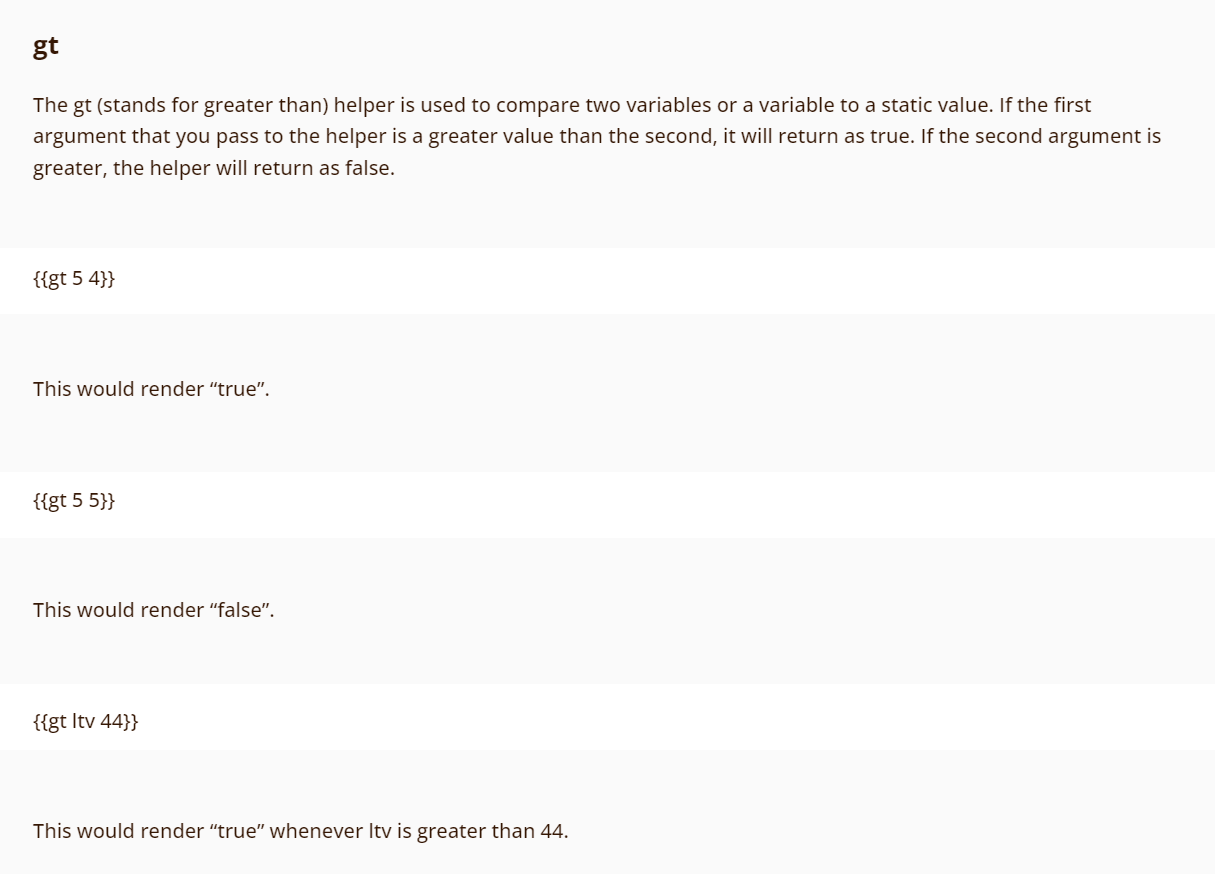

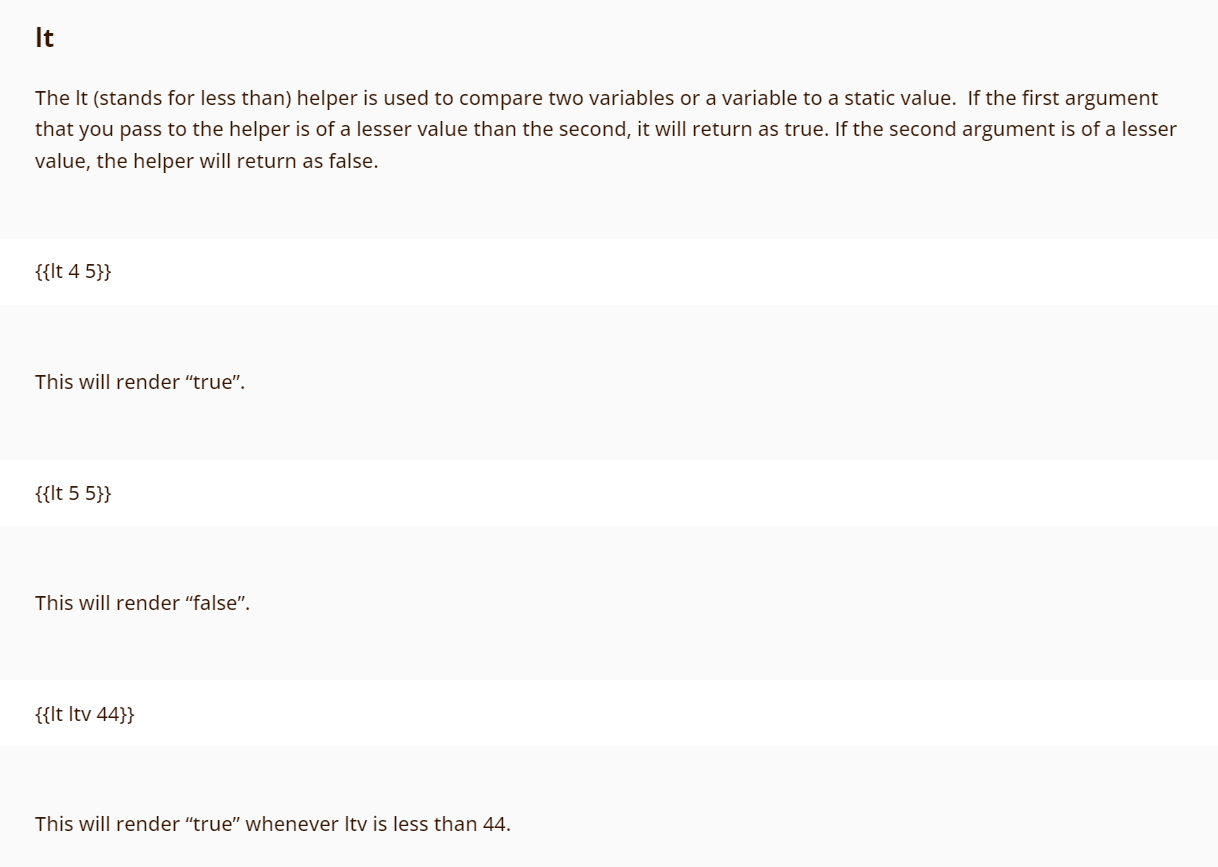

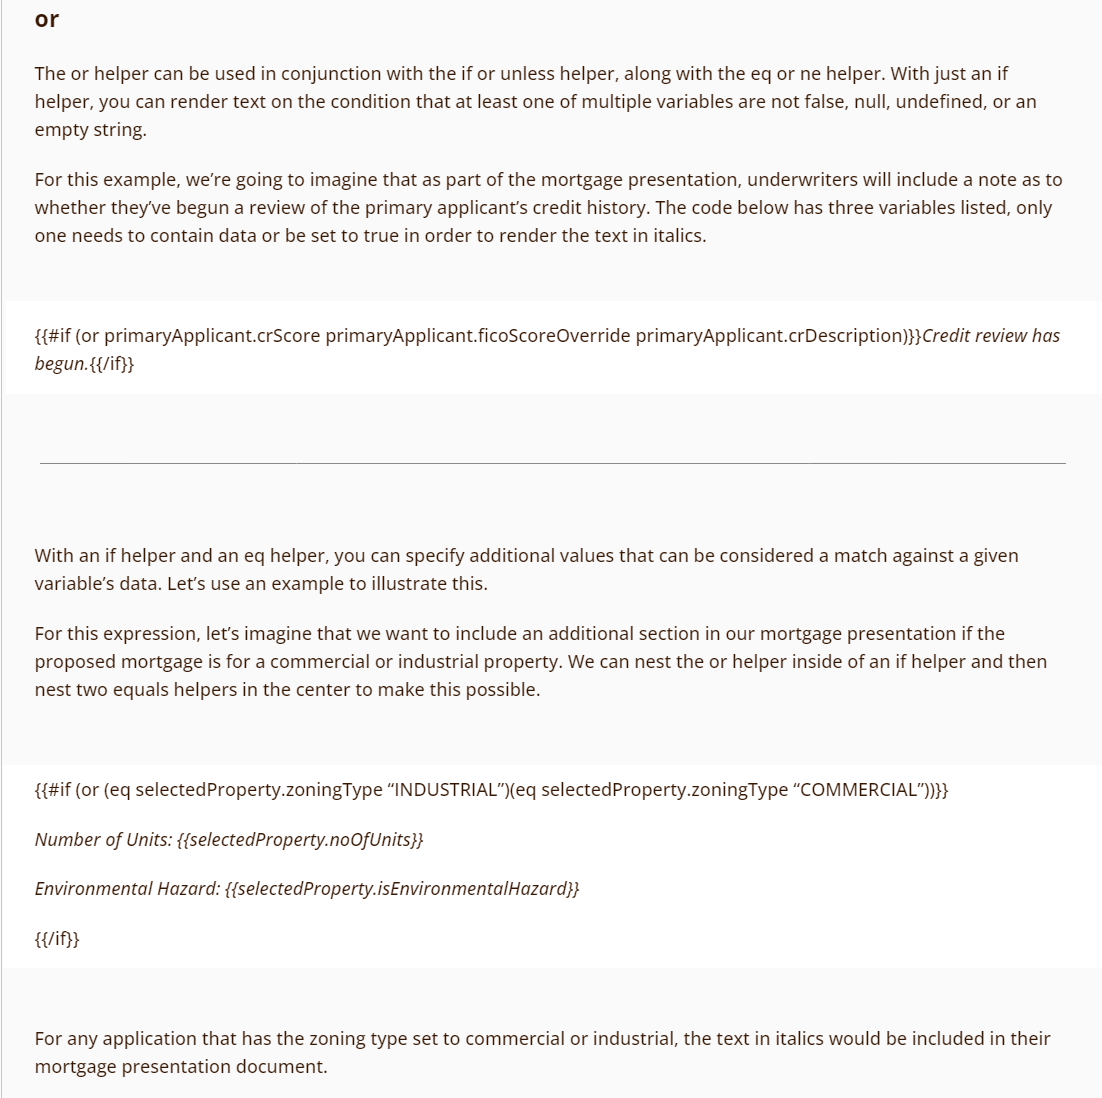
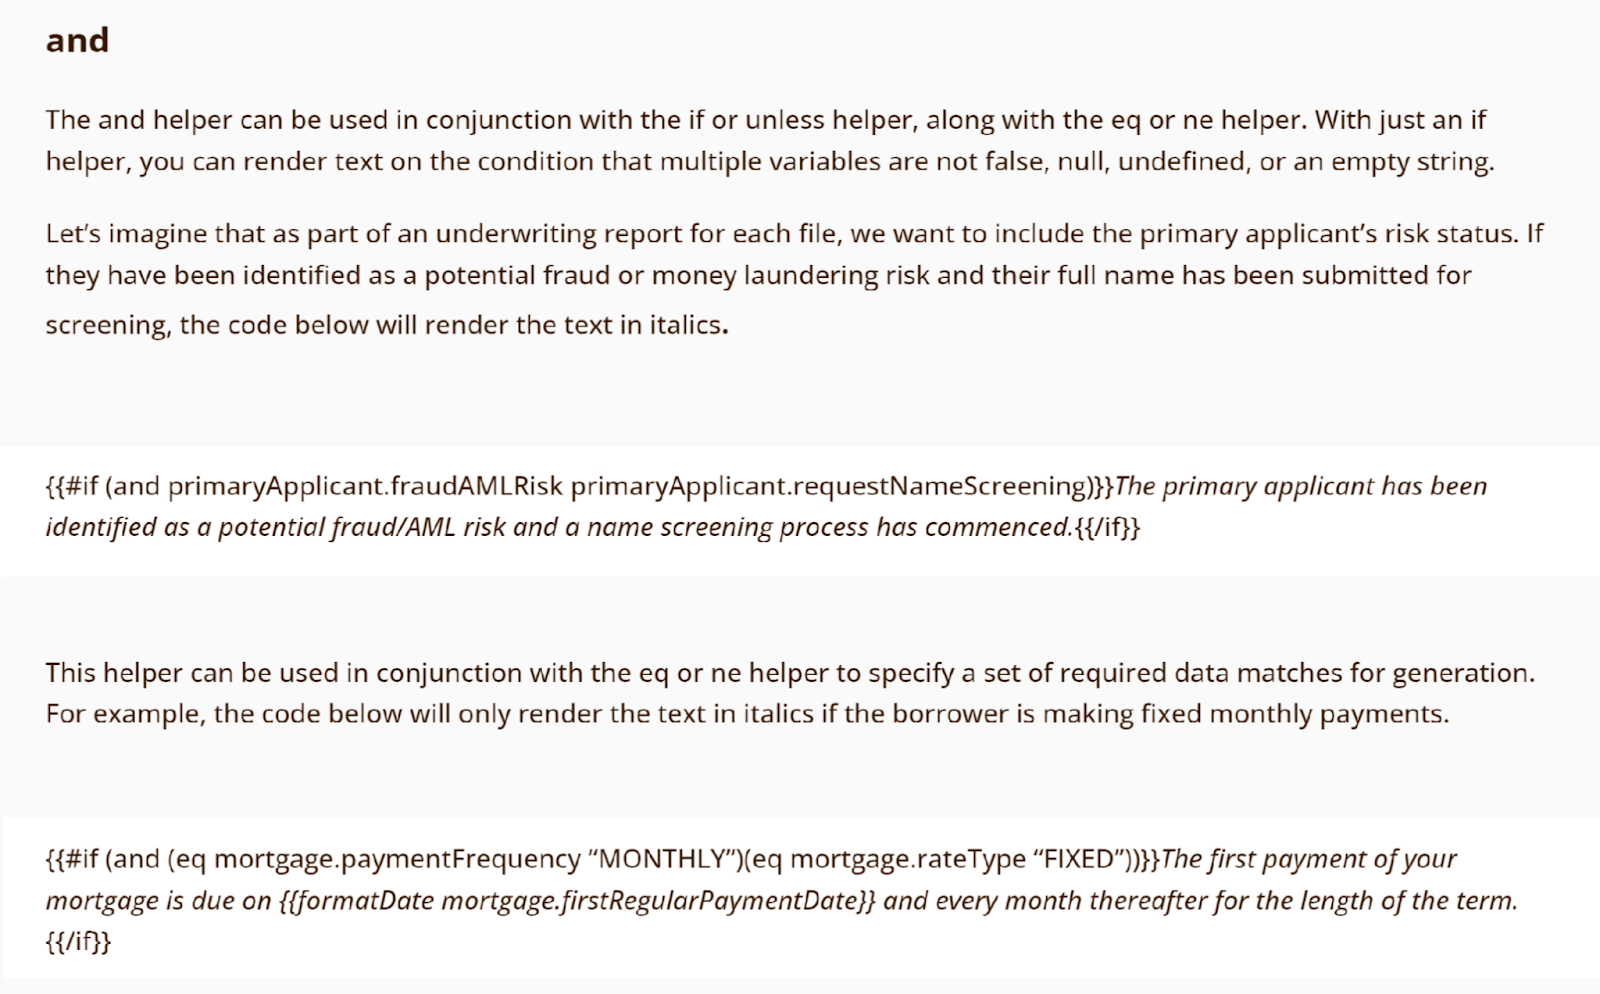
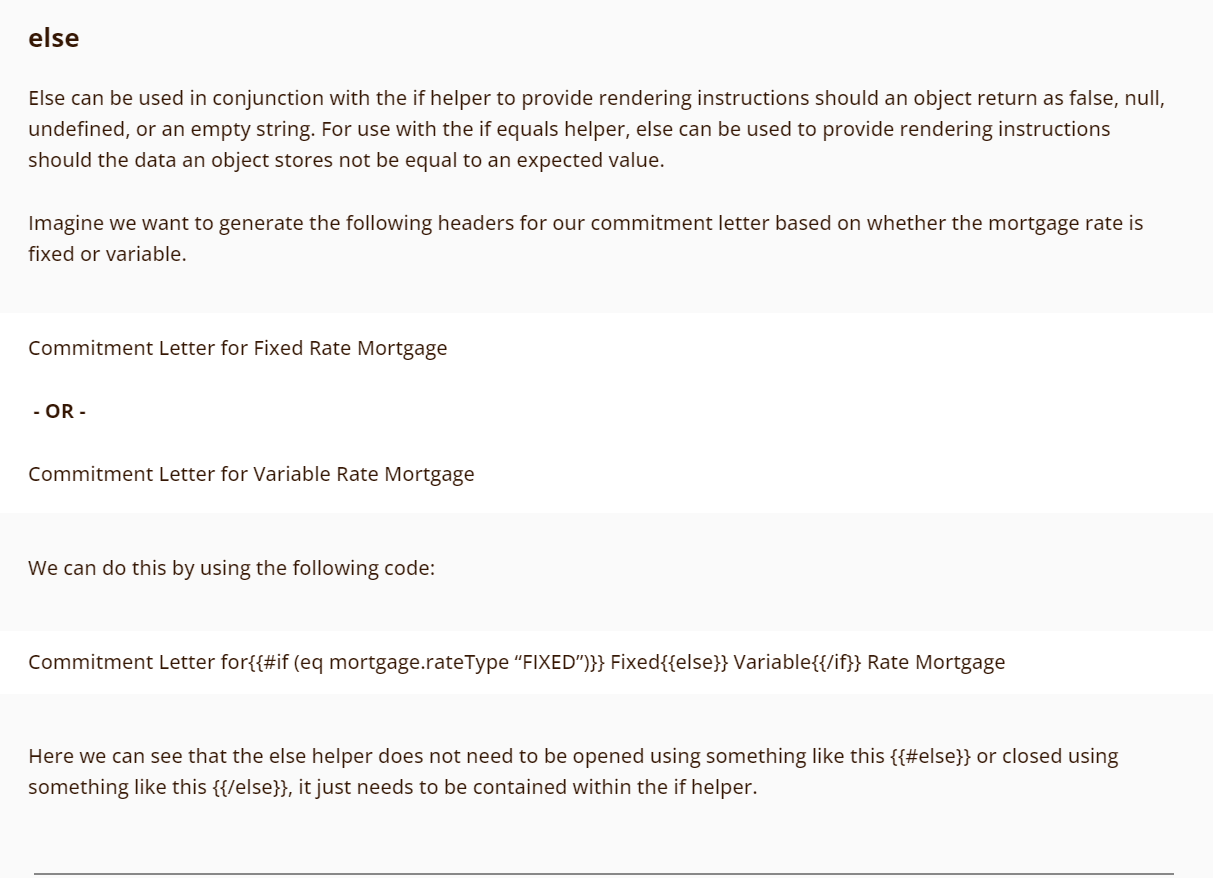
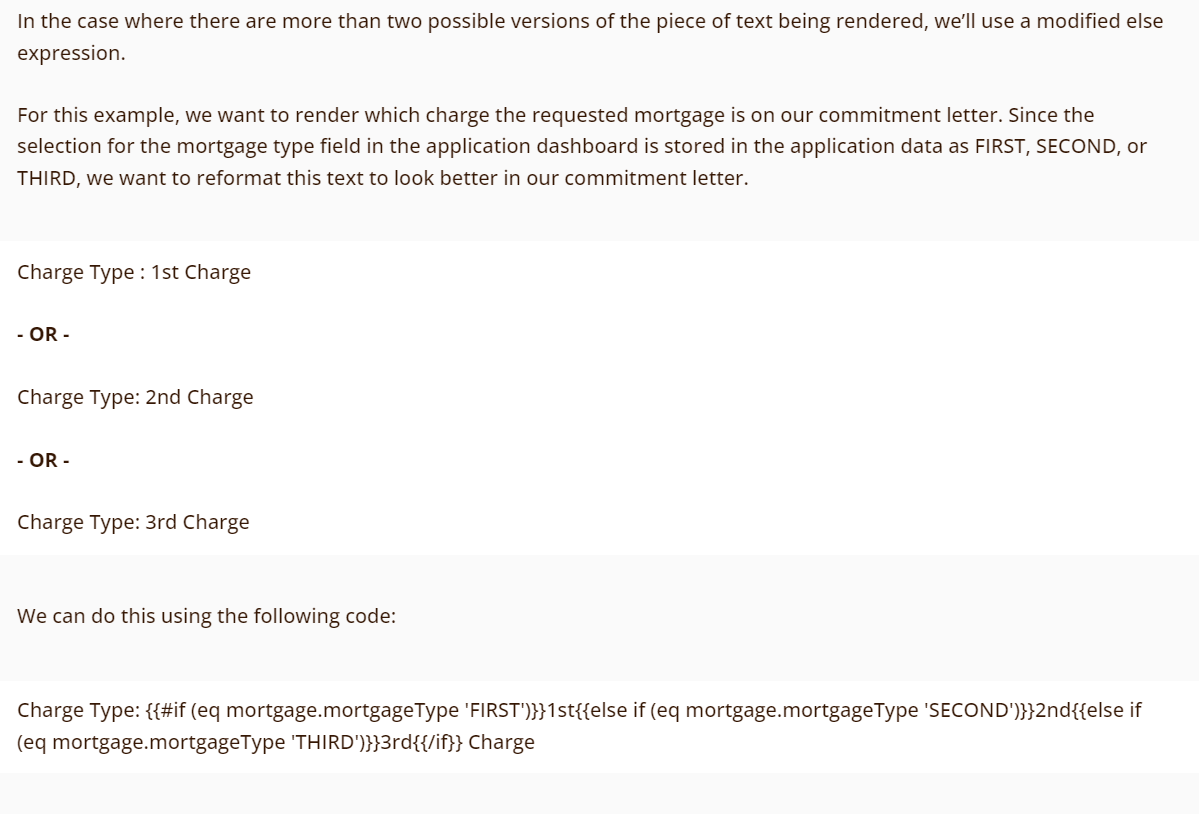
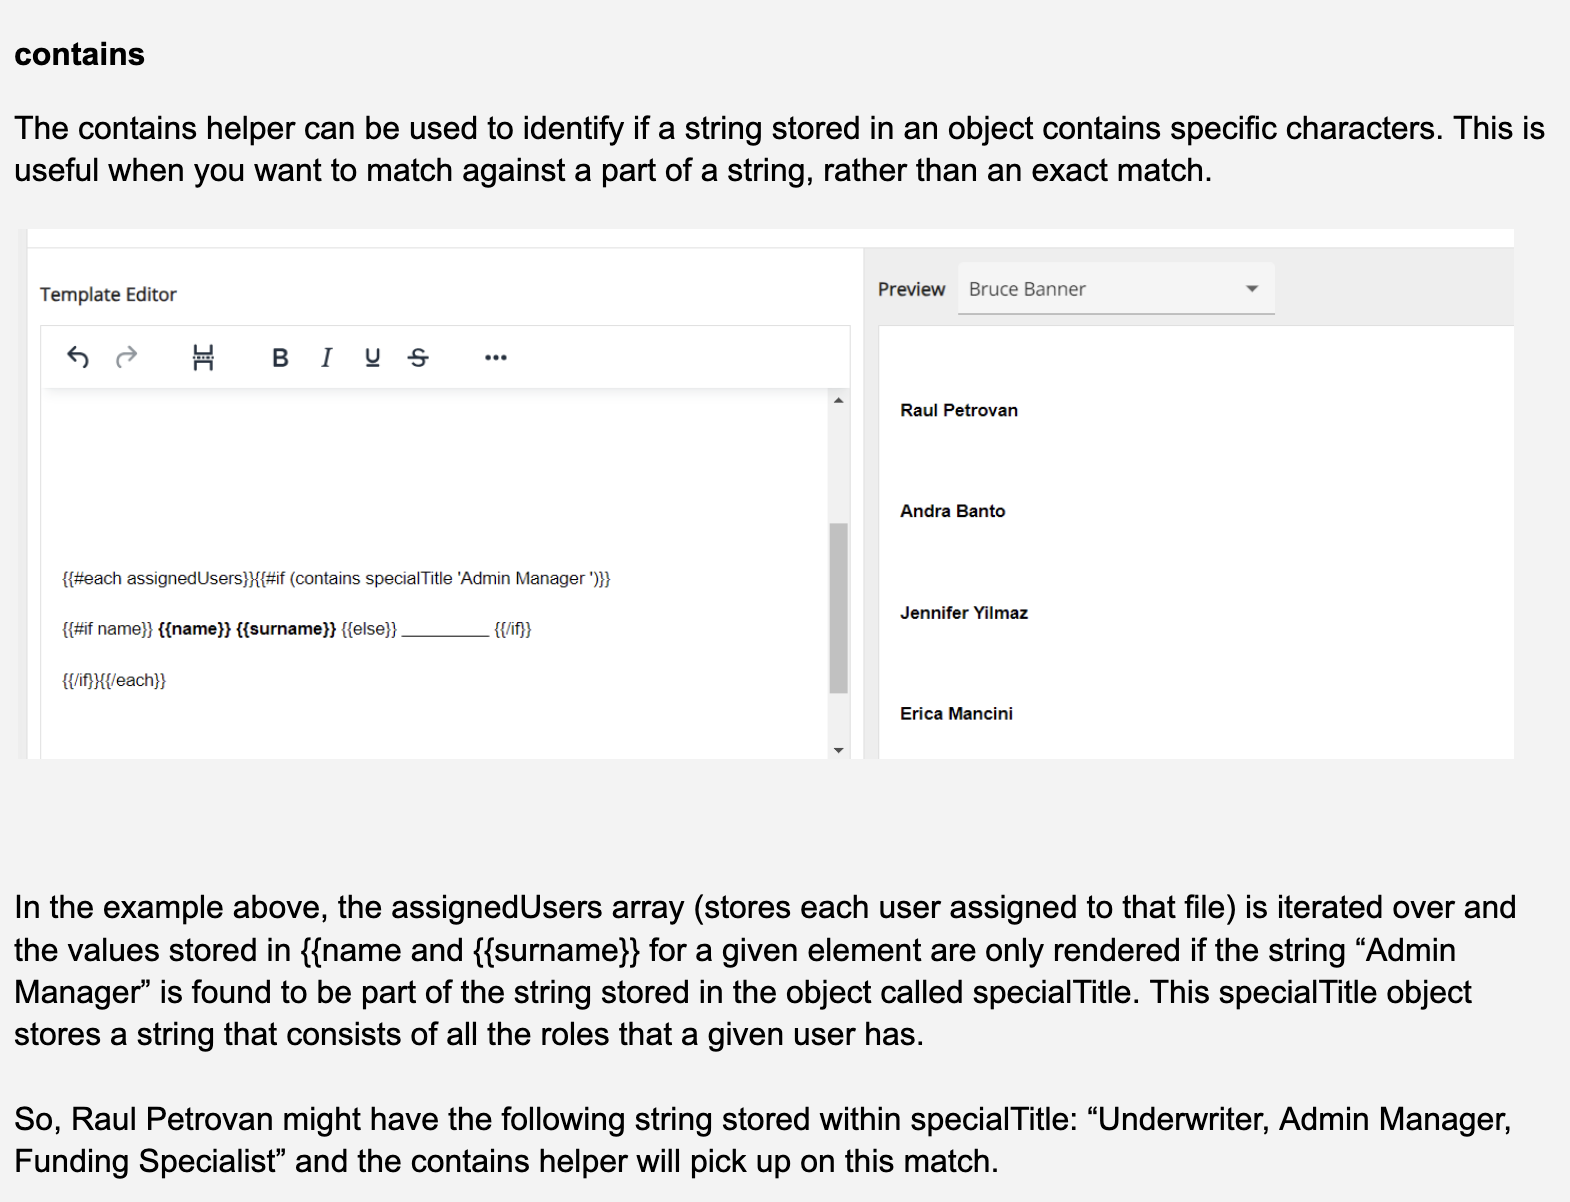
Conditional and Iterative Helpers


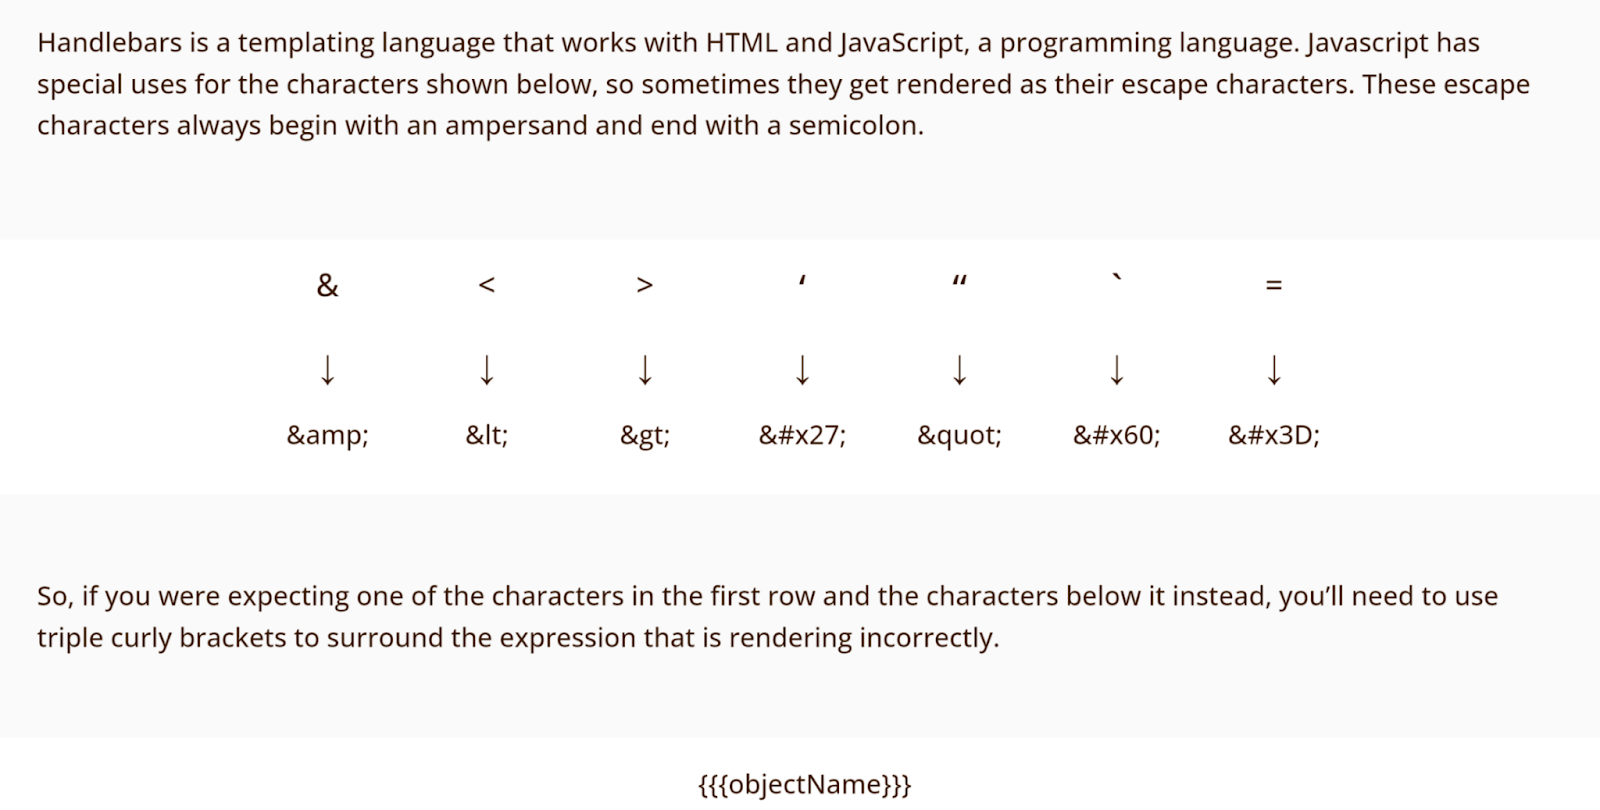
Escaping
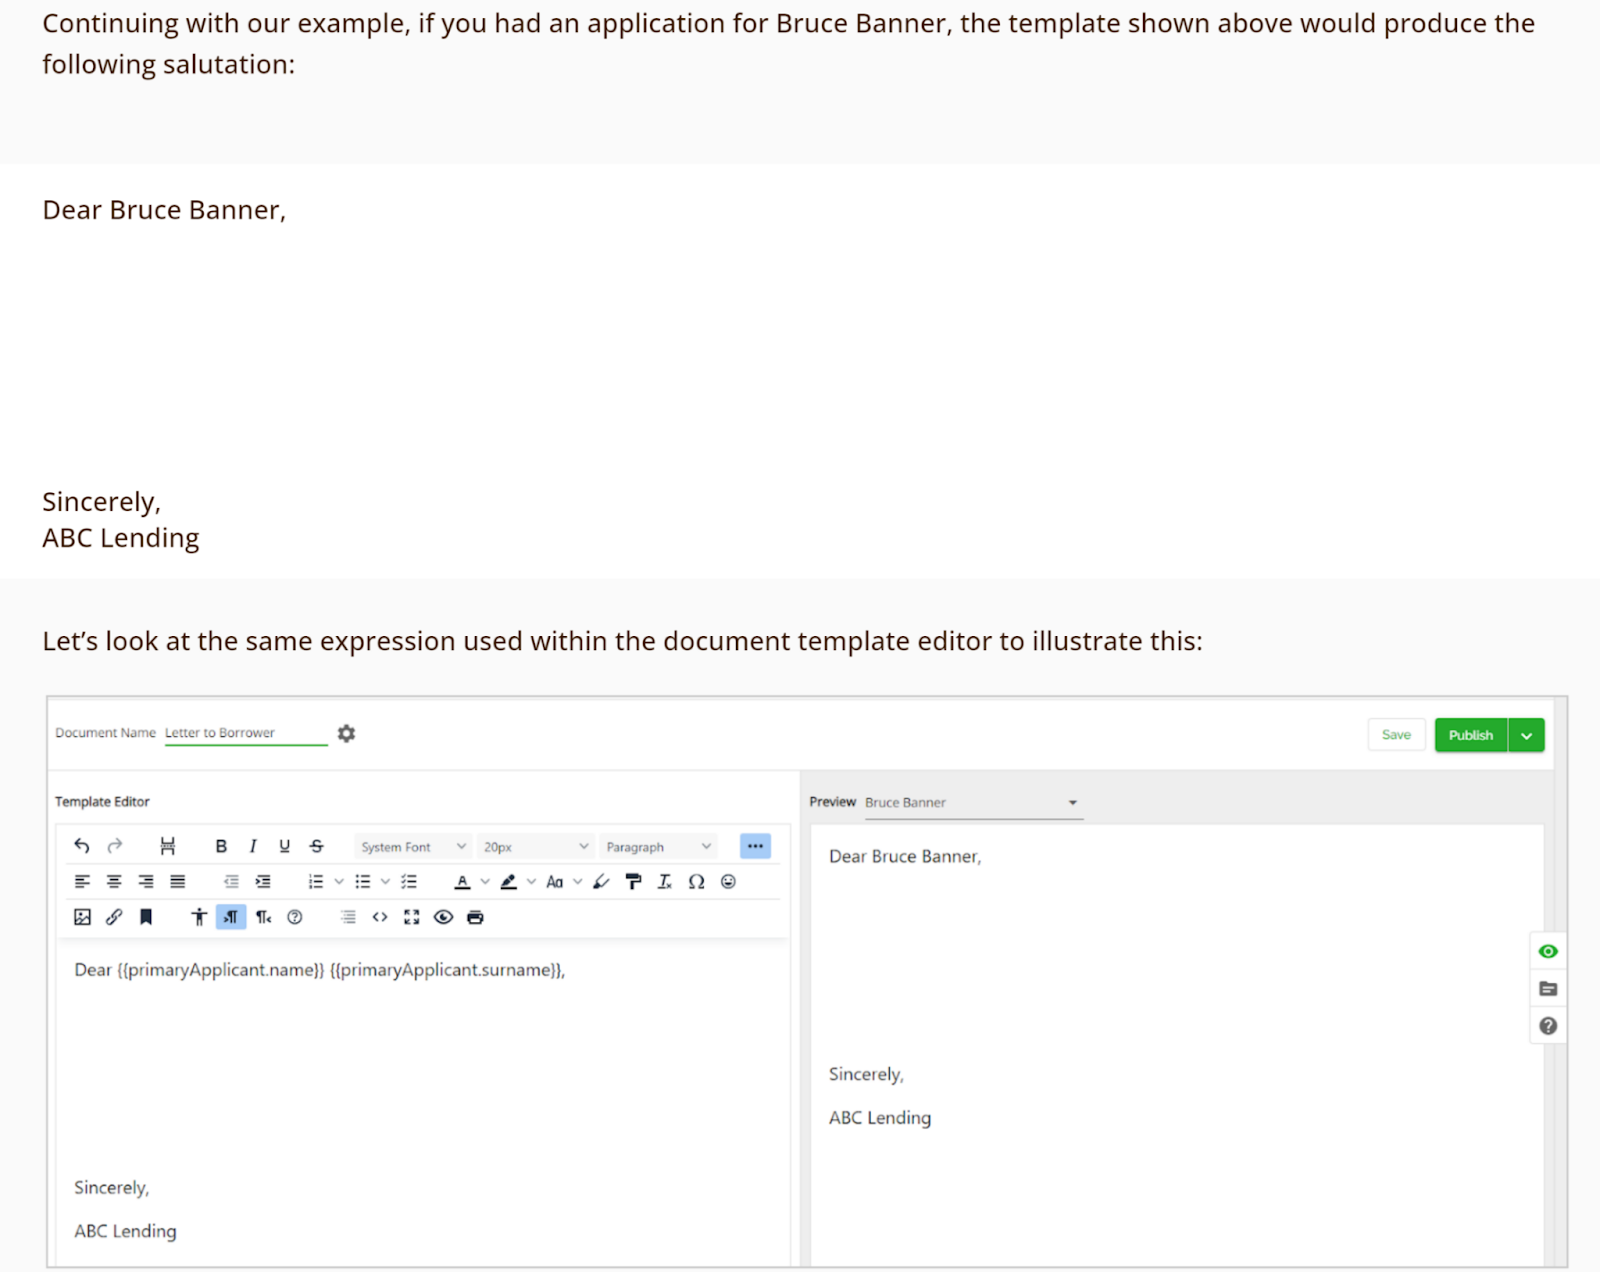
*Previously encountered use case for triple curly braces: rendering employer names in within condition text*
Templating with HTML
Introduction

Finding Your Spot In Source Code Easily
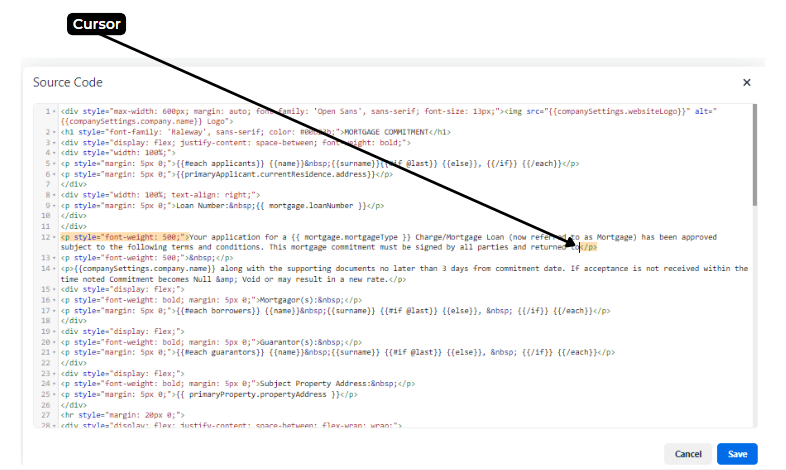
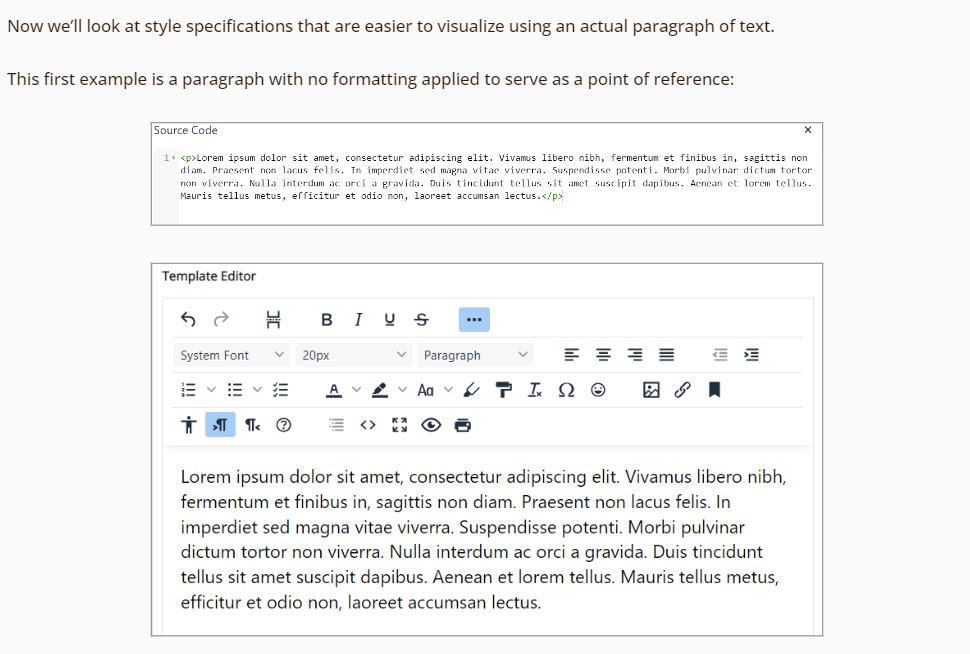
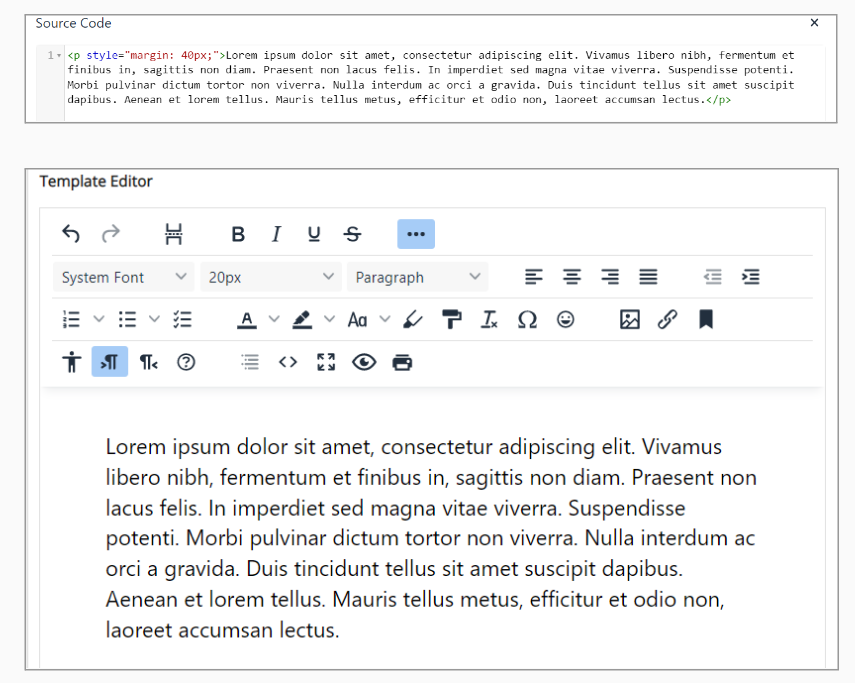
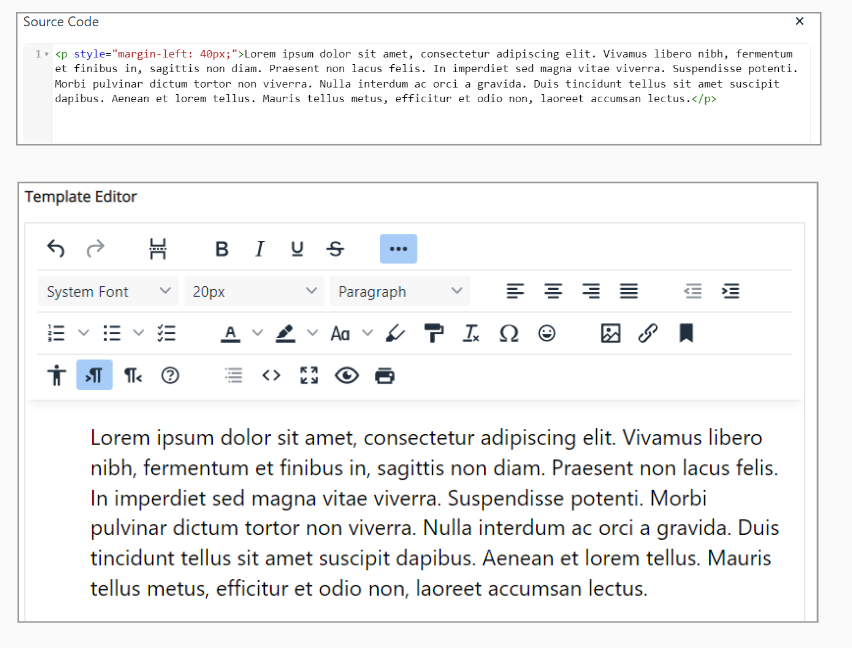
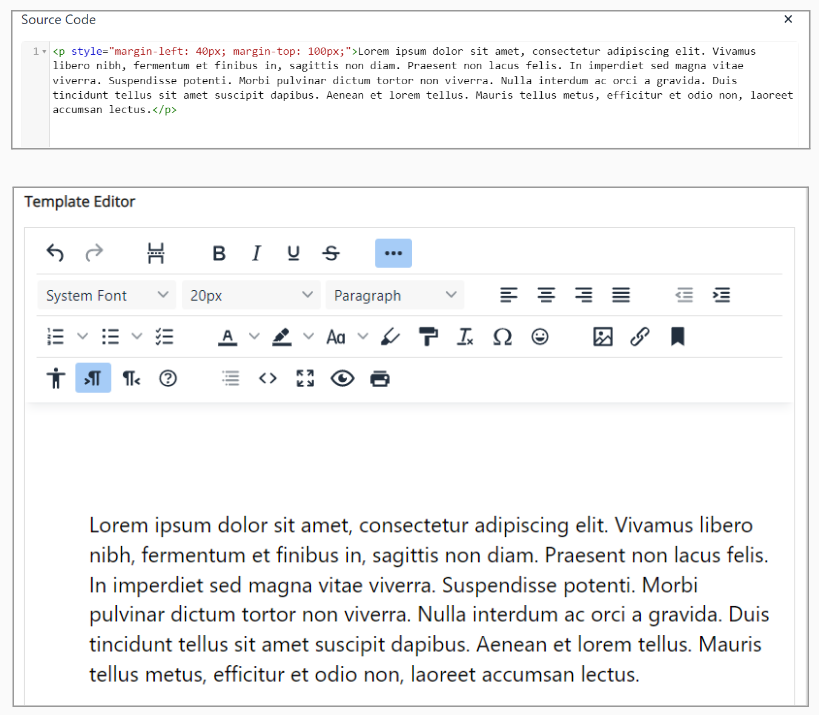
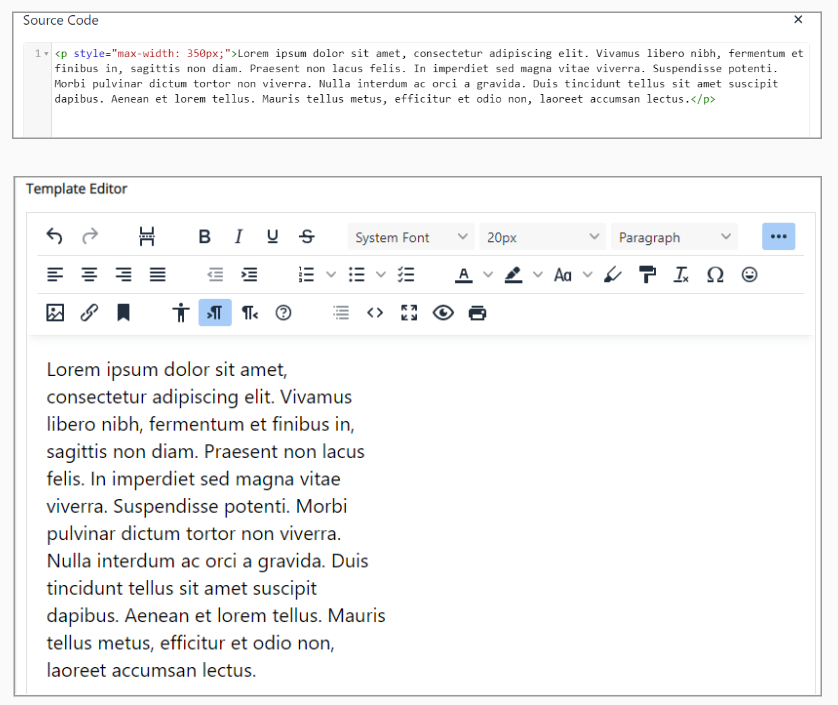
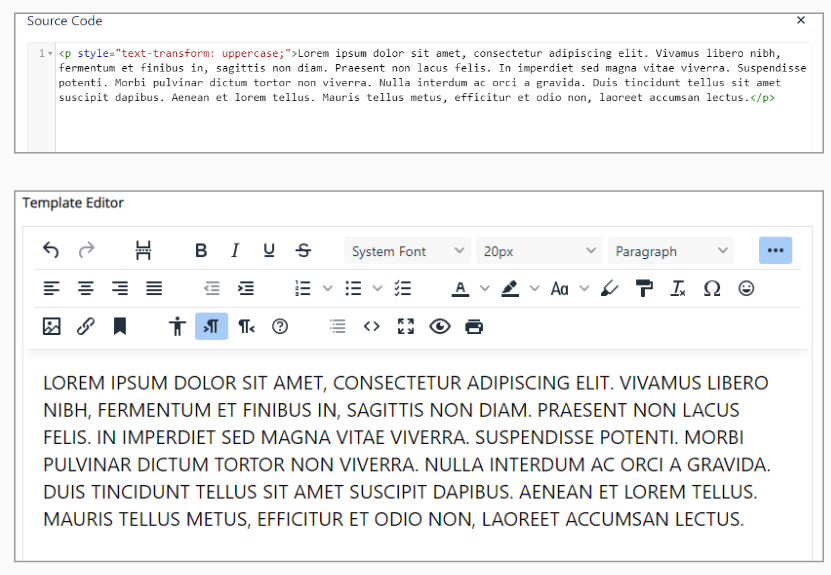
To find your place in the source code, place your text cursor in the body of the template editor where you would like to change the code. As shown below:
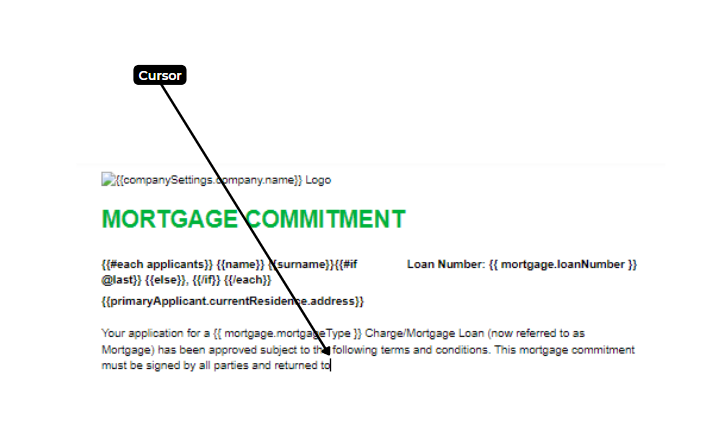
Then click the source code button and you will find the cursor in the same location within the document.
Source Code
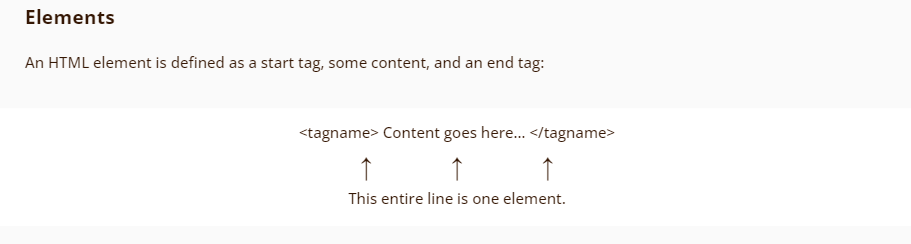
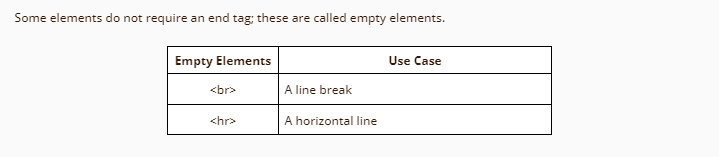
Components of HTML


Troubleshooting


Additional Resources