Table of Contents
Managing Document Requests as a Lender
Accessing the Document Request Feature
Document Requests on Ingestion
Initiating a Document Request Manually
Document Signing via Document Upload
Managing Document Requests as a Broker
Guidance on Document Submissions for Brokers
Introduction
FundMore.IQ is our document request feature which is integrated directly into our LOS system for seamless and efficient document collection. This ties directly into our Conditions & Documents functionality within the LOS. With this feature, users can now manage document collection and conditions together in the same widget. Users can request documents directly from stakeholders, often brokers, who can then upload documents directly into the system and manage them efficiently, enhancing a collaborative document collection process.
Note: This is a tenant specific feature and is not enabled by default. To have it enabled, you would need to submit a request. Please contact our Sales Department if you wish to have this product deployed.
Document Requests comprise two essential elements - Document Types and Templates. These are predefined by Admin users within the Documents to Request section of the Manager Portal. Document Types refer to the document being requested whereas templates are predefined formats or layouts used for creating standardized document requests. These templates outline a group of specific documents required for a particular purpose, such as a common application type. A typical use case would be purchase transactions for salaried applicants. To understand how these are configured, review the FundMore.IQ Management (Document Requests) Product Feature Guide. Once configured in the Manager Portal, the document types and templates can be used to send document requests.
Managing Document Requests as a Lender
As a lender, the document request feature provides a number of valuable functionalities aimed at streamlining the document request and collection process. These functionalities include the ability to configure the system to automatically create document requests on ingestion, initiate document requests manually, action submitted documents, manage conditions with linked documents, communicate with brokers via notes or comments, and facilitate document signing via DocuSign or direct uploads within the Document section of the Conditions and Documents widget.
Accessing the Document Request Feature
The Document Request feature is accessible within the Conditions and Documents widget. The widget has a section called “Requested Documents” where document requests are created and managed. This section comprises of two subsections: Documents and Notes. This section acts as a central hub for requesting, tracking, and managing requested documents.
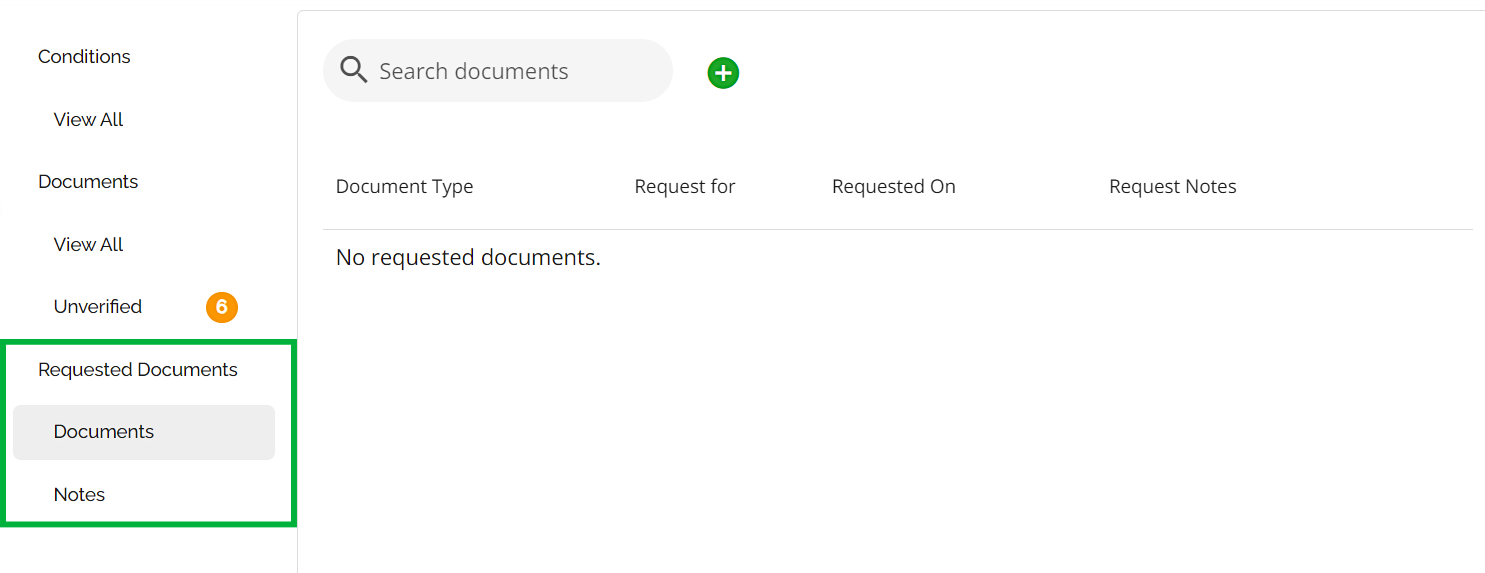
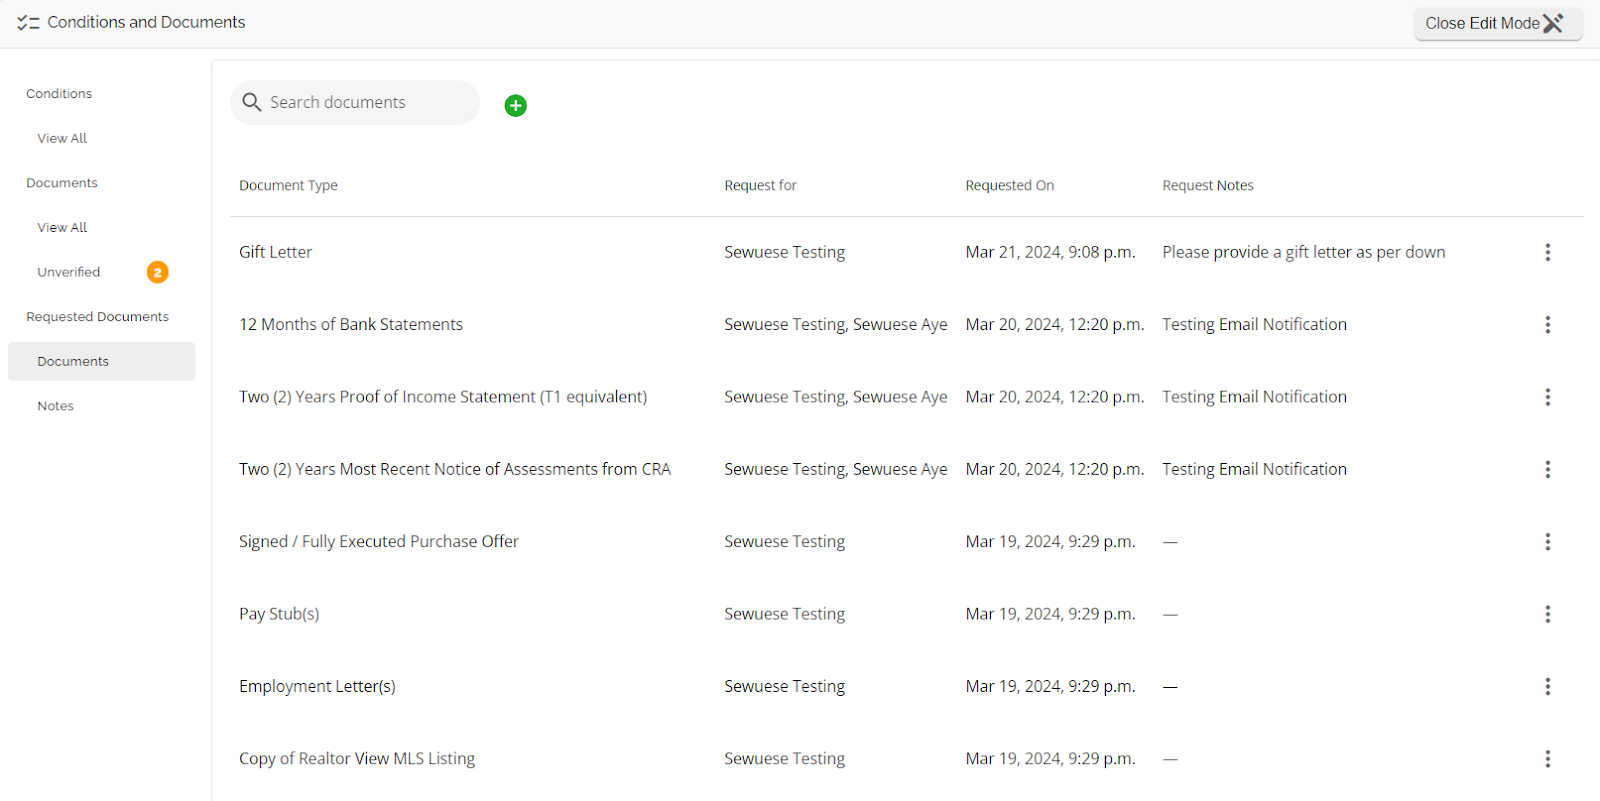
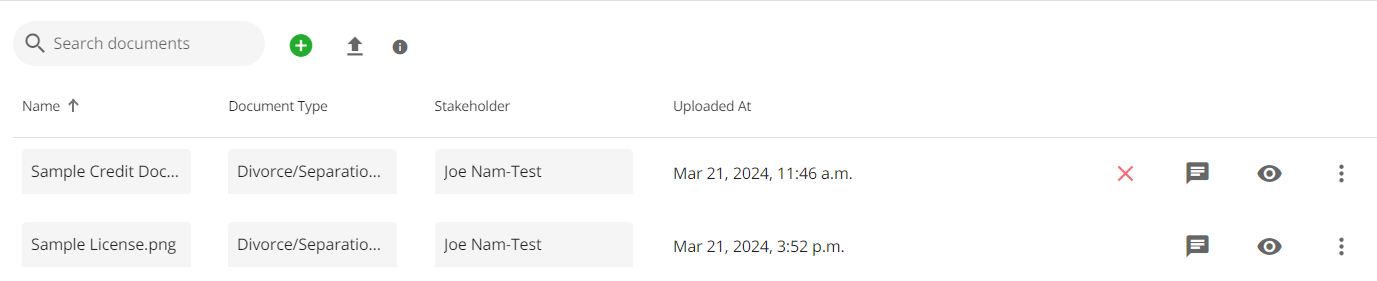
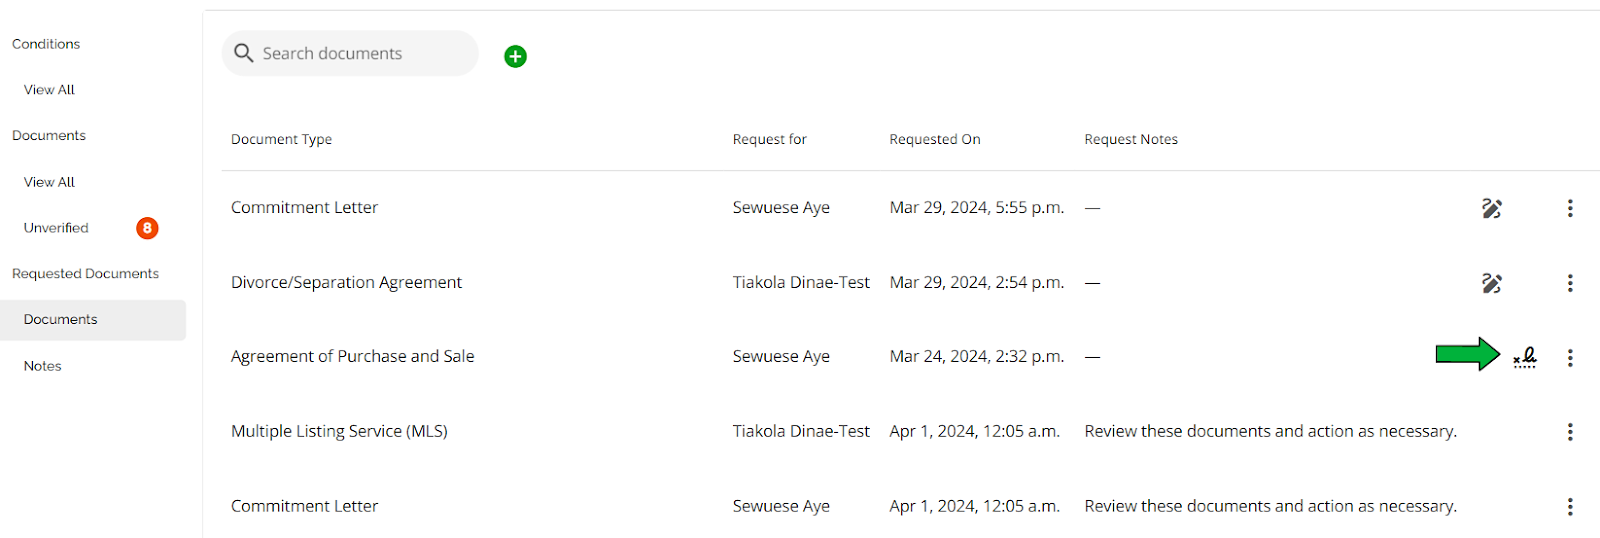
Once documents are requested or submitted, they populate a list view within the Documents tab in the Requested Documents section. The document will show the document type requested, who it was requested for (Stakeholder), when it was requested and any notes tied to the request. These notes are specific to that document. As documents are requested or removed from the request the list will update. The list will also update if we are waiting for any signatures on documents and when documents have been signed via DocuSign.
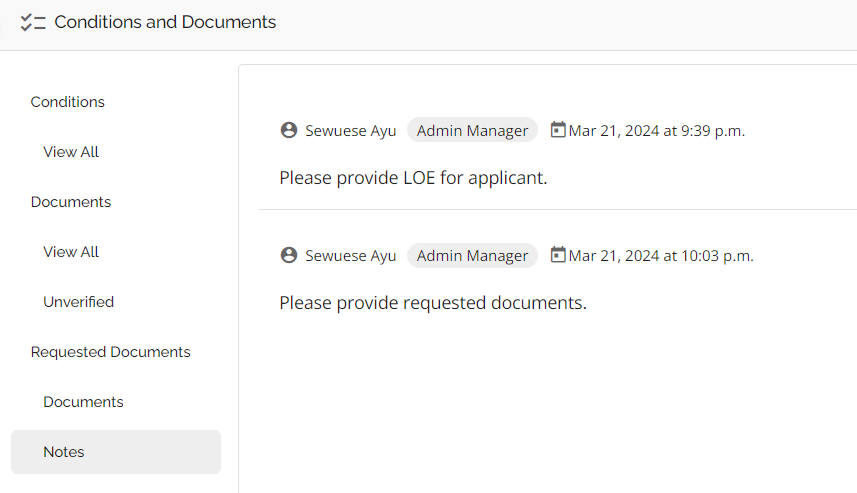
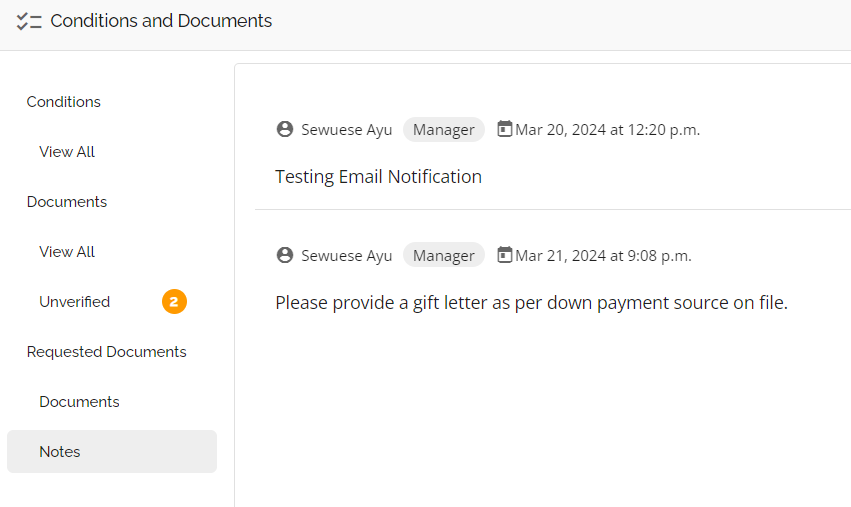
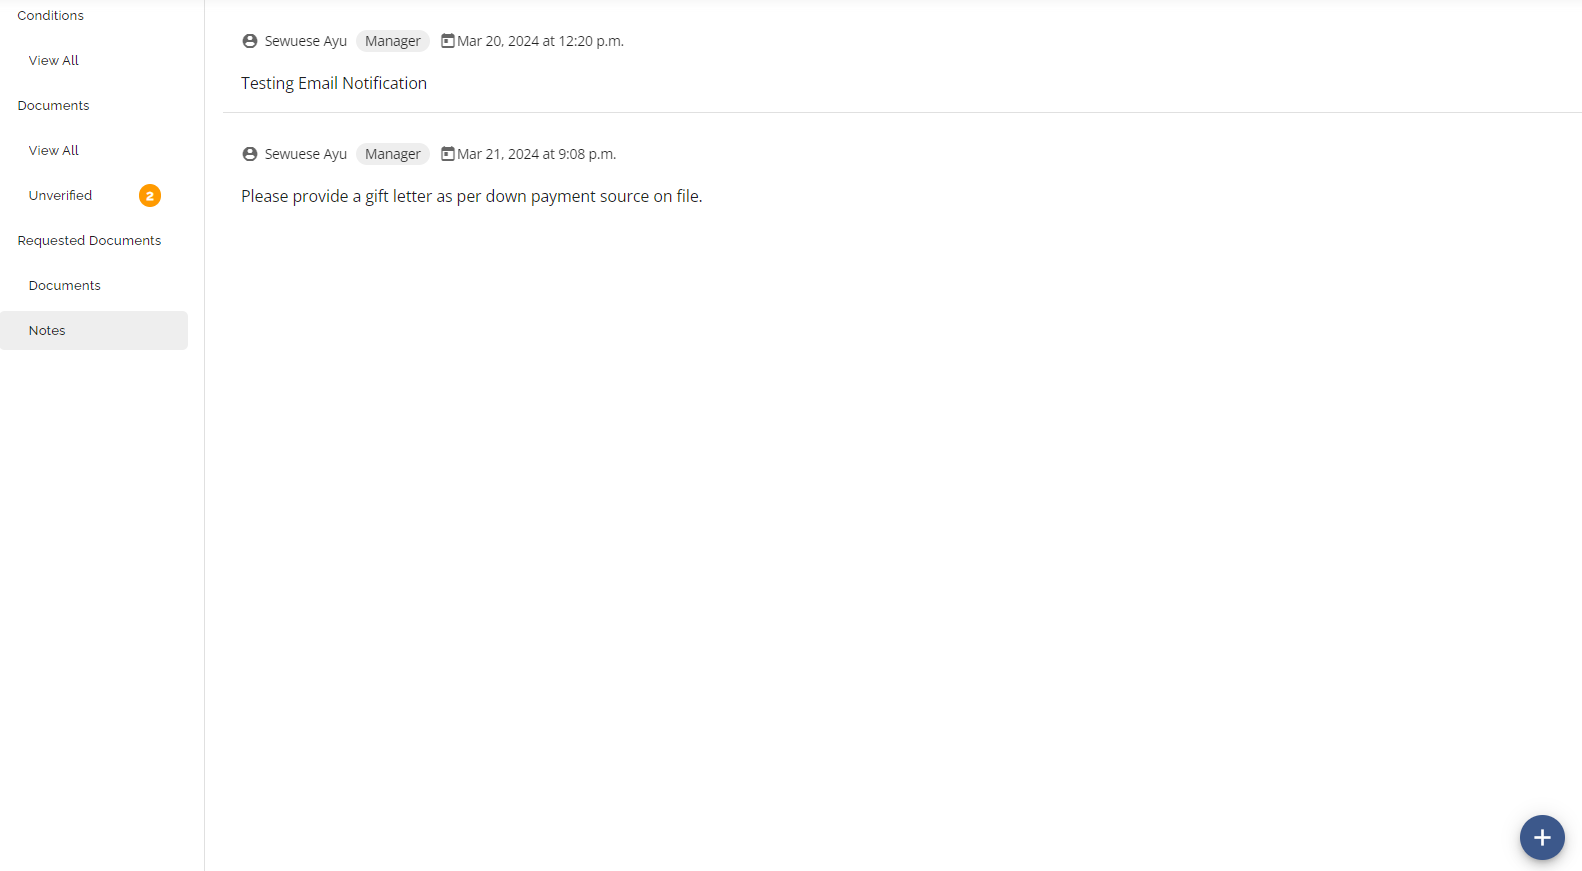
The Notes section is where the lender can communicate with the stakeholders and is for more general comments rather than comments for specific documents providing for enhanced organization and collaboration. An example would be where a document request was automatically generated by the system but no documents have been received when the underwriter picks up the deal. The underwriter can write a note in here that will go to the stakeholder the document request went to advising that they will be the underwriter on the file and reminding the stakeholder that documents are still outstanding.
Caution! Notes are visible by all stakeholders a document request has been sent to on that file. I.E. If a document request was sent to a broker, another to an accountant, and yet another to a lawyer, any notes written by any of the stakeholders and by the lender will be visible to all.
Document Requests on Ingestion
Document Requests can be automatically initiated upon application ingestion, streamlining the process of document collection. To ensure automatic document requests are triggered during ingestion, specific configurations must be set up within the Manager Portal by Admin users. This is discussed in detail in the FundMore.IQ Management (Document Requests) Product Feature Guide.
Admin users configure predefined templates within the Manager Portal to facilitate document request automation. Each template must include an Application Purpose, such as Purchase, Refinance, Switch/Transfer, etc., and the Use on Ingestion checkbox within the template settings must be selected.
When a broker submits an application to a lender, they typically specify an application purpose. The system relies on this information to automatically generate document requests based on configured templates. Upon application submission, the system compares the Application Purpose selected by the broker with the predefined Application Purpose within each template. If a matching Application Purpose is found in a template where the "Use on Ingestion" checkbox is selected, the system initiates an automatic document request using that template.
Note: When the "Use on Ingestion" checkbox is selected, the document request will be sent out automatically. However, this will only happen after any applicable system compliance checks are completed, preventing unnecessary document requests. In addition, selecting this checkbox generates automatic document requests for applications with the Application Type of “Approval” upon ingestion. This is not the case for pre-approvals or deals with an application type of Rate Hold, as document requests are typically not required on such applications.
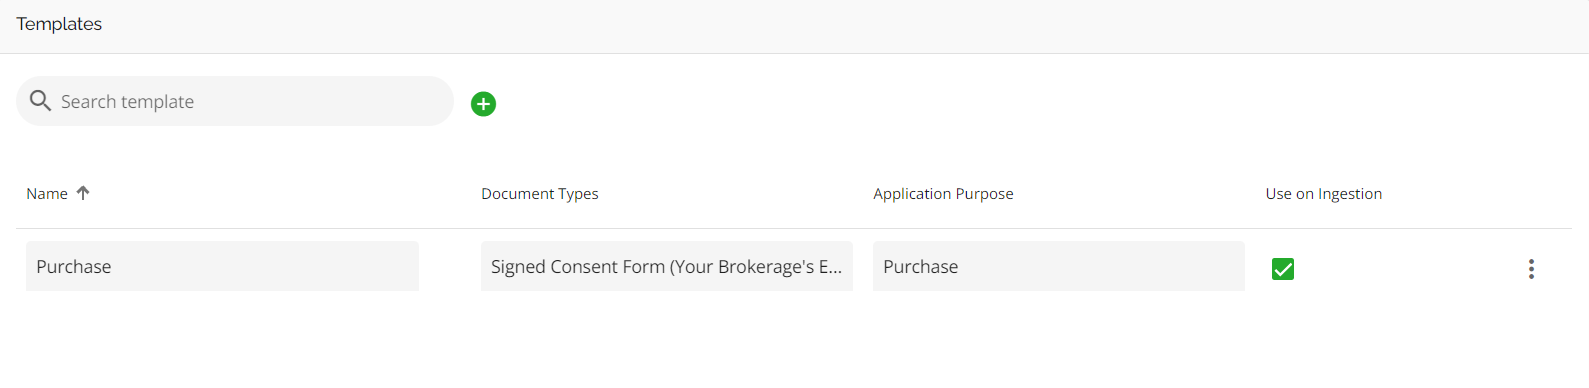
In the example below, we have a template named "Purchase" configured with an Application Purpose of Purchase and the "Use on Ingestion" checkbox selected.
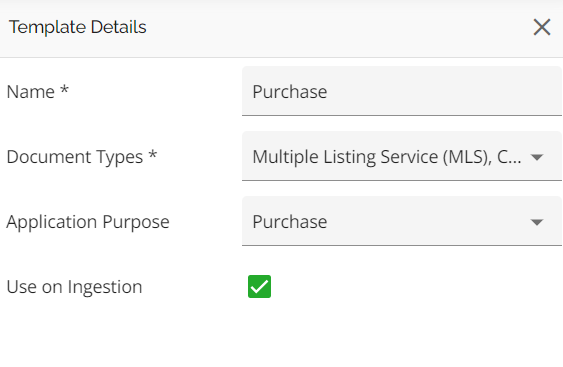
When a broker submits an application with the purpose of Purchase, the system automatically triggers a document request using the "Purchase" template. The templates include specific document types, representing the documents to be requested from the broker. These document types are determined by the lender based on their company's requirements. For the example above, these are the selected documents in the “Purchase” template which will be requested from the broker.

Refer to this section to understand how to manage document requests as a broker.
Initiating a Document Request Manually
Users can initiate document requests (either individual documents or document templates) from the Documents subsection of Requested Documents in the Conditions and Documents widget. This can be used in instances where the document request is not created on application ingestion, if the lender needs to request additional documents, or if an additional document request needs to be created. To initiate a Document Request, follow these steps:
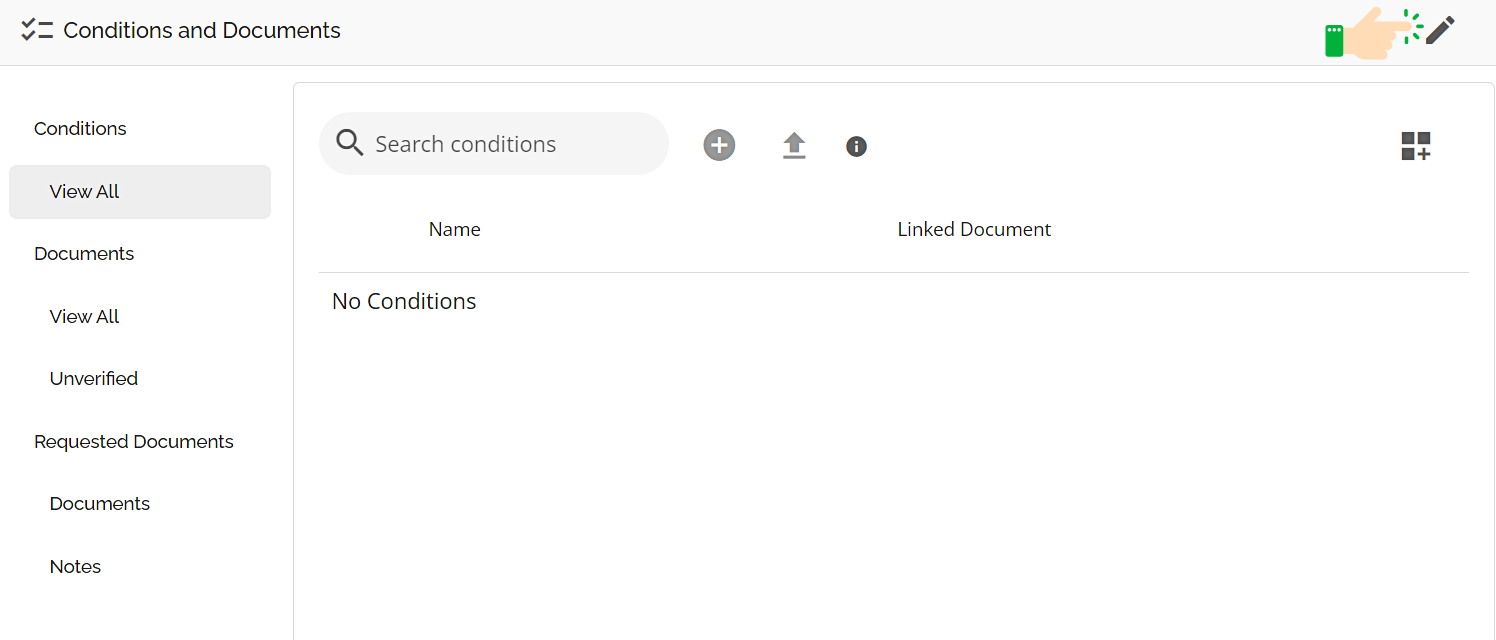
- Navigate to the Conditions and Documents widget.
- Click on the pencil icon in the top right corner to enter Edit mode.
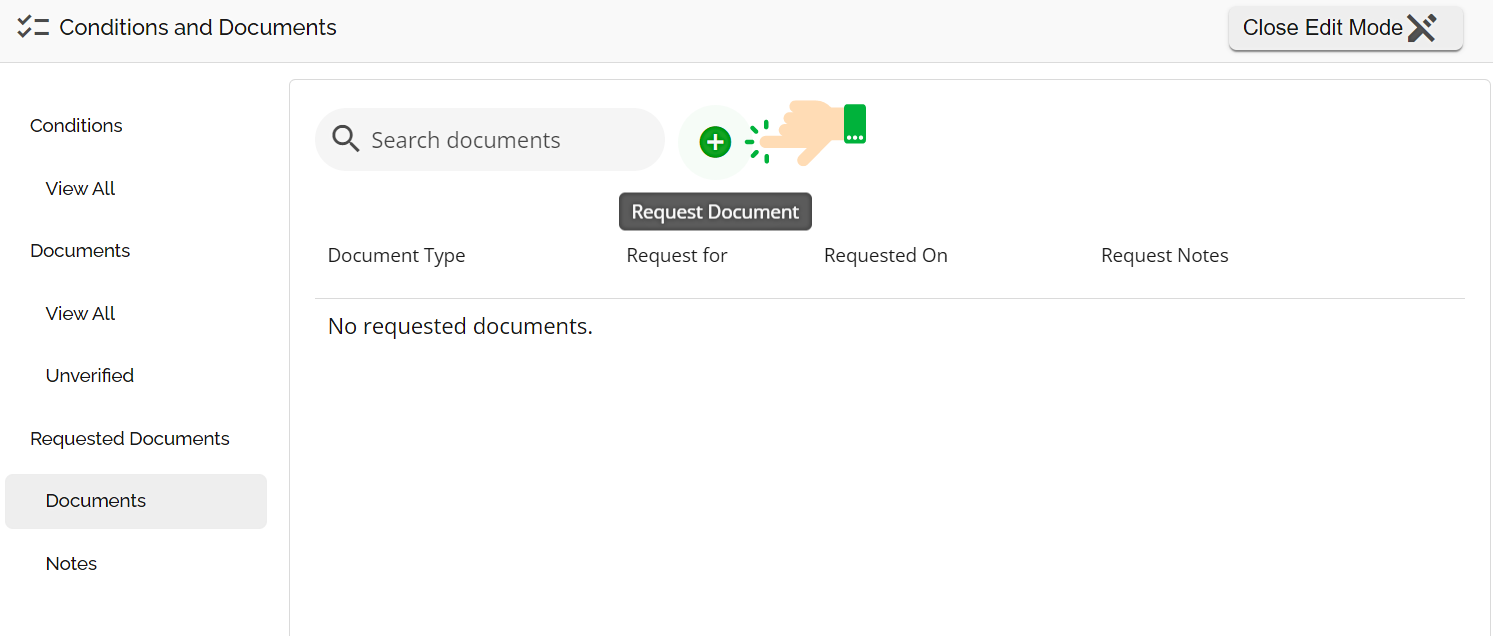
- Select the "Requested Documents" tab. By default, the Documents subsection will be selected.
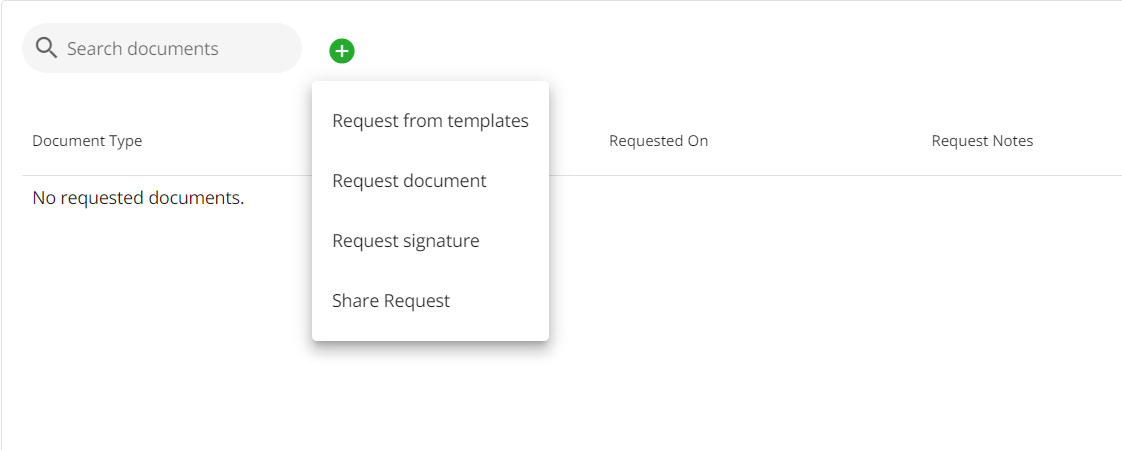
- Click on the Request Documents button i.e. the green plus button.
- A drop down menu will appear offering a selection of choices. Select the most appropriate action i.e., Request from templates or Request document.
-
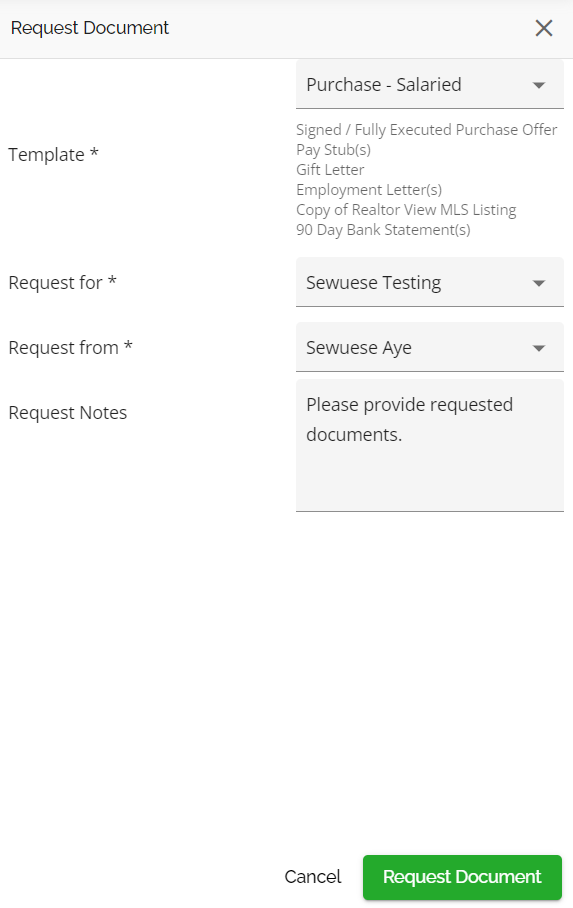
Request from templates: This is used when requesting a group of documents required for a particular purpose. An example of a template would be Purchase (Salaried) used on a purchase transaction for a salaried applicant. Selecting this option will open a sidebar to the right of the screen.
Complete the necessary fields. The template field is populated by the predefined list of templates from the Manager Portal. The mandatory fields are as follows:
- Template - The group of documents being requested. This field is prepopulated.
- Request For: This is who the document is being requested for - usually the borrower.
- Request From: This is who the document is being requested from - usually the broker. Access to document requests in IQ is determined by the broker selected in the "Request From" field at the time the request is created. The broker specified in this field is the one who will receive the email notification and have the ability to log in to the platform to access the request and its associated documents. It is important to ensure that the correct broker is selected in the "Request From" field to avoid access issues. Only the designated broker can view and manage the document request. If a different broker logs into the platform and attempts to access the request, they will receive a message indicating that they do not have access. This is expected behavior and helps maintain security and clarity around document ownership.
- Request Notes: You can include any relevant notes here. While this field is optional, we recommend completing it to provide more context for the request. Any notes included will populate in the notes section.
-
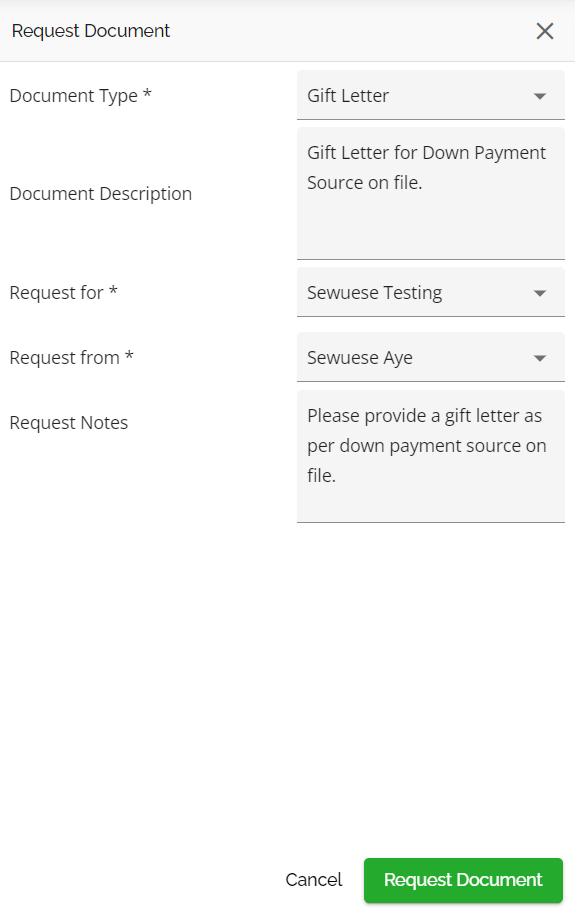
Request from document: This is used when requesting a single document. Selecting this option will open a sidebar to the right of the screen.
Complete the necessary fields. The document type field is populated by the predefined list of document types from the Manager Portal. The mandatory fields are:
- Document Type - This is the document being requested
- Request For: This is who the document is being requested for - usually the borrower.
- Request From: This is who the document is being requested from - usually the broker. Access to document requests in IQ is determined by the broker selected in the "Request From" field at the time the request is created. The broker specified in this field is the one who will receive the email notification and have the ability to log in to the platform to access the request and its associated documents. It is important to ensure that the correct broker is selected in the "Request From" field to avoid access issues. Only the designated broker can view and manage the document request. If a different broker logs into the platform and attempts to access the request, they will receive a message indicating that they do not have access. This is expected behavior and helps maintain security and clarity around document ownership.
Other optional fields include the following:
- Description: This will auto populate if a description was provided in Manager Portal. If not, you can include a description.
- Request Notes: You can include any relevant notes here.
While these fields are optional, we recommend completing them to provide more context for the request. Any notes included will populate in the notes section.
-
- Once completed, click on the Request Documents button. The request documents will populate a list in the Documents subsection.
The system will send an email to the recipient of the request. Once the document is uploaded, the lender will receive both an in-app and email notification. Refer to this section to understand how to manage document requests as a broker.


Actioning Uploaded Documents
Once a document has been uploaded by a broker, the lender will receive a notification. This notification will be sent in-app and by email to all team members assigned to the application. The email will indicate the Name and Category of the document, and will include a link to navigate directly to the application in the LOS.

To act on an uploaded document, follow these steps:
- Click on the “Open Application” link within the email notification to navigate to the application within the LOS. Alternatively, you can navigate to the Pipeline View and select the appropriate deal.
- Go to the Conditions and Documents widget.
- Click on the pencil icon in the top right corner to enter Edit mode.
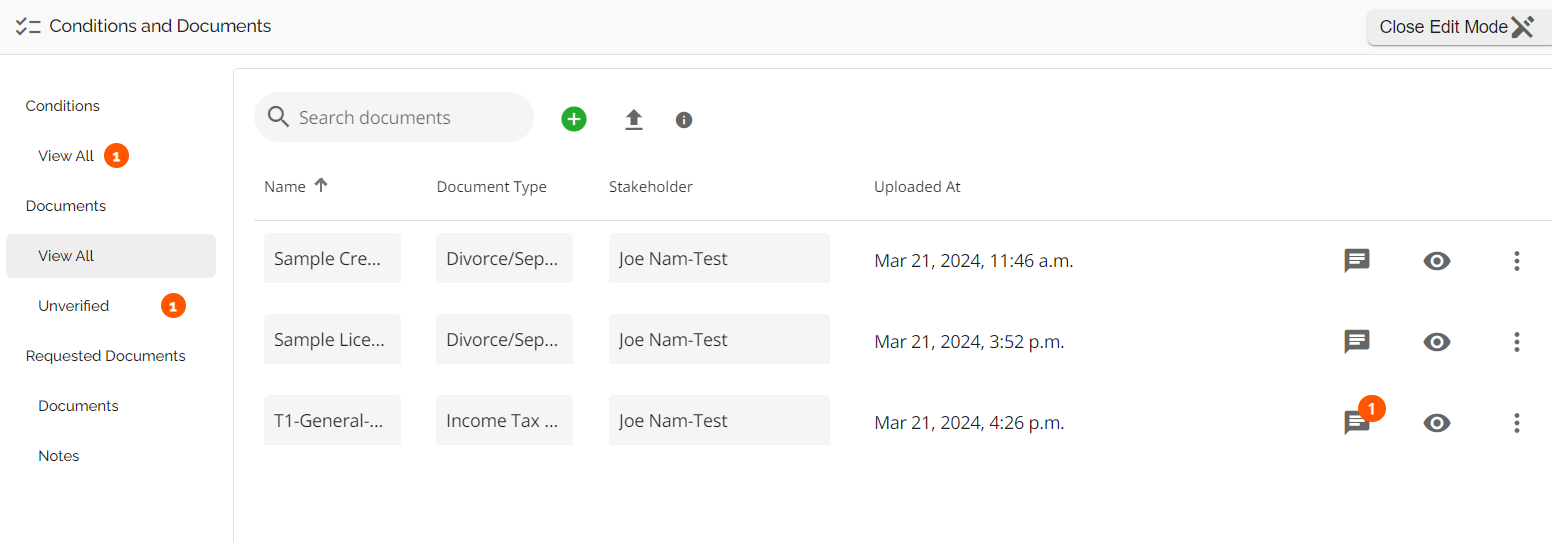
- Locate the uploaded document. The location of the document in the widget varies depending on the existing conditions within the deal.
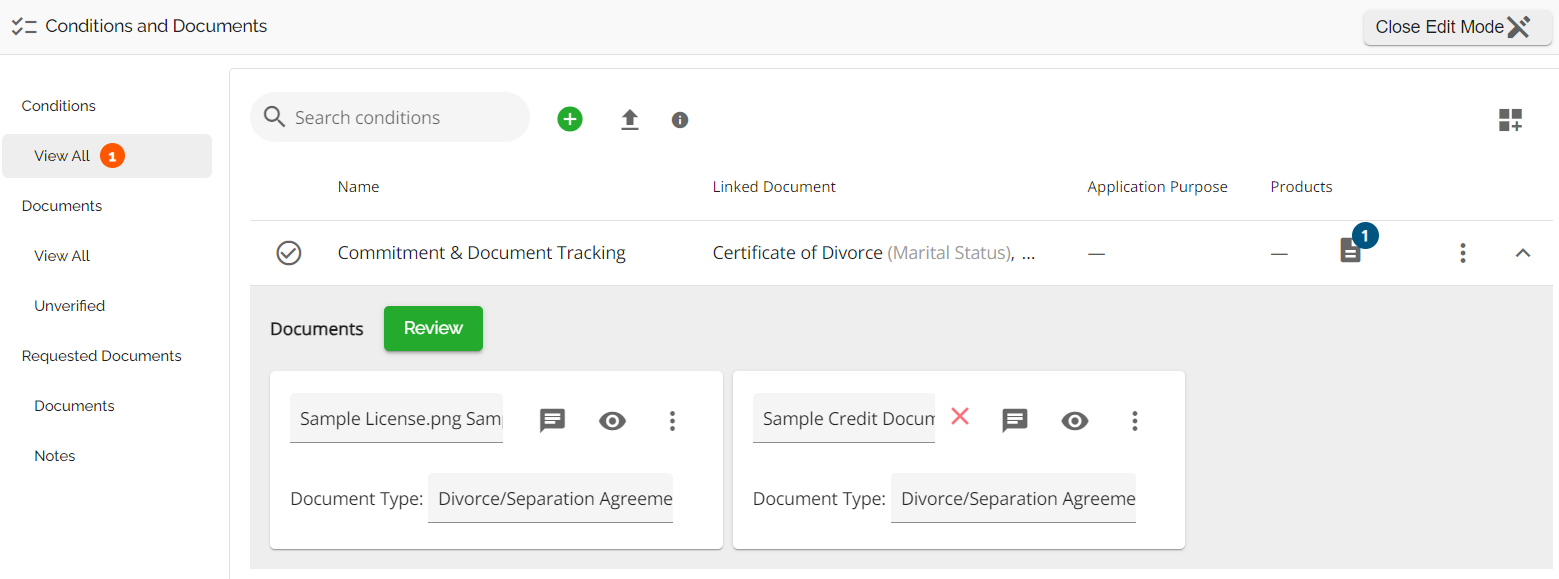
- Conditions (View All): When conditions are added to a deal and the uploaded document is linked to a condition, it will appear in this section. To match uploaded documents to conditions, the system checks the document name and category against the Linked Documents selected by lenders when creating conditions.
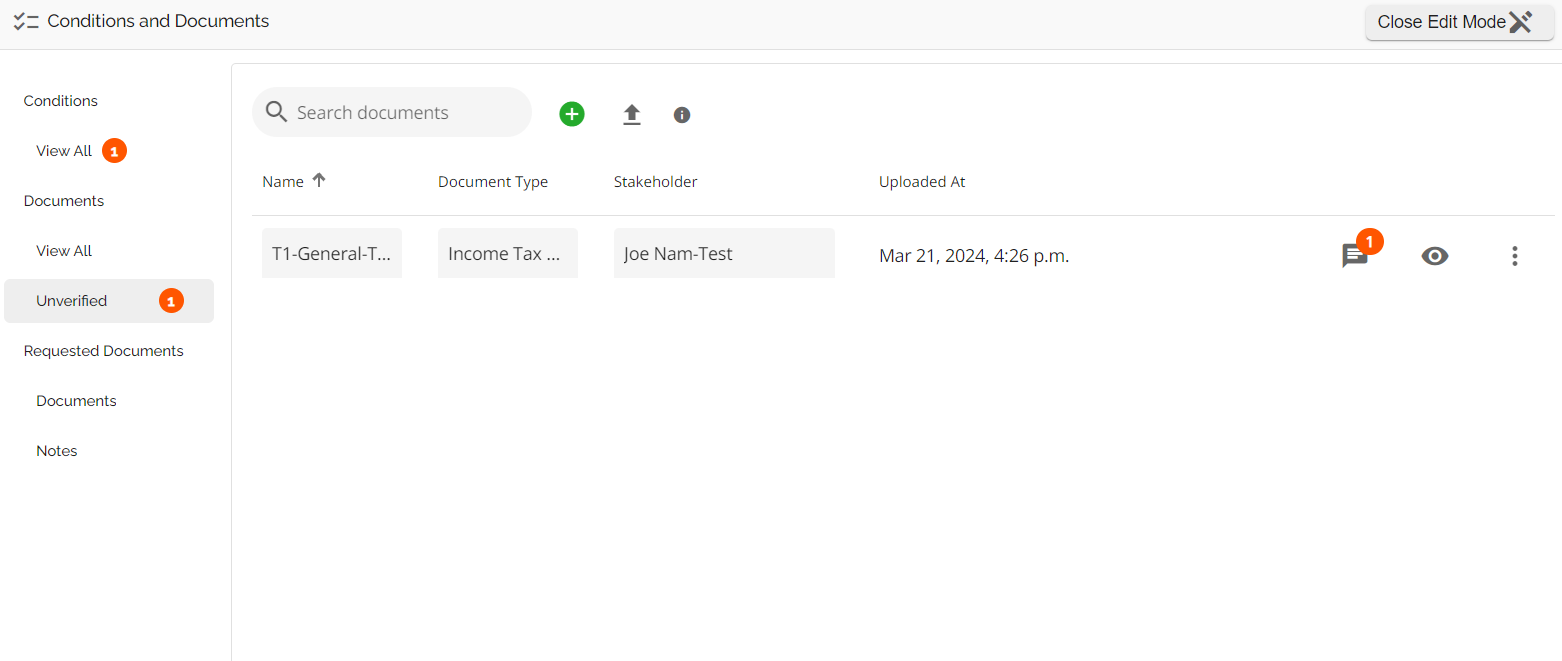
- Documents (Unverified): If no conditions exist on the deal or the uploaded document does not match any of the conditions, the document will populate here.
If conditions are added after the documents have been uploaded, the system will automatically identify any documents matching those conditions and move them from the Unverified list to the documents listed in the Conditions section.
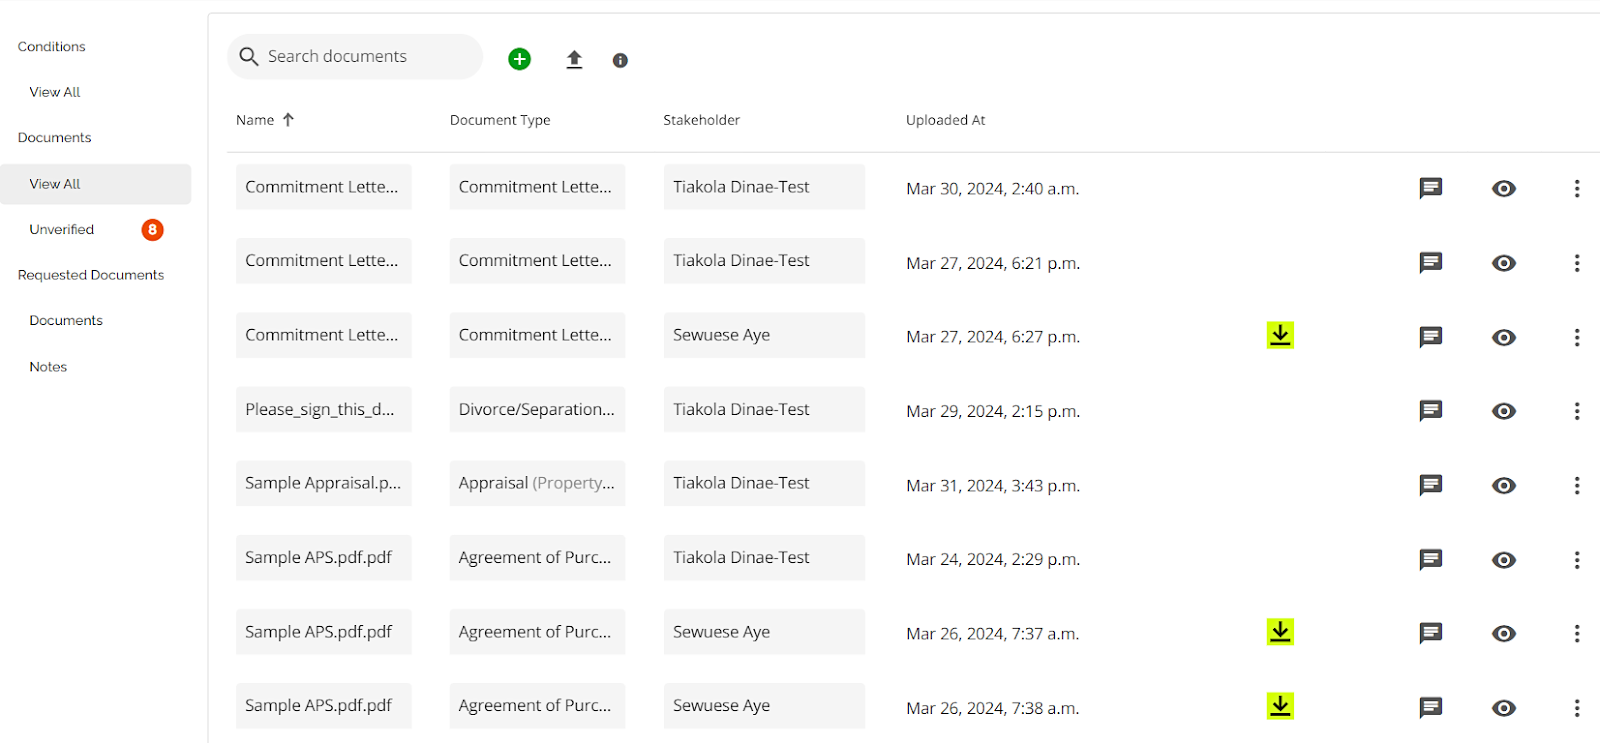
- Documents (View All): This section houses all documents uploaded by the broker, regardless of whether they match a condition or not. It offers a comprehensive view of all documents associated with the deal.
The document can be actioned or managed in any of these sections. - In the right-hand corner of the document you wish to action, there are three clickable icons. Clicking on any of these icons will direct you to a window to review and action the document.
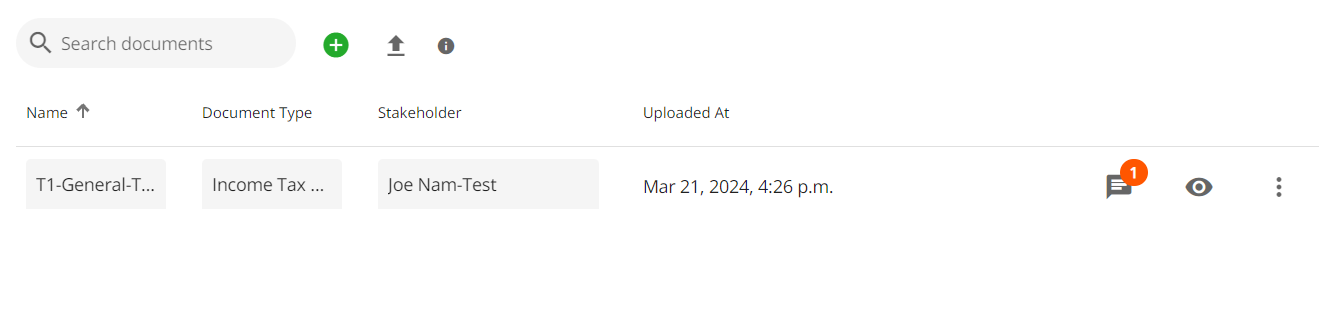
- Comments Icon: The comments icon indicates if there are any comments on a specific document. If the broker has included comments on a document, a counter will appear beside the icon. Clicking on this icon directs you to a window where you can see the document details and the comments as well as add comments.
- View Document Icon: Clicking on this icon opens up the document for viewing. Clicking on this icon directs you to a window to see the document details and the comments as well as add comments.
- Inline Ellipsis: Clicking on the inline ellipsis opens a drop down with three options: Review, Download, and Delete. Review directs you to a window where you can see the document details and the comments as well as add comments. Download enables you to download the document to your device. This is useful when you need to email the document to a stakeholder. Delete is used to remove the document from the system.
Note: The lender has the option of making any comments added here visible internally only or externally.
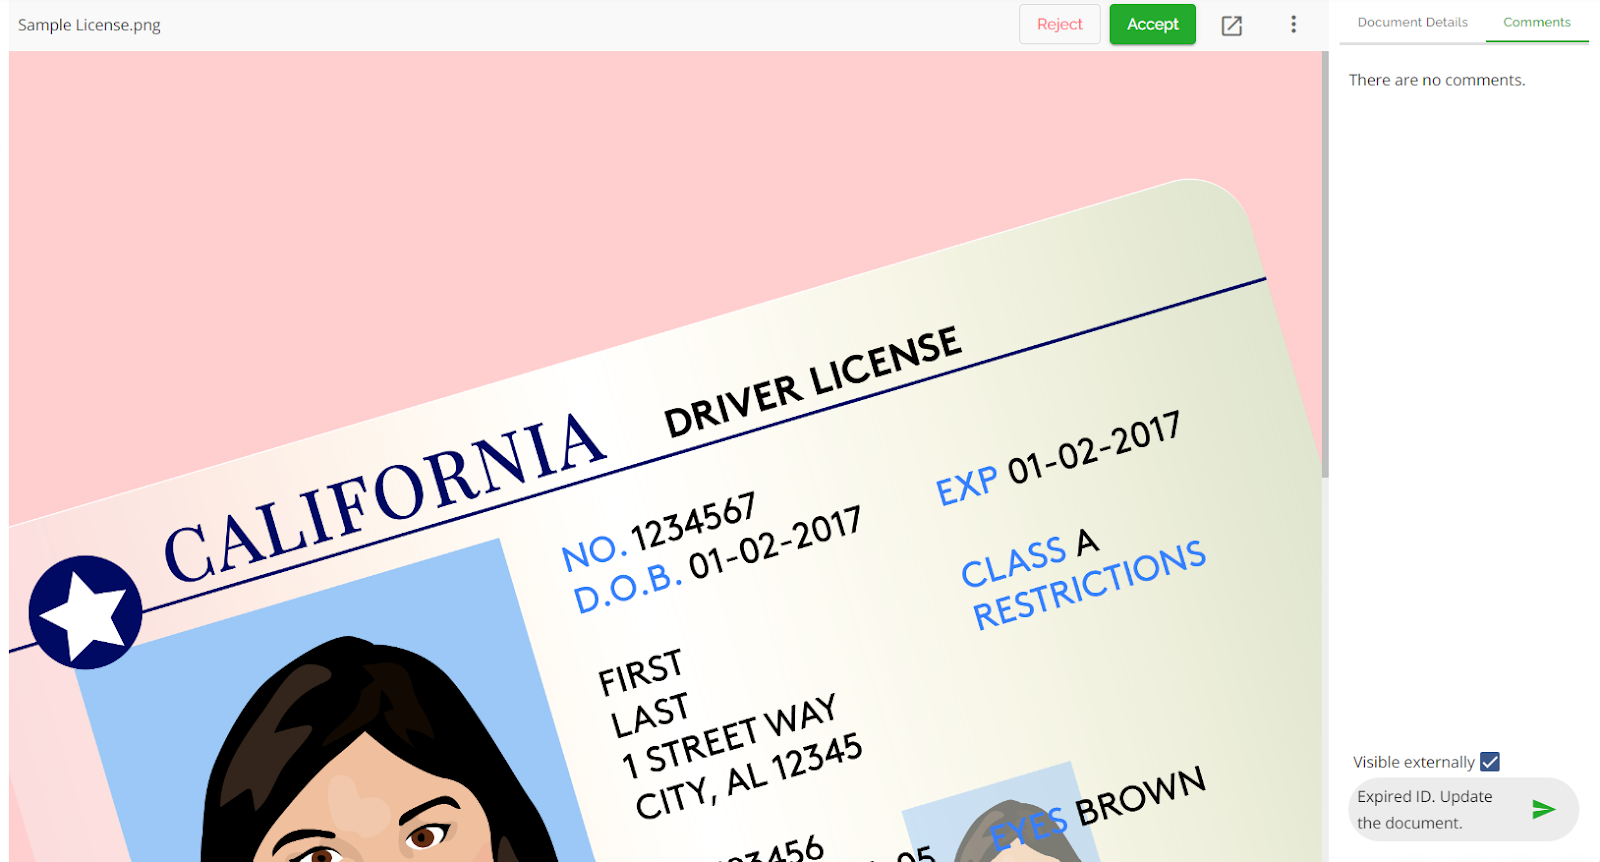
- The document review window will open within the widget. You can review it in the widget or click on the open in a new window icon to view it in a maximized view.
- To accept or reject the document, click on the appropriate button at the top of the page.


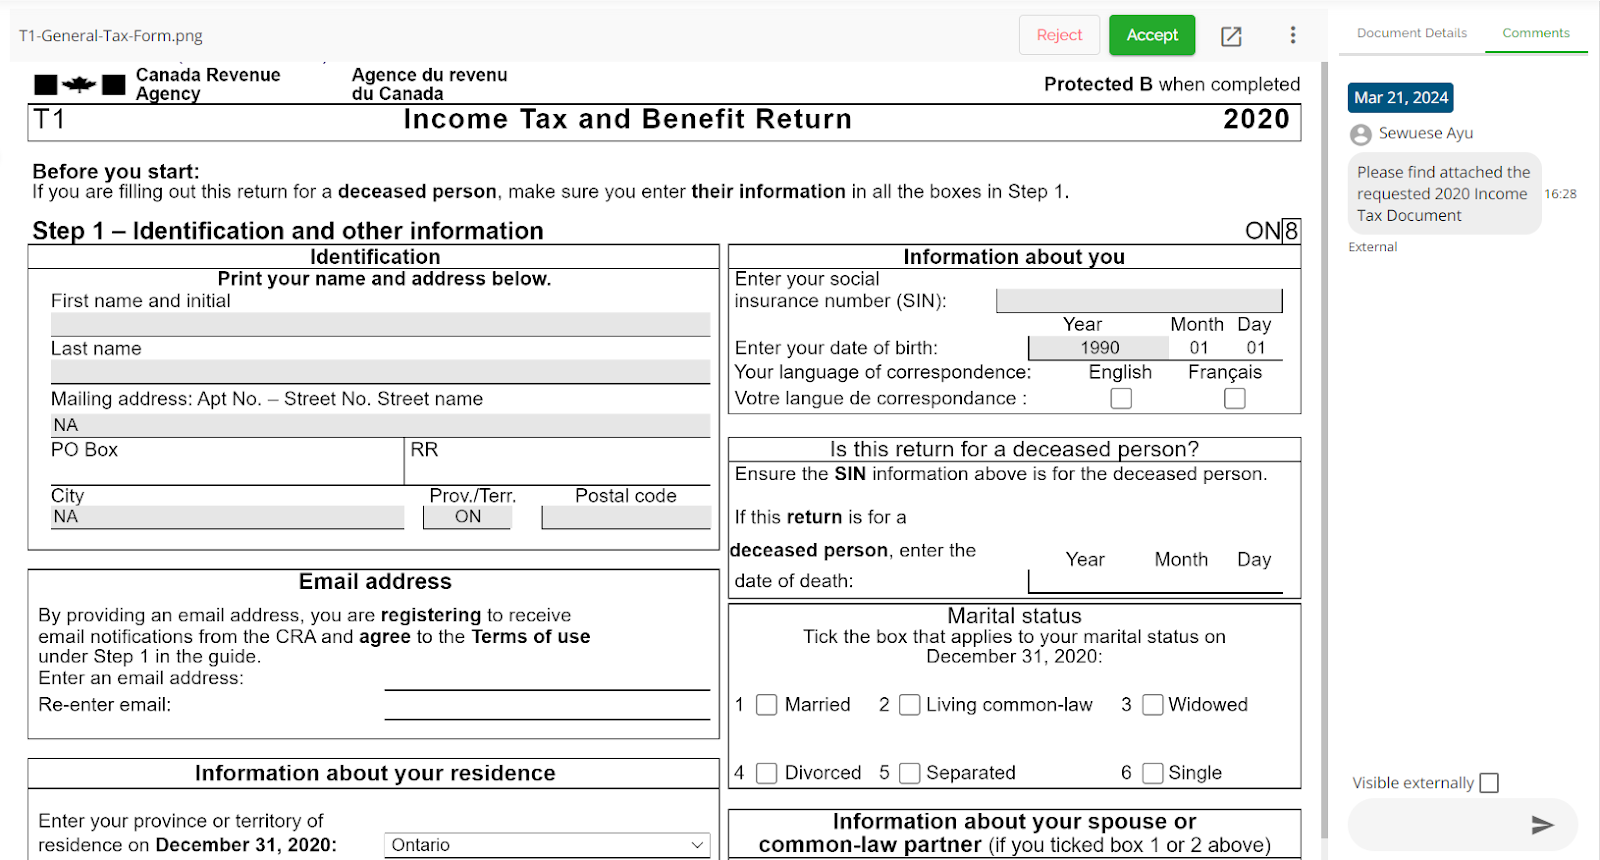
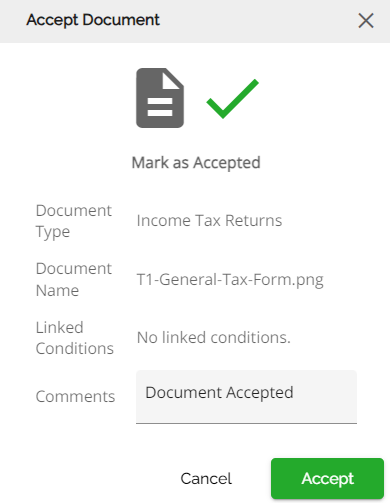
- Accept a Document: Clicking on the Accept button triggers a pop-up window, prompting confirmation of your intention to accept the document. You have the option to input comments before finalizing your acceptance by clicking the Accept button.
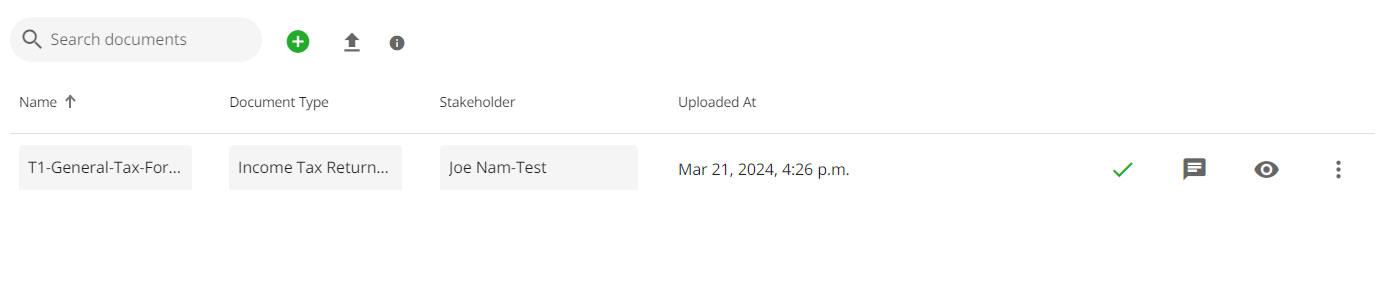
The status of the document is updated in the widget. This is indicated by a green checkmark that appears in the right-hand corner of the document.
- Reject a Document: Clicking on the Reject button triggers a pop-up window, prompting confirmation of your intention to reject the document. You have the option to input comments before finalizing your rejection by clicking the Reject button.

The status of the document is updated in the widget. This is indicated by a red icon that appears in the right-hand corner of the document.
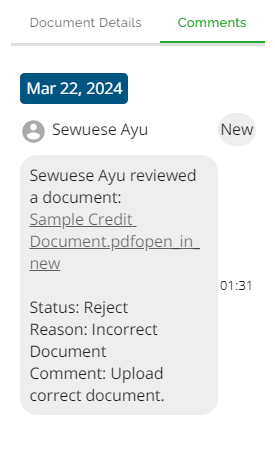
If the broker has an account in the authenticated view of FundMore.IQ, the decision will immediately be visible to them. Within the LOS, the comments are updated to indicate that an action has been taken by the lender. This is an internal comment.
Communication as a Lender
The document request feature includes comment functionality which facilitates seamless communication between brokers and lenders. This option is only applicable to brokers with an account in FundMore.IQ i.e, brokers in an authenticated view. For brokers using an unauthenticated view, the comments will be received via email notification.
There are two different ways that lenders can communicate with brokers.
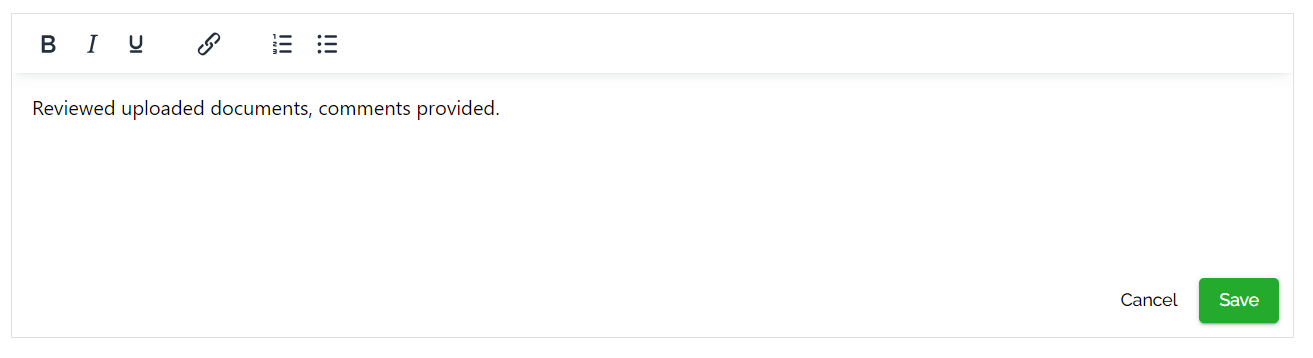
- Notes: This can be accessed by the icon in the bottom right-hand corner of the Notes section. This is used for general communication on the file, and as such the comments here are not tied to specific documents. To leave a general comment, click on the blue plus button. Enter the comments in the text box, then click on Save.
The comment will populate in the Notes section and will also be visible by the broker in the authenticated view.
- Comments on Documents: This is accessed only after a document has been uploaded by the broker. It is accessed through the comment icon next to the document. The comments are specific to the selected document. When a comment is added, a counter will appear beside the icon, alerting you to the presence of new activity.
Clicking on this icon opens up the document for viewing, providing access to the comments section where existing comments can be viewed and new comments can be added. Lenders have the option to leave two types of comments: internal and external. To make a comment visible to the broker, you must select the "Visible externally" checkbox before adding the comment. If this checkbox is left unchecked, the comment will remain visible only internally within the LOS.
Document Signing via DocuSign
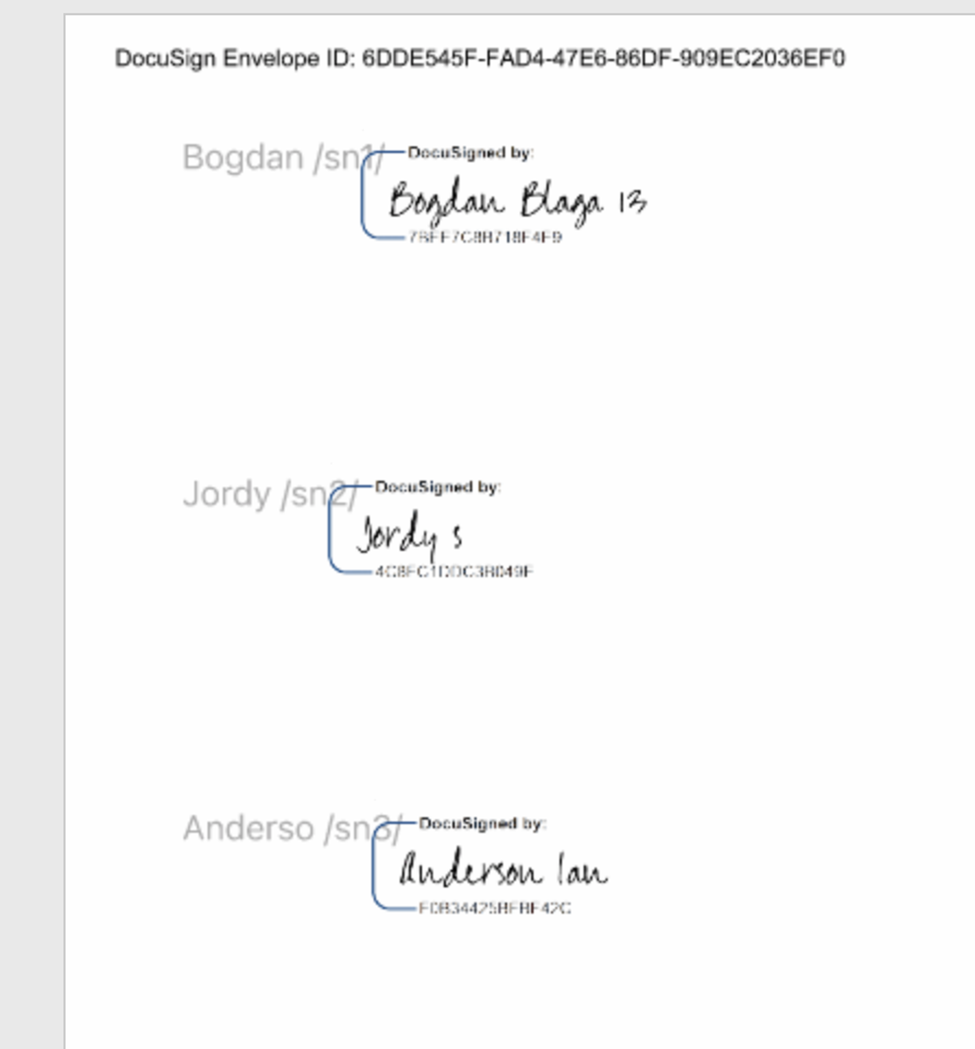
We have integrated DocuSign into the document request feature. Document signing via DocuSign allows lenders to seamlessly request signatures on any uploaded documents. This feature streamlines the signing process, enhancing efficiency and reducing the need for manual handling of documents. This is applicable for documents that can be generated and sent to stakeholders e.g., Commitment Letters, Disclosures, Solicitor Instructions, etc. These documents are configured with the “/sn1/” anchor. This anchor is placed in the document, in fields where a signature is required. This translates as a signature tag when the document is signed in DocuSign. The /sn1/ anchor is for signatures. Other anchors that can be configured in the document are /dn1/ for date signature, /in1/ for initials signature, /tn1/ for textbox one line, and /tb1/ for two lines. We will add these tags where appropriate when setting up your documents.
To initiate a signature request via DocuSign, follow these steps:
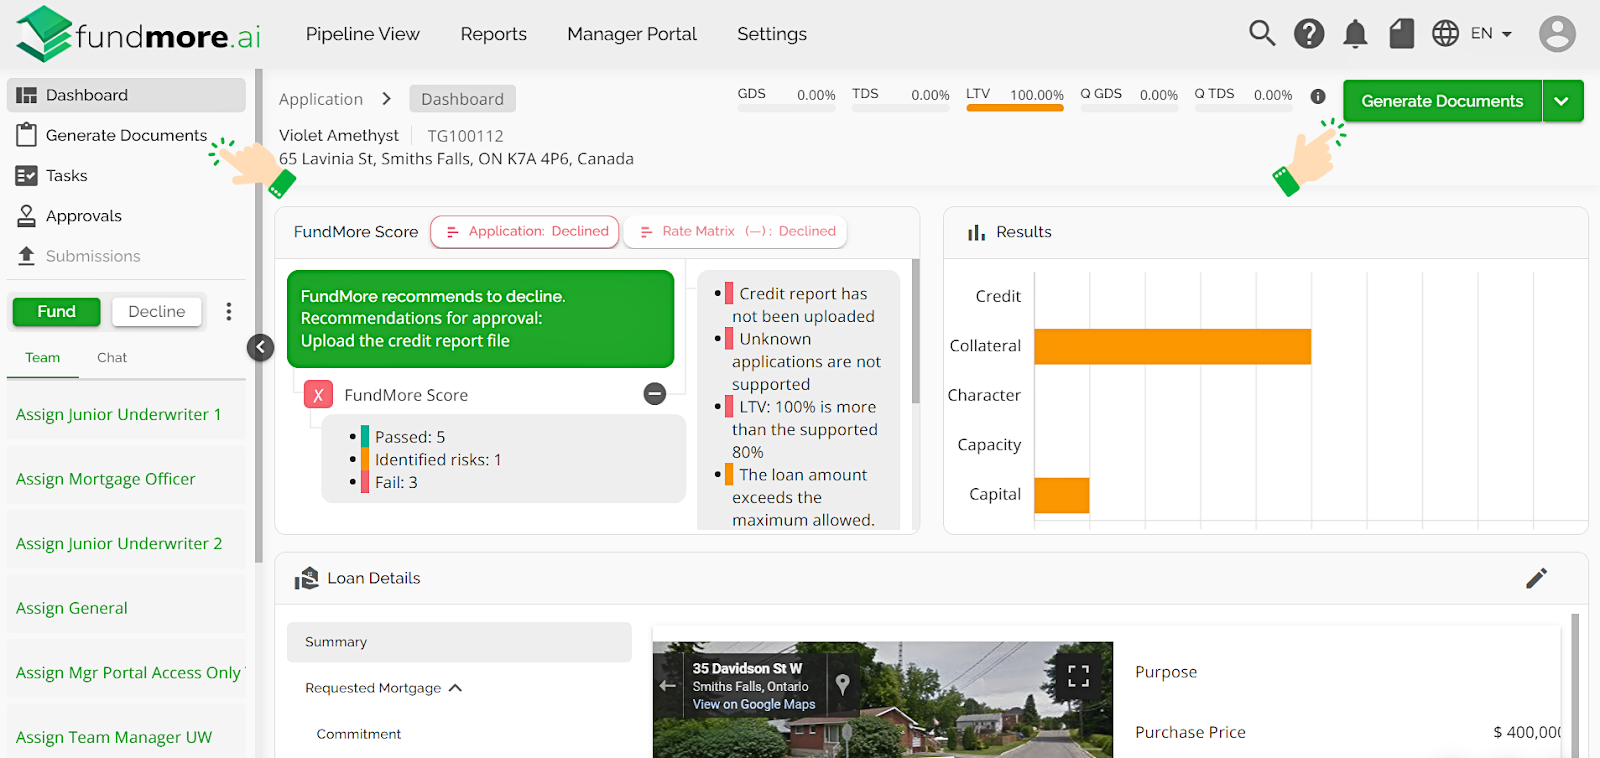
- Click on Generate Documents from the left hand sidebar or the top of the dashboard.
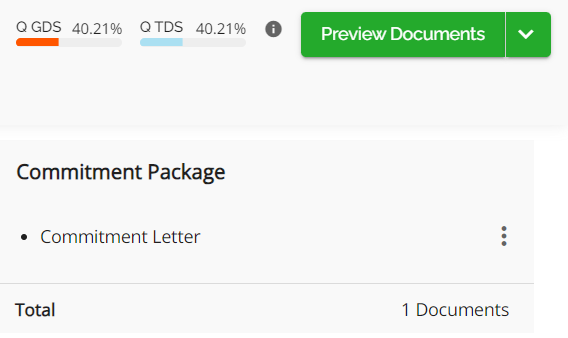
- Click on the Build Commitment Package tab.
- Select the document you wish to send to the stakeholder. You can do this by clicking on the plus (+) button to the right of the document name.
- Click on the Preview Documents button at the top of the dashboard.
- Review the document to ensure accuracy. Make edits as needed.
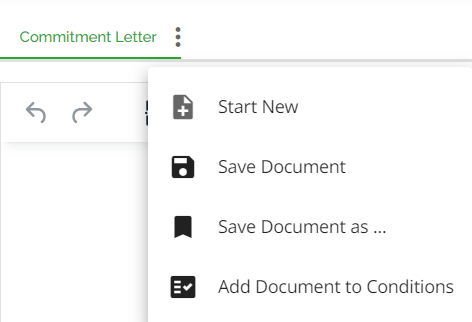
- Once you are satisfied with the content of the document, click on the ellipsis to the right of the document tab and select the Add Documents to Conditions option from the drop down menu.
- Select the stakeholder the Condition applies to (usually the borrower), and the Document Type.
- Click on the Add button. The document will be converted to PDF format and added to the Conditions and Documents widget. It will be visible in the View All tab of the Documents section.
- Navigate to the Conditions and Documents widget.
- Click on the pencil icon in the top right corner to enter Edit mode.
- Select the "Requested Documents" tab. By default, the Documents subsection will be selected.
- Click on the Request Documents button i.e. the green plus button.
- A drop down menu will appear offering a selection of choices. Select the Request Signature option.
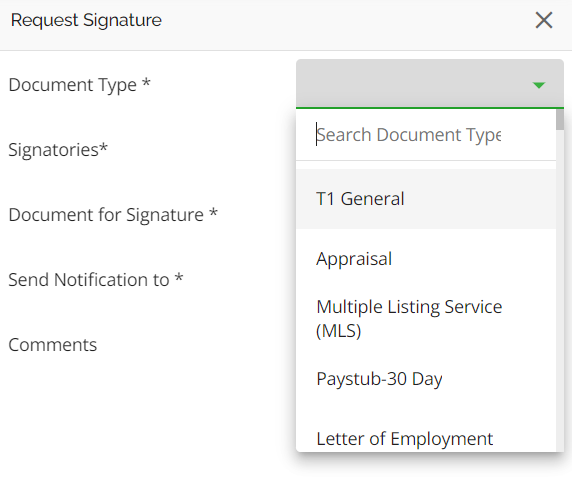
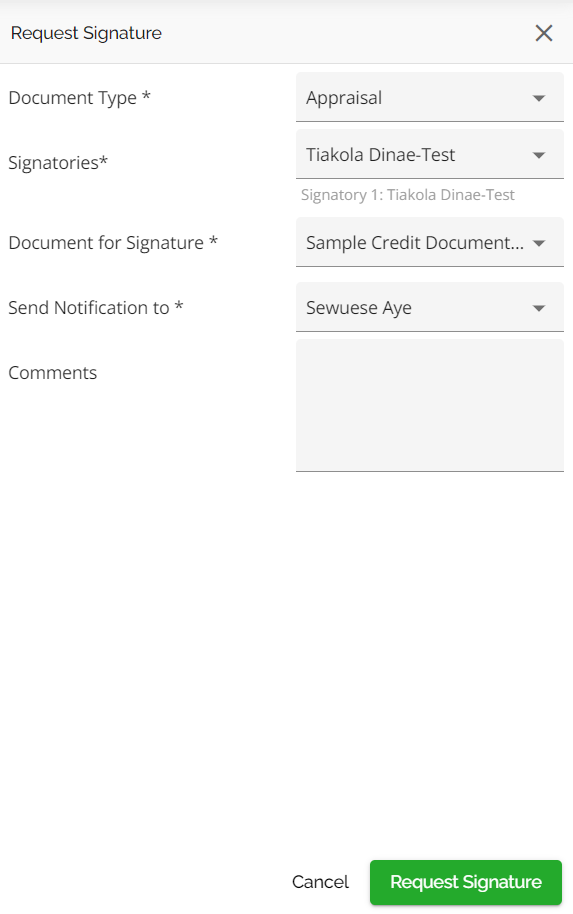
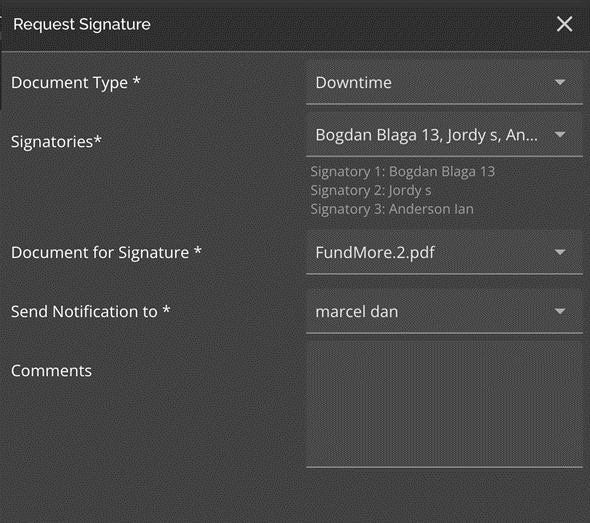
- This will open a sidebar to the right of the screen. Complete the necessary fields.
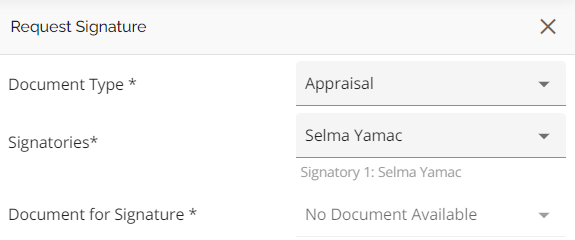
- Document Type*: This is a mandatory field. It is used to indicate the document type you need a signature for. This will be similar to the document type selected when generating the document. We have included the ability to search for the document type, making it easier to find what you need.
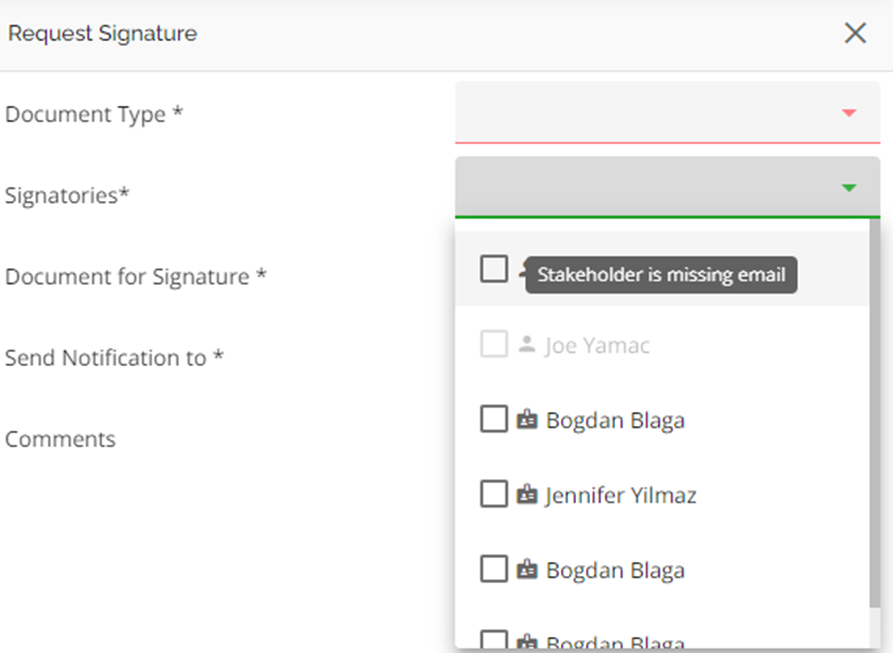
- Signatories*: This is a mandatory field. It is used to indicate the signatories for the document. This is a multi-select field so multiple stakeholders can be selected if necessary. The signature request will be sent to these stakeholders. Any Signatories that do not have a valid email address will be disabled (greyed out) from the list. If a user attempts to select them, a pop up will appear indicating that the Stakeholder is missing an email.
Multiple signatories can be selected for a single document. It is important to note that in the stakeholder’s view in FundMore.IQ, signatories on documents will appear in the order they are selected within the Request Signature form. This order typically matches the Stakeholder list order in the Stakeholder widget, i.e. the Primary Applicant/Borrower is always the first stakeholder, co-applicant(s) next, etc.
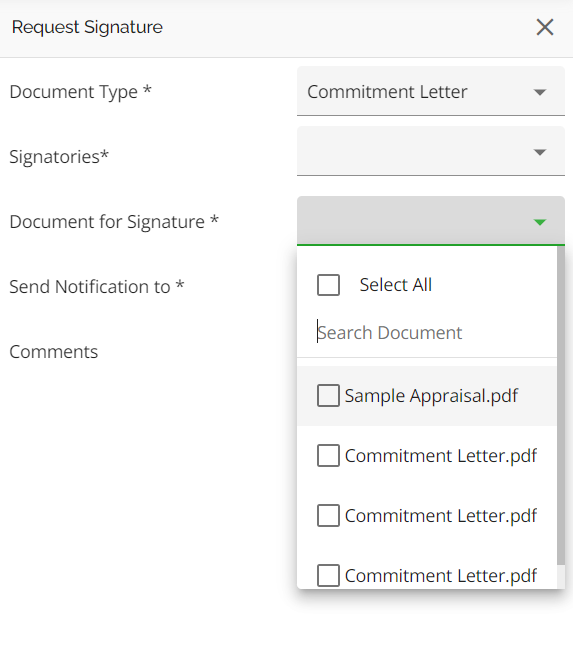
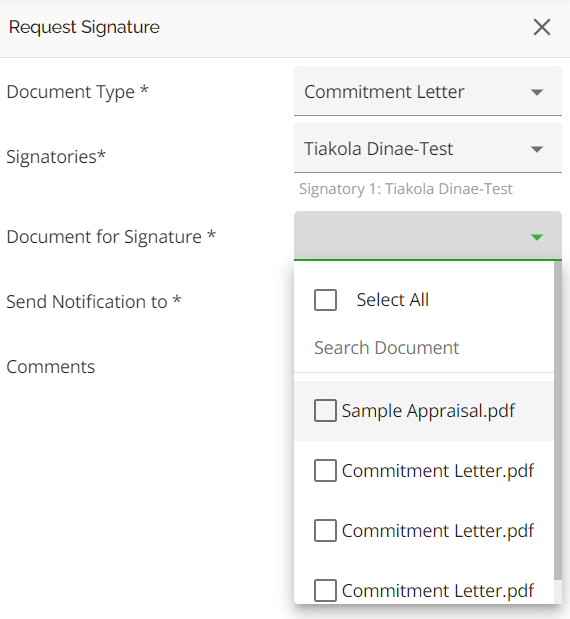
- Document for Signature*: This is a mandatory document field. It is a multi-select field which allows users to send multiple documents of the same document type for signing at once. Select the document(s) you need to be signed. The dropdown menu will populate with any uploaded document with the specified document type. We have included the ability to search for the document type, making it easier to find what you need.
If the corresponding document for this document type has not been uploaded, the Document for Signature field will be greyed out.
- Send Notifications to*: This is a single select mandatory field. Select who you wish to advise of the signature request (typically the broker).
- Comments: This is an optional field. You can include any comments to give the stakeholder(s) more context.
- Once completed, click on the Request Signature button.


A system notification will generate indicating that a signature request was created.

The system will send an email to the recipients indicated as the signatory, notifying them of the request. The document in the LOS will be updated with an icon indicating that the lender is waiting for a signature. When the stakeholder has signed the document, the signed document will instantly be sent back to the lender through the LOS. There will be both an in-app and email notification, and the document will populate in the Conditions and Documents widget either in the unverified document section or attached directly to the condition with the matching document type.

The “Waiting for signature” sign will be updated to a “Signed” icon in the Requested Documents (Documents) tab. Additionally, a DocuSign icon will appear in line with the signed document in the Documents tab (i.e., View All and Unverified). It is important to note that the original (unsigned) document will still appear in the list of documents.
Refer to this section to understand how to action a signature request.
Document Signing via Document Upload
In addition to utilizing the DocuSign feature, there is also the capability to upload documents or resend documents previously uploaded by the broker to stakeholders for their signatures. In this case, it would be a wet signature i.e. printing and signing the document. To initiate this process, follow these steps:
- Navigate to the Conditions and Documents widget.
- Click on the pencil icon in the top right corner to enter Edit mode.
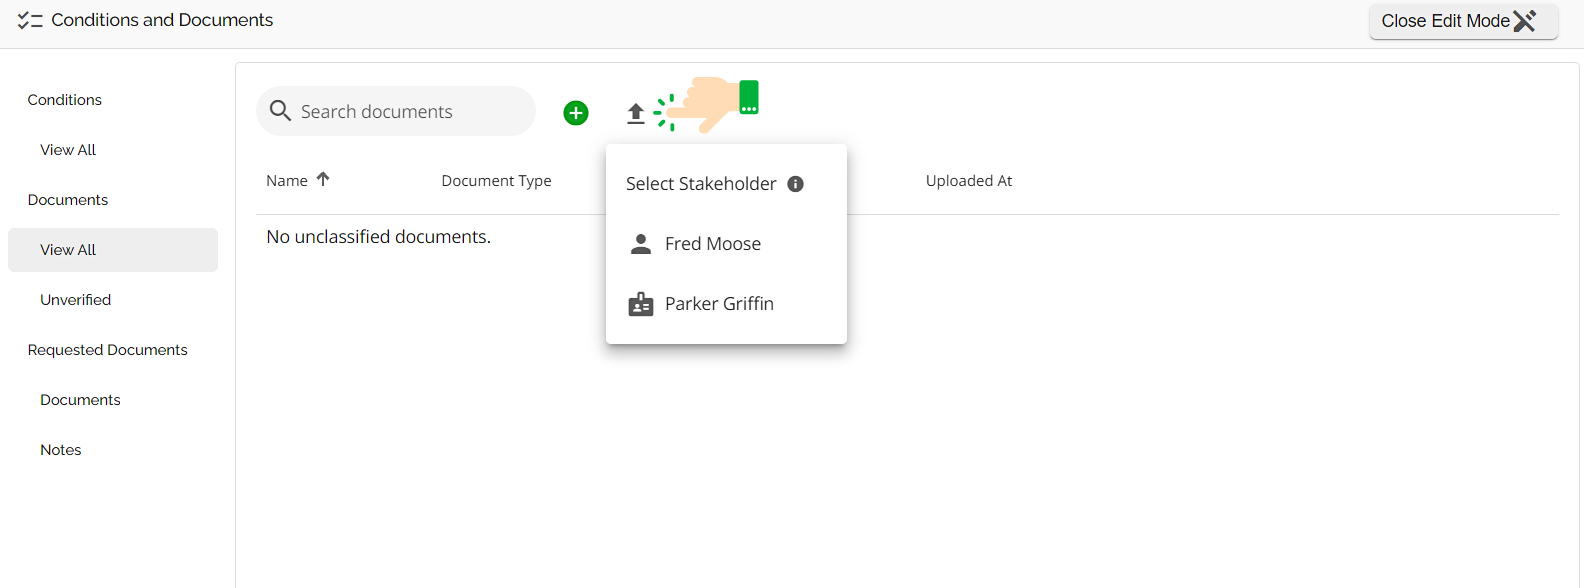
- Navigate to the Documents (View All) section.
- Click on the Upload document icon.
- Select the appropriate Stakeholder from the drop down menu.
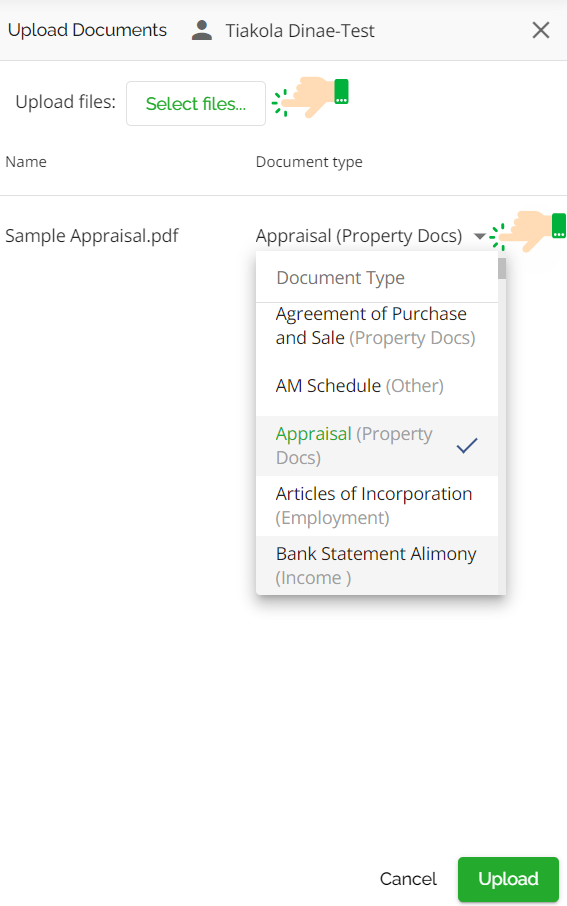
- In the pop-up sidebar, select the file and document type.
- Once completed, click on the Upload button.
Note: If you are requesting a signature on a file submitted by the broker, skip the last two steps.
- Select the "Requested Documents" tab. By default, the Documents subsection will be selected.
- Click on the Request Documents button i.e. the green plus button.
- A drop down menu will appear offering a selection of choices. Select the Request Signature option.
- This will open a sidebar to the right of the screen. Complete the necessary fields.
- Document Type*: This is a mandatory field. It is used to indicate the document type you need a signature for. This will be similar to the document type selected when generating the document. We have included the ability to search for the document type, making it easier to find what you need.
- Signatories*: This is a mandatory field. It is used to indicate the signatories for the document. This is a multi-select field so multiple stakeholders can be selected if necessary. The signature request will be sent to these stakeholders. Any Signatories that do not have a valid email address will be disabled (greyed out) from the list. If a user attempts to select them, a pop up will appear indicating that the Stakeholder is missing an email.
- Document for Signature*: This is a mandatory document field. Select the document you need to be signed. The dropdown menu will populate with any uploaded document with the specified document type. We have included the ability to search for the document type, making it easier to find what you need.
If the corresponding document for this document type has not been uploaded, the Document for Signature field will be greyed out.
- Send Notifications to*: This is a mandatory field. Select who you wish to send the signature request to.
- Comments: This is an optional field. You can include any comments to give the stakeholder more context.
- Once completed, click on the Request Signature button.
A system notification will generate indicating that a signature request was created.

The system will send an email to the recipient of the request. Refer to this section to understand how to action a signature request.
Share a Document Request
We have implemented the capability to Share an Existing Document Request. This functionality is useful when a lender needs to add an additional stakeholder to the request, this includes external stakeholders not listed on the deal. To utilize this feature, follow these steps:
- Navigate to the Conditions and Documents widget.
- Click on the pencil icon in the top right corner to enter Edit mode.
- Select the "Requested Documents" tab. By default, the Documents subsection will be selected.
- Click on the Request Documents button i.e. the green plus button.
- A drop down menu will appear offering a selection of choices. Select the Share Request option.
- Enter the necessary information in the pop-up window.
- Email: Enter the email address of the stakeholder you wish to add to the request. The system recognizes invalid email addresses. If one is entered, the “Forward” button will be disabled until a valid email address and all required fields are entered. Additionally, a warning message will alert users when an invalid email address is selected. This ensures that users are aware of any potential issues with their input before proceeding. Here is a video demonstrating this functionality: Email validation on share request.
- Documents: Select the documents you wish to share. This is a multi-select field.
Note: The stakeholder will only see the selected documents in FundMore.IQ. Any documents that are not selected will not be visible.
- Comments: This is an optional field. You can include any comments to give the stakeholder more context.
- Click on the Forward Application button to confirm and share the document request.

Once the request is shared, the stakeholder will receive an email prompting them to action the request. The lender will also receive notifications (in-app notification and via email) indicating that the document request has been shared.
Remove a Document Request
To remove a document request, follow these steps:
- Navigate to the Conditions and Documents widget.
- Click on the pencil icon in the top right corner to enter Edit mode.
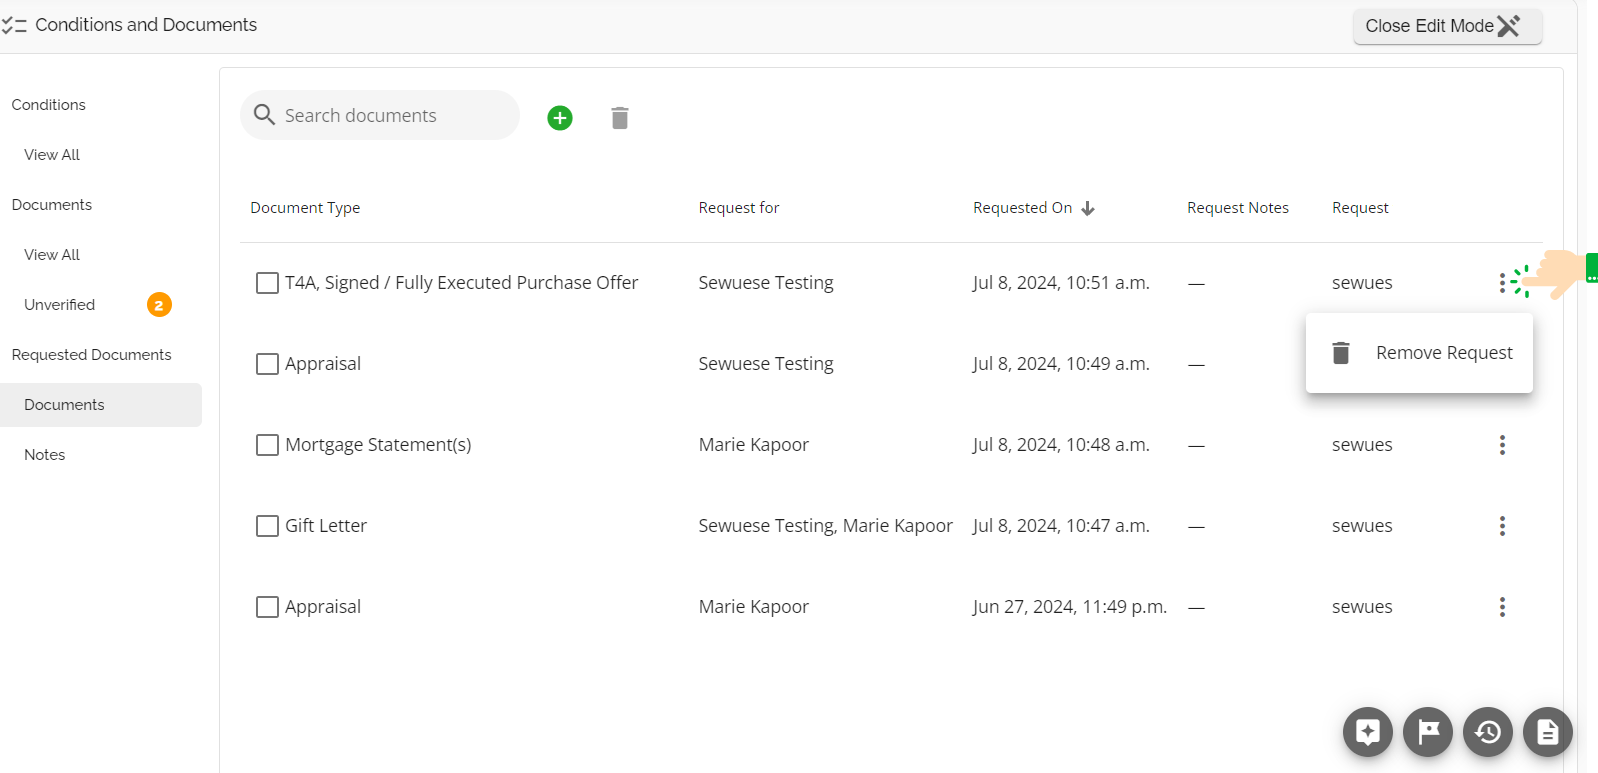
- Select the "Requested Documents" tab. By default, the Documents subsection will be selected.
- Click on the inline ellipsis for the document request you wish to remove. This will open a dropdown menu.
- Click on Remove Request.
- The following popup will appear for you to confirm your action:
- To remove the request, click on the Delete button. If you wish to cancel this action, click on Cancel.


The request will be removed both in the LOS and in FundMore IQ.
Alternatively, you can follow these steps to remove a document request:
- Navigate to the Conditions and Documents widget.
- Click on the pencil icon in the top right corner to enter Edit mode.
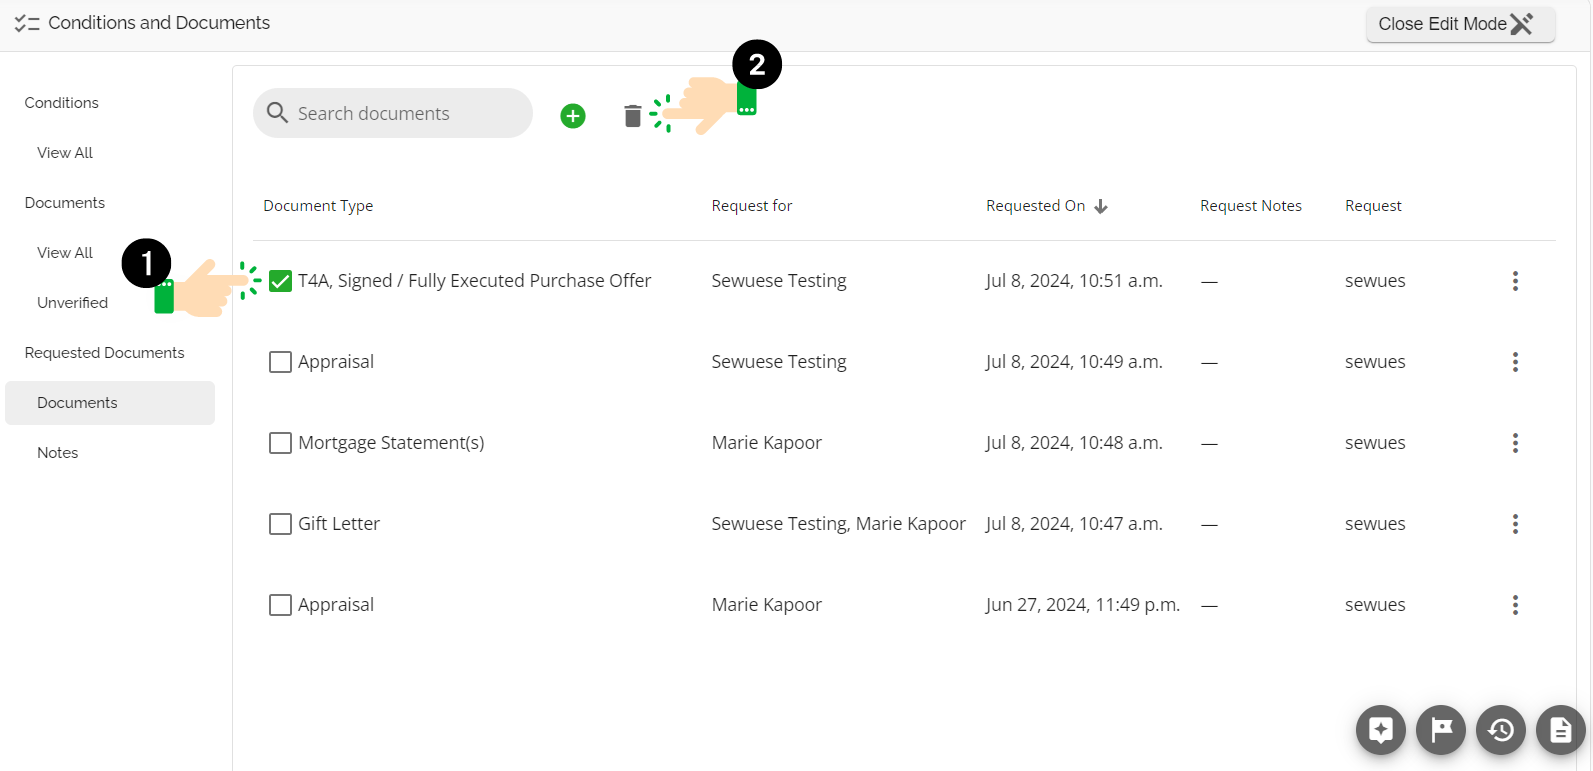
- Select the "Requested Documents" tab. By default, the Documents subsection will be selected.
- Select the checkbox next to the document request you wish to delete.
- Click on the Delete icon next to the green plus button.
- The following popup will appear for you to confirm your action:
- To remove the request, click on the Delete button. If you wish to cancel this action, click on Cancel.
The request will be removed both in the LOS and in FundMore IQ. Click on this link to watch a video demonstration of this functionality.
We have also implemented the functionality to delete document requests in bulk. To do so, follow these steps:
- Navigate to the Conditions and Documents widget.
- Click on the pencil icon in the top right corner to enter Edit mode.
- Select the "Requested Documents" tab. By default, the Documents subsection will be selected.
- Select the checkboxes next to the document requests you wish to delete.
- Click on the Delete icon next to the green plus button.
- The following popup will appear for you to confirm your action:
- To remove the request, click on the Delete button. If you wish to cancel this action, click on Cancel.

The selected requests will be removed in the LOS and in FundMore IQ. Click on this link to watch a video demonstration of this functionality.
Managing Document Requests as a Broker
The system automatically dispatches document requests upon initiation by the lender, whether triggered during ingestion or manually generated by the user. Recipients of these requests receive an email notification listing the requested documents, and providing a link for document upload.
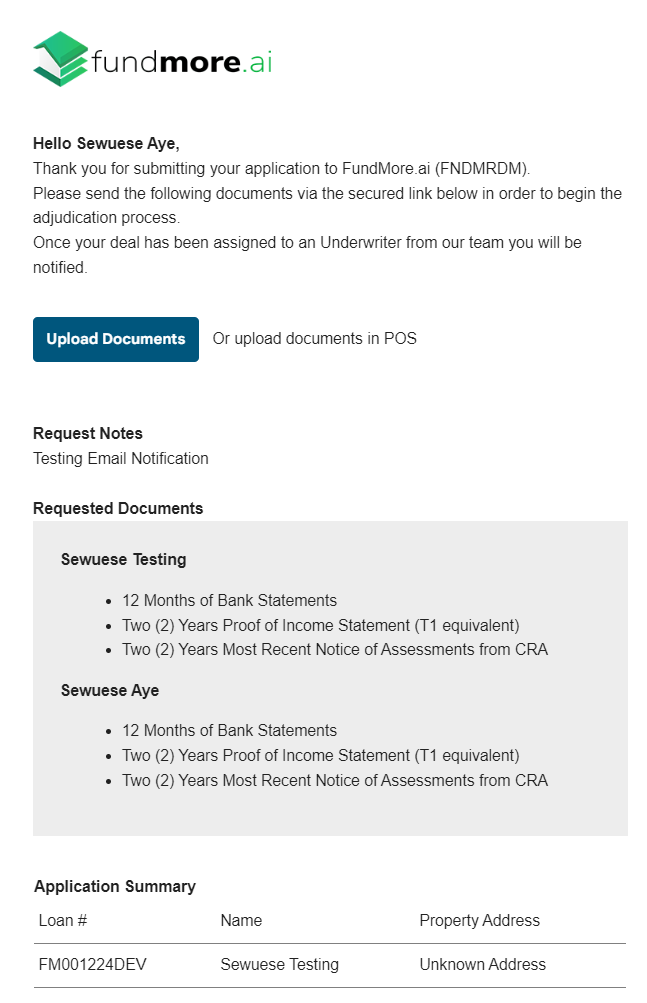
To begin uploading the requested documents, follow these steps:
- Click on the Upload Documents button within the email.
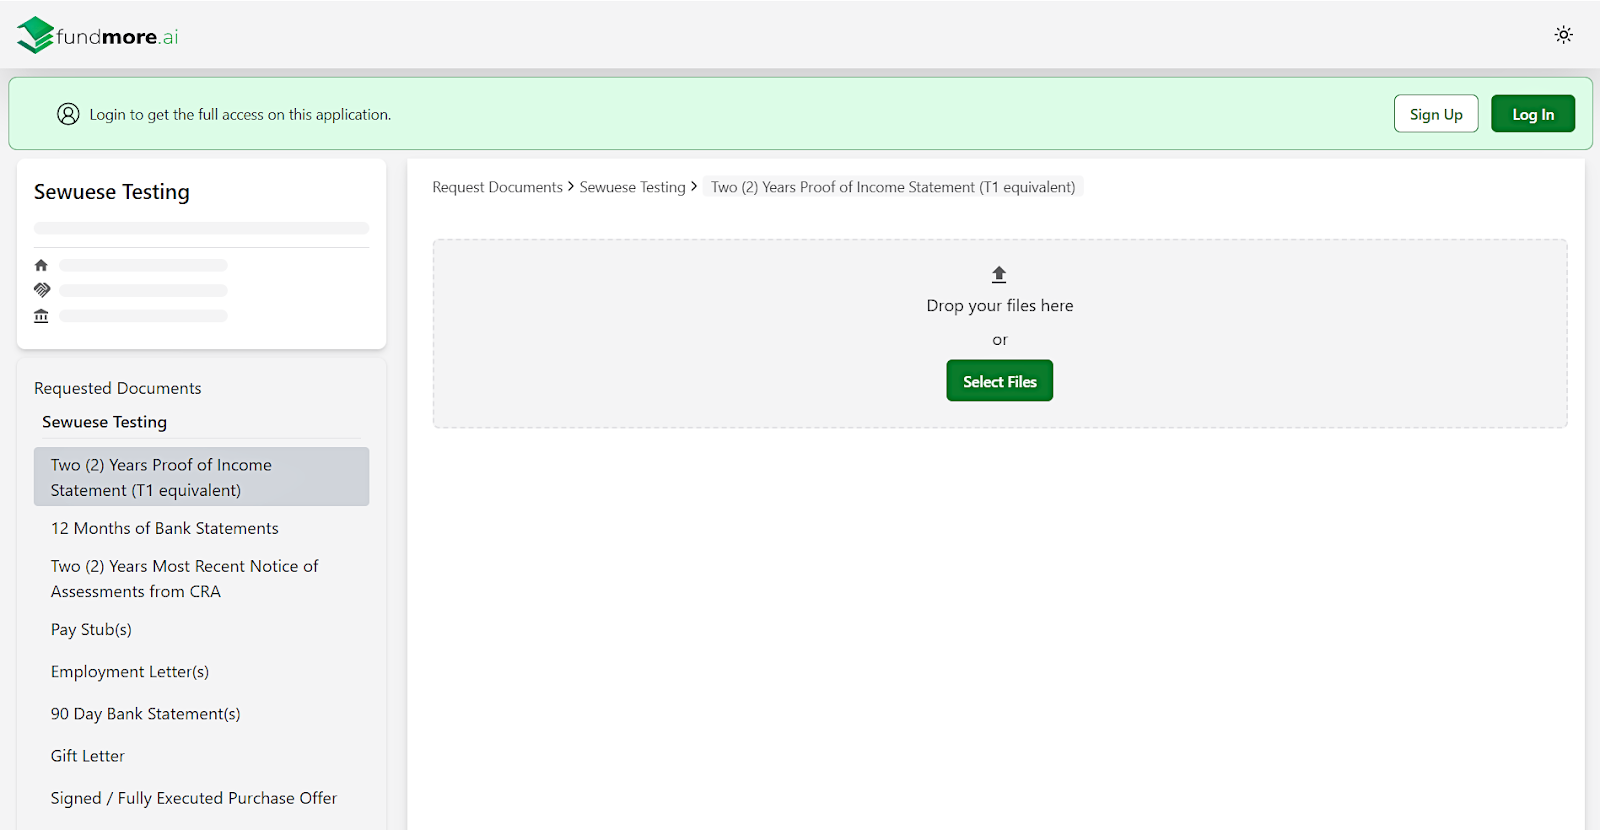
- You will be directed to a new window.
- In this window, you have the option to Sign Up, Upload the documents without creating an account, or Upload documents via the POS. The option you select will determine how much information you can see throughout the document collection process.
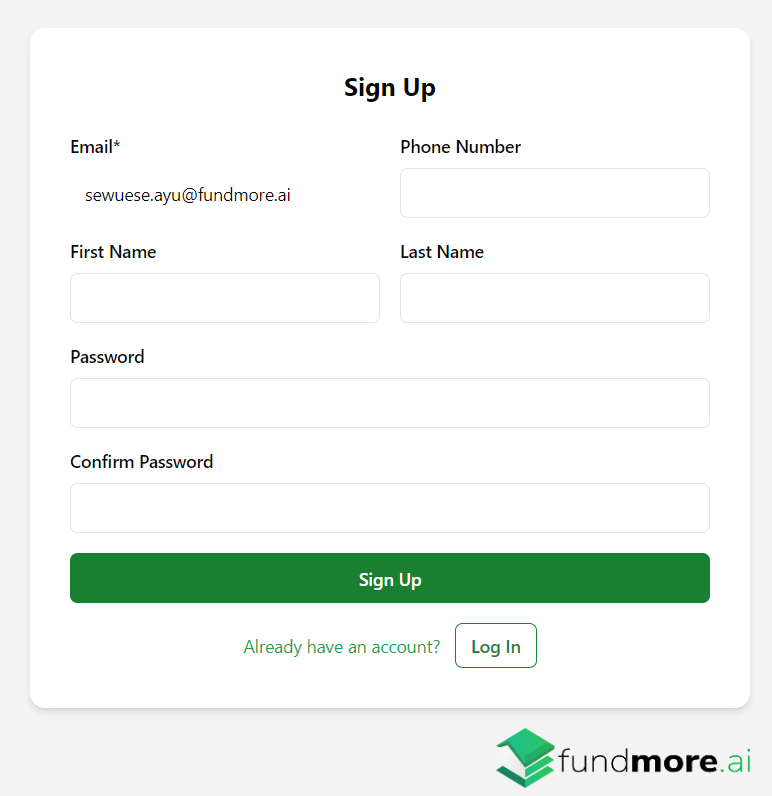
- Sign Up: We recommend selecting this option. It allows the user to create an account and gives them full visibility into the status of the documents requested and submitted as well as the status of their application. This is what we refer to as an authenticated view. To sign up, click on the Sign Up button. You will be directed to a new window where you need to fill in the necessary information and create a password for your account.
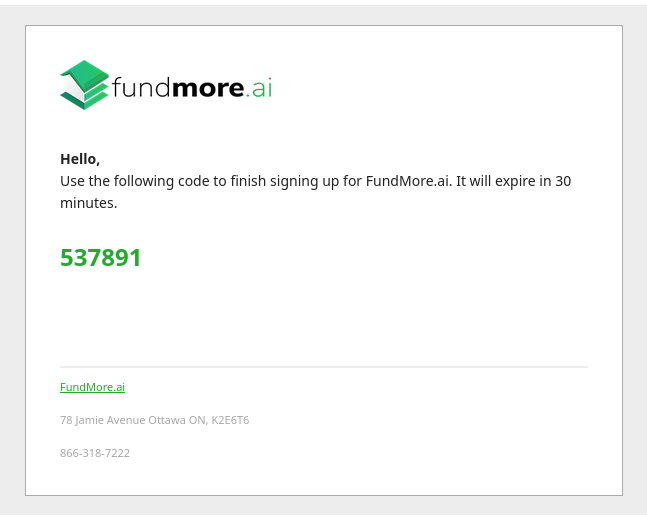
Once you have completed the sign up form, click on the Sign Up button. You will receive an email with a verification code which must be entered in the IQ portal to complete the process. To enhance security within the IQ platform, users will receive an error message when there are too many failed attempts when entering the security code.
Refer to this video demonstration for more information on this process: Demo-for-IQ-Signup, IQ-Failed-Attempts-Signup-Demo.
Once you have verified your email, you will be directed to the authenticated view of the IQ platform and you can proceed to action the relevant document request.
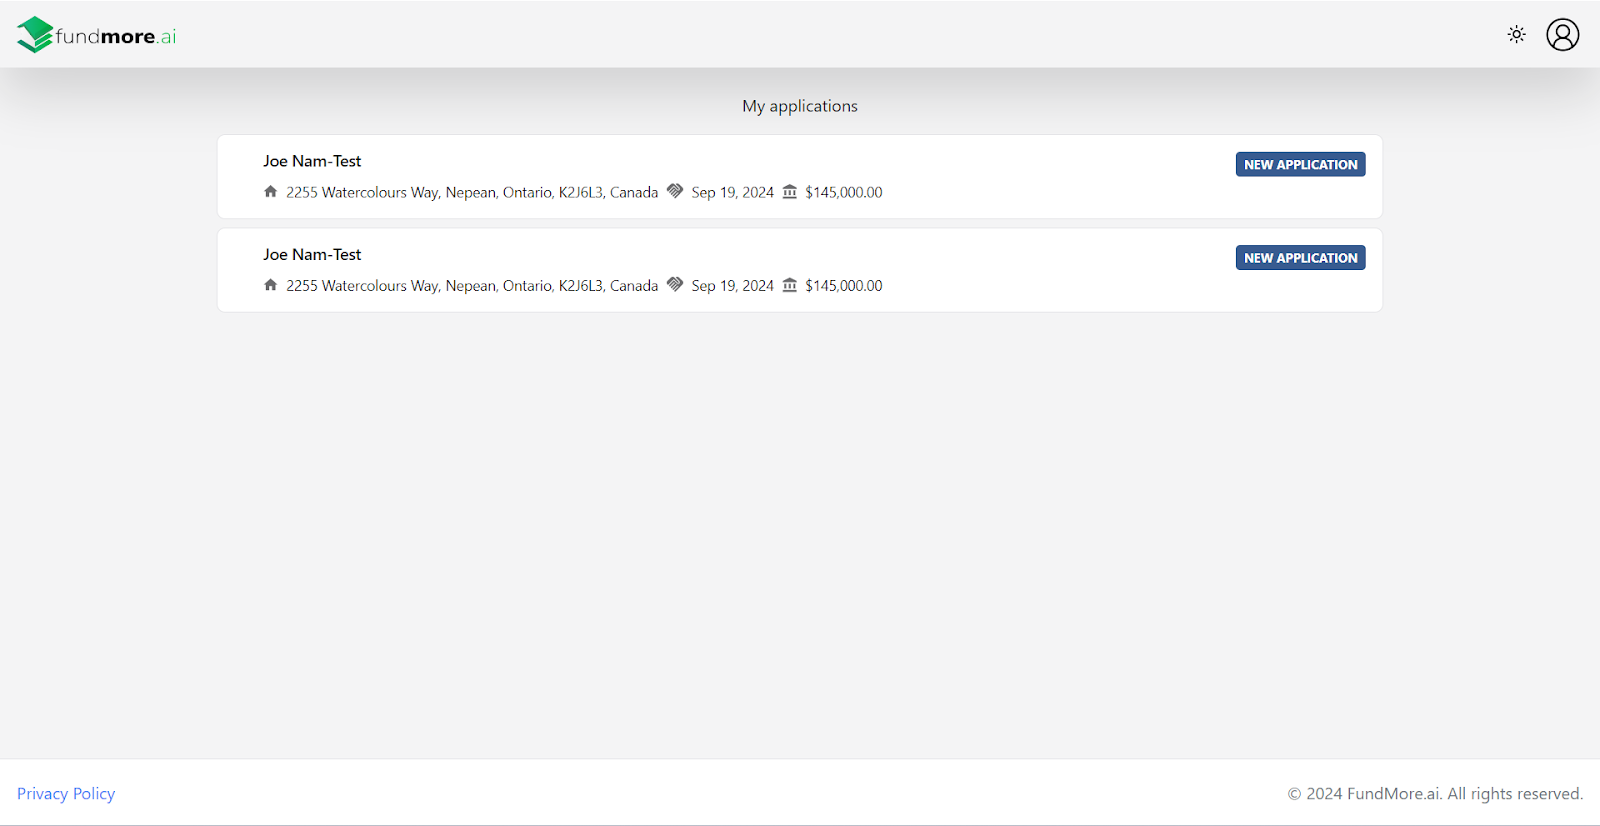
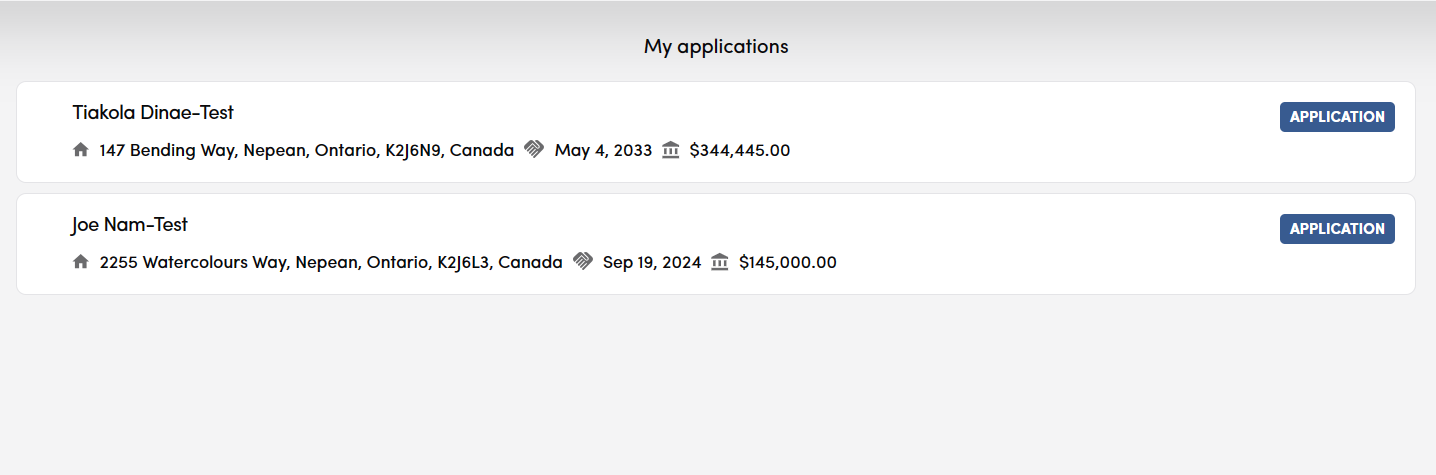
Whenever you need to manage the document request, simply login to the newly created account. The authenticated account can be used to manage multiple files simultaneously. To view all your document requests, simply click on the lender icon in the top left hand corner. This option is not available in the unauthenticated view.
Note: Access to document requests in IQ is determined by the broker selected by the lender at the time the request is created. The broker specified is the one who will receive the email notification and have the ability to log in to the platform to access the request and its associated documents. It is important to ensure that the correct broker is who is logged in when accessing the request in the IQ portal. Only the designated broker can view and manage the document request. If a different broker logs into the platform and attempts to access the request, they will receive a message indicating that they do not have access. This is expected behavior and helps maintain security and clarity around document ownership.
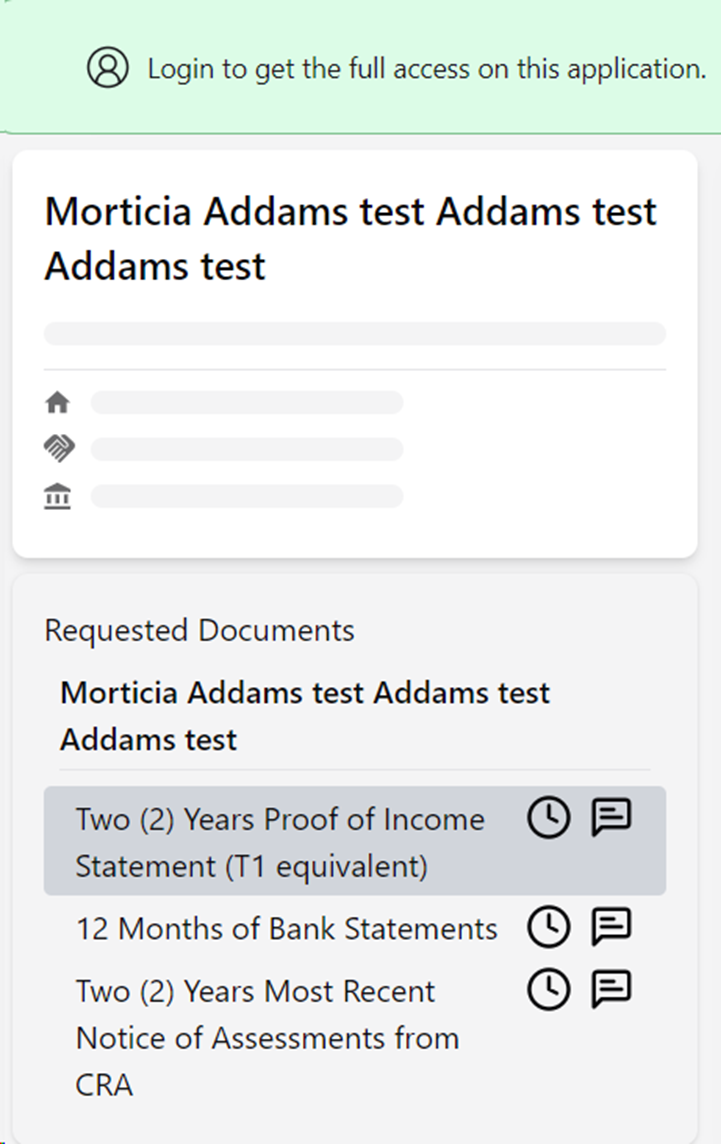
- Use Upload Link: With this option, the user is not required to create an account to manage the document request. Using the upload link will only provide you with basic information, such as the Applicant Name and the documents requested. We refer to this view as an unauthenticated view.
- Upload documents in POS: We do not recommend this option as it gives the broker the least amount of visibility into the status of their file and documents.
Note: The option to “Upload documents in POS” is available for brokers on Finmo (Lendesk) or Velocity who have the option to upload documents via the POS. By uploading documents via the POS, the broker loses visibility into the status of their documents in FundMore.IQ. This includes any notes or comments from the lender.
- Sign Up: We recommend selecting this option. It allows the user to create an account and gives them full visibility into the status of the documents requested and submitted as well as the status of their application. This is what we refer to as an authenticated view. To sign up, click on the Sign Up button. You will be directed to a new window where you need to fill in the necessary information and create a password for your account.
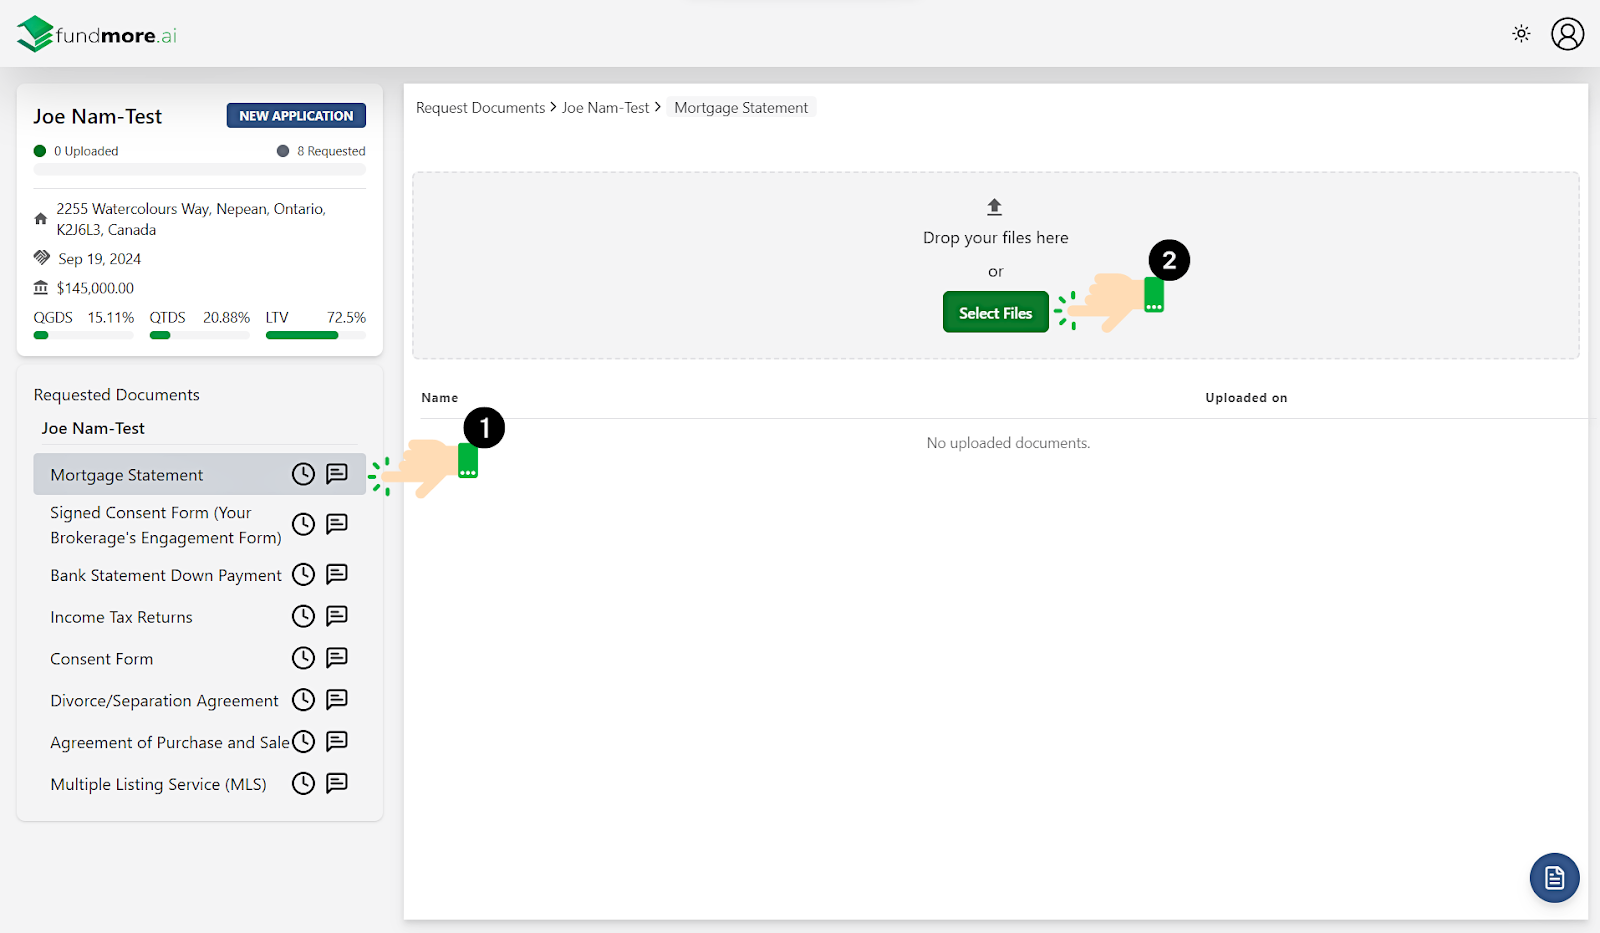
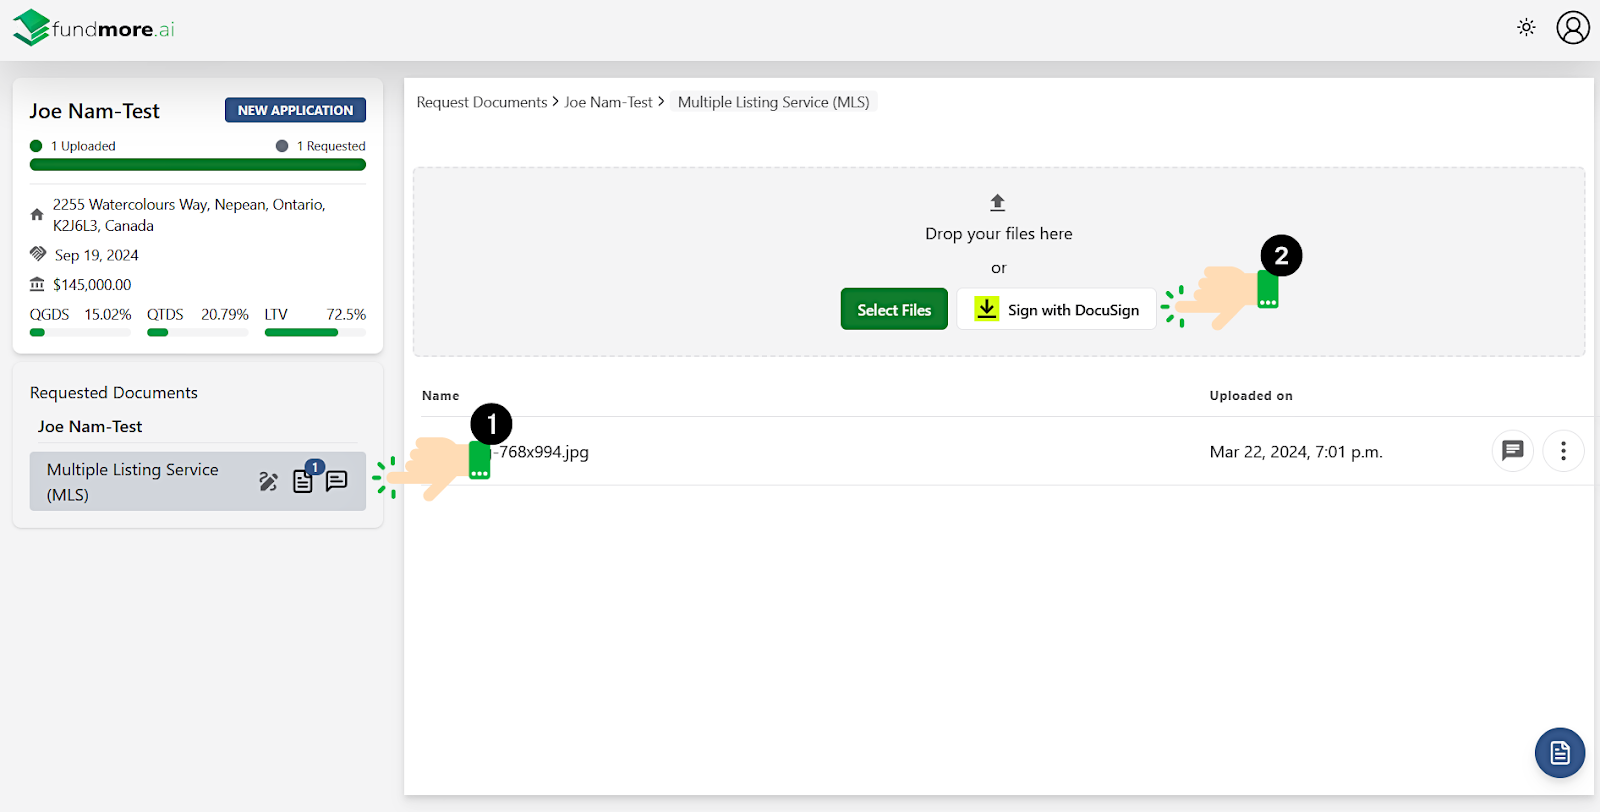
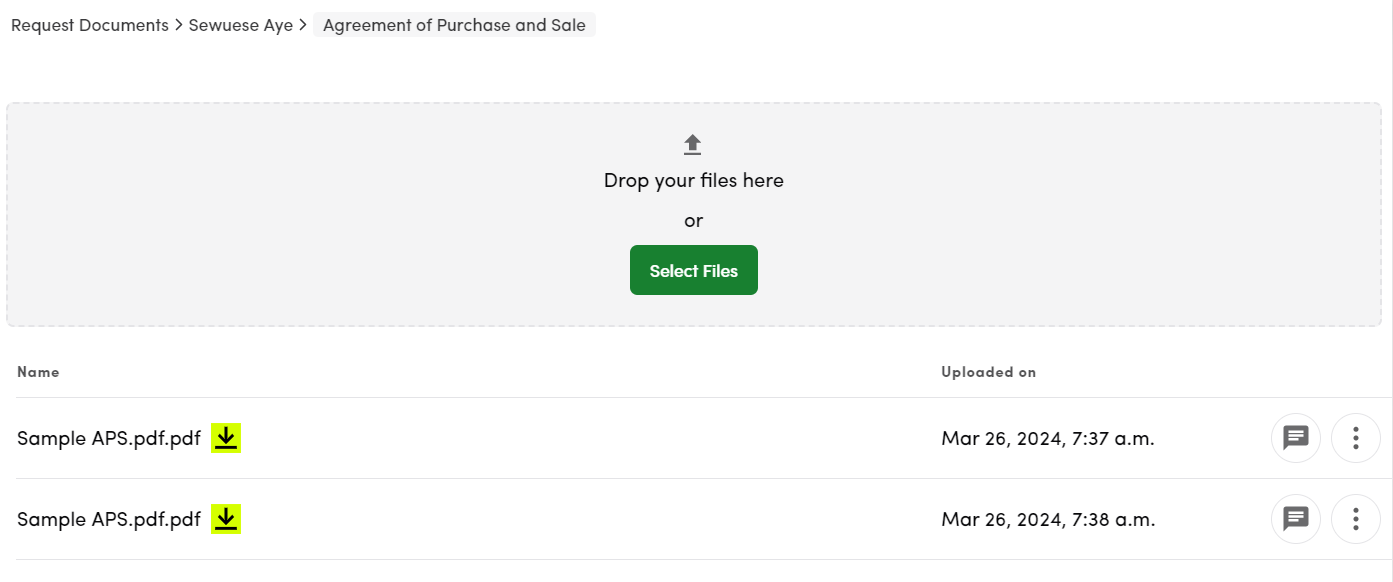
- Presuming the broker uses the link in either unauthenticated view or authenticated view, they would highlight the document they wish to upload and click on the green “Select Files” button. The system will navigate to their documents folder where they can select the appropriate document for upload.
Note: There is no known maximum for document size with respect to uploading. If the file is huge it will most likely fail eventually but we have tested up to 20MB without issue.
SUPPORTED FILE TYPES in IQ are as follow: 'image/*,.pdf,.doc,.docm,.docx,.dot,.dotm,.dotx,.htm,.html,.mht,.mhtml,.odt,.pdf,.rtf,.txt,.wps,.xml,.xps,.xls,.xlsx,.sign'
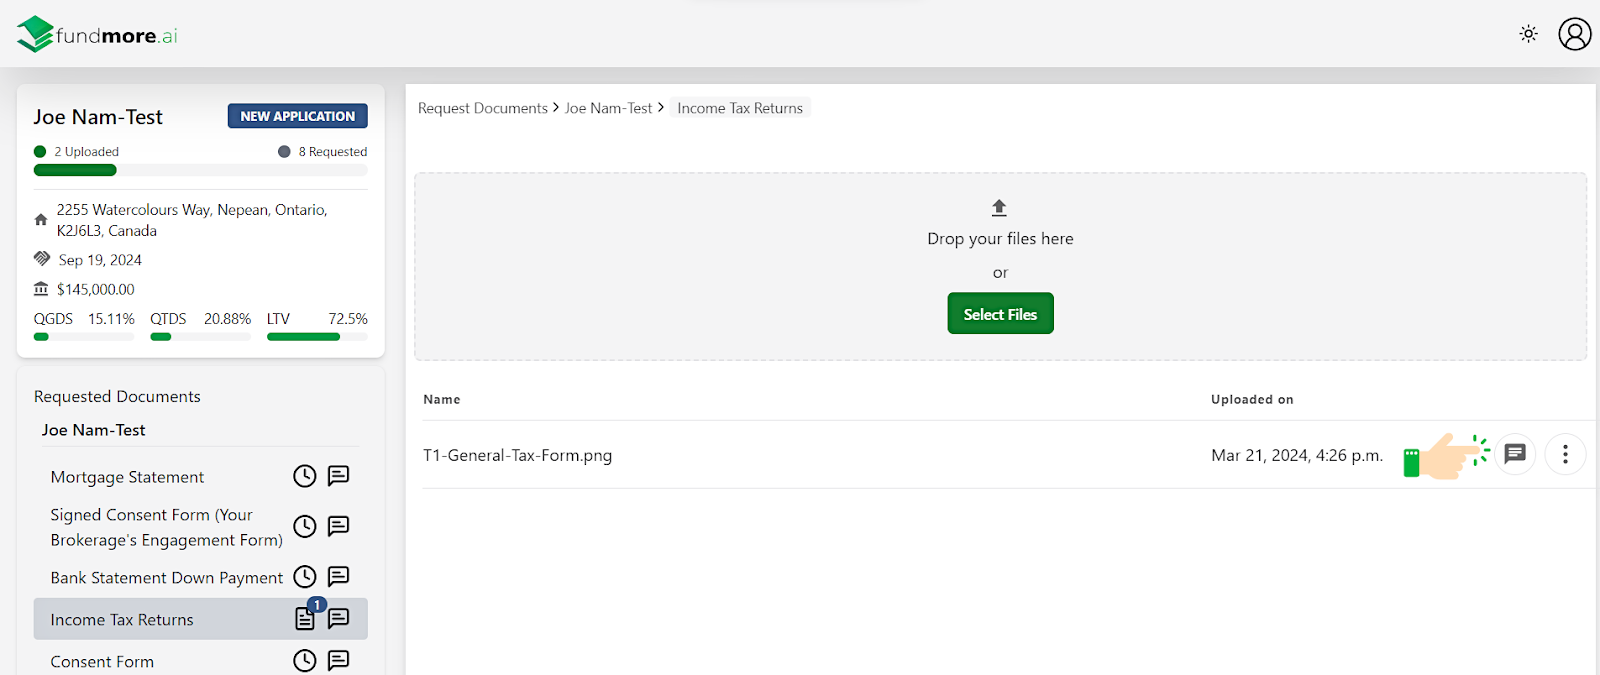
- Once the document is uploaded, the system will automatically send it to the LOS. This will populate within the Conditions and Documents widget. Within the authenticated broker’s view, a counter will be added to the document in the list. This gives the broker a visual cue of how many documents have been uploaded for each requested document. The document name, as well as the date and time the document was uploaded, will populate in the center of the page.


The counter is not present in the unauthenticated view but the document name, as well as the date and time the document was uploaded, will populate in the center of the page. If the page is refreshed or closed, the list in the center of the page will be cleared. This is because in the unauthenticated view, the sessions are not saved in the browser.
The document request can still be accessed from the link in the original email notification. In addition, any subsequent activity from the lender i.e., an additional document request or notes, will generate an email notification with a link to document request.

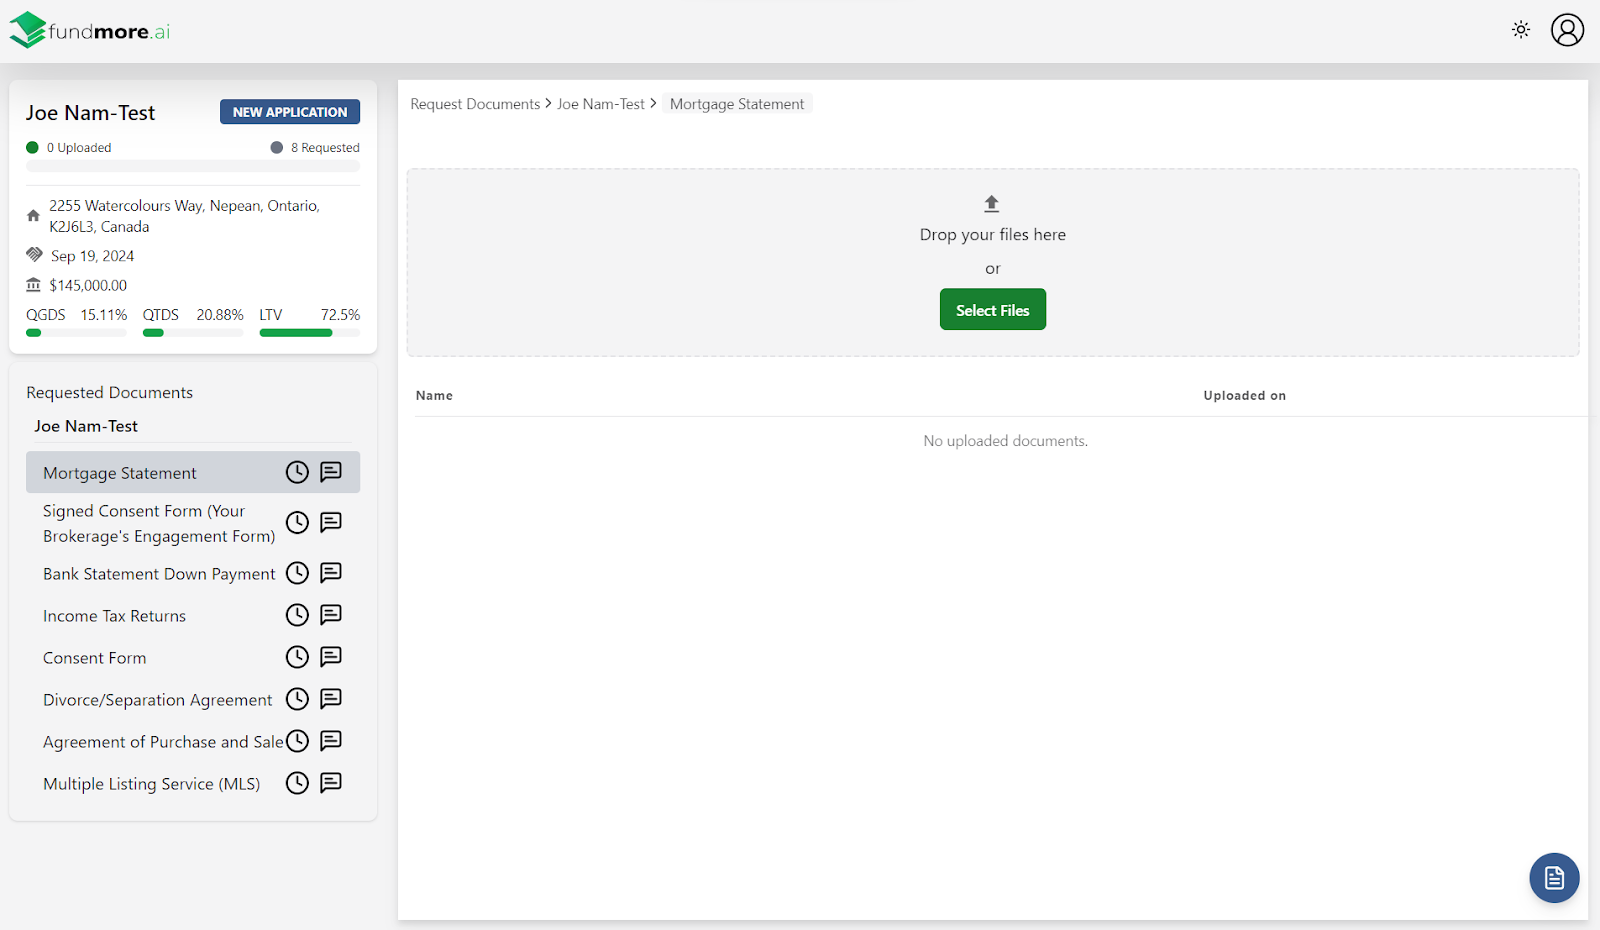
Within the authenticated view, there are visual cues that are useful for the broker. There is a progress bar at the top of the page indicating the number of documents that have been uploaded, and the pending documents. There is a reference to the Stage the file is in as well as, the Borrower’s Name, Subject Property Address, Closing Date, Loan Amount, and Ratios.

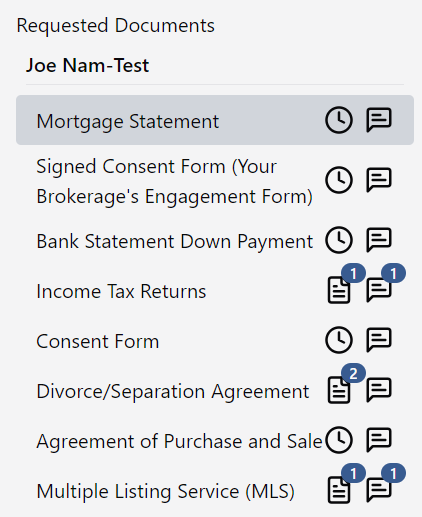
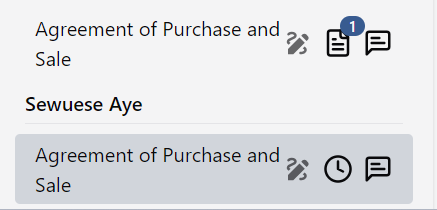
Within the list of requested documents, the broker will see icons to the right of the document name.
- Clock Icon - This indicates documents that are yet to be uploaded.
- Page Icon with a Number Counter - This indicates a document that has been uploaded.
- Comment Icon with no number counter - This indicates that there are no comments on the document.
- Comment Icon with a number counter - This indicates that there is a pending comment on the document.
Guidance on Document Submissions for Brokers
Brokers are encouraged to upload each document as a separate file for each requested item to ensure clarity and alignment with specific conditions. If a document contains multiple sections (e.g., a single PDF includes both a bank statement and a letter of employment), brokers are encouraged to split and resubmit them. Currently, our system does not support in-app document splitting, so users will need to handle this outside the platform. As a best practice, uploading individual files rather than consolidating multiple documents into one helps streamline document review and ensures each document corresponds directly to its intended request.
SUPPORTED FILE TYPES in IQ are as follow: 'image/*,.pdf,.doc,.docm,.docx,.dot,.dotm,.dotx,.htm,.html,.mht,.mhtml,.odt,.pdf,.rtf,.txt,.wps,.xml,.xps,.xls,.xlsx,.sign'
Recommendation for Brokers: Document upload capabilities support larger file sizes, up to approximately 20MB. For DocuSign uploads, the maximum is 25MB. To avoid potential upload failures, brokers should be advised to keep files below 20MB where possible.
Communication as a Broker
FundMore.IQ's authenticated view includes comment functionality which facilitates seamless communication between brokers and lenders, fostering direct dialogue regarding the application. There are two different ways that brokers can communicate with lenders.
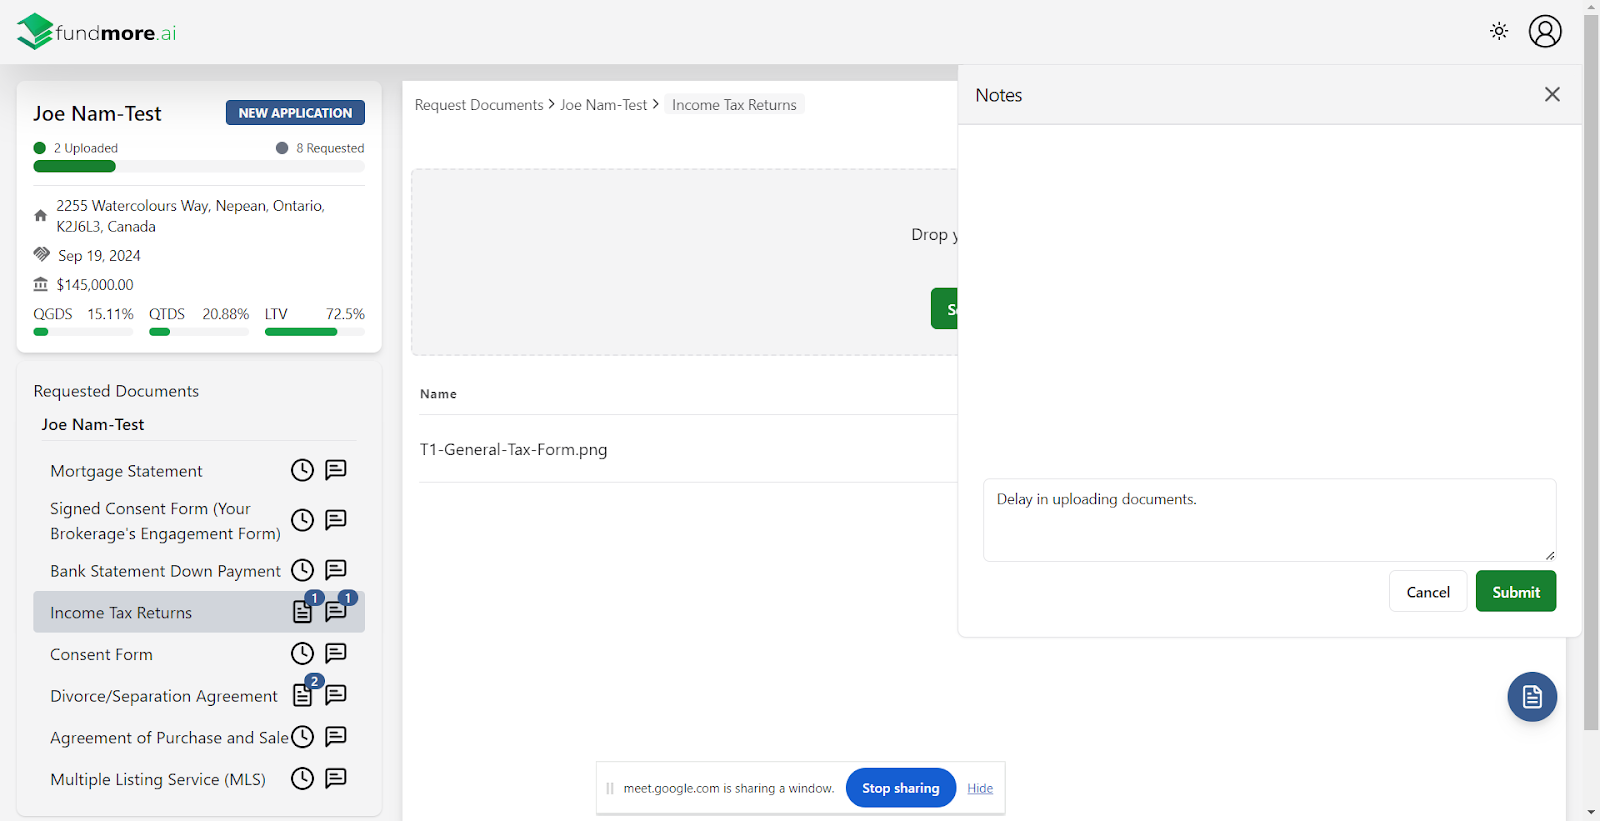
- Notes: The Notes feature, accessible via the icon in the bottom right-hand corner of the screen, allows users to communicate about the overall document request. Unlike comments tied to specific documents, these notes provide a space for general inquiries or updates related to the entire request. A sample use case for this would be before uploading a document, users can leave a note asking for clarification on any part of the request. For instance, if the required document type or format is unclear, a user could ask for confirmation to ensure they upload the correct file. This promotes smooth communication and avoids potential delays or errors.
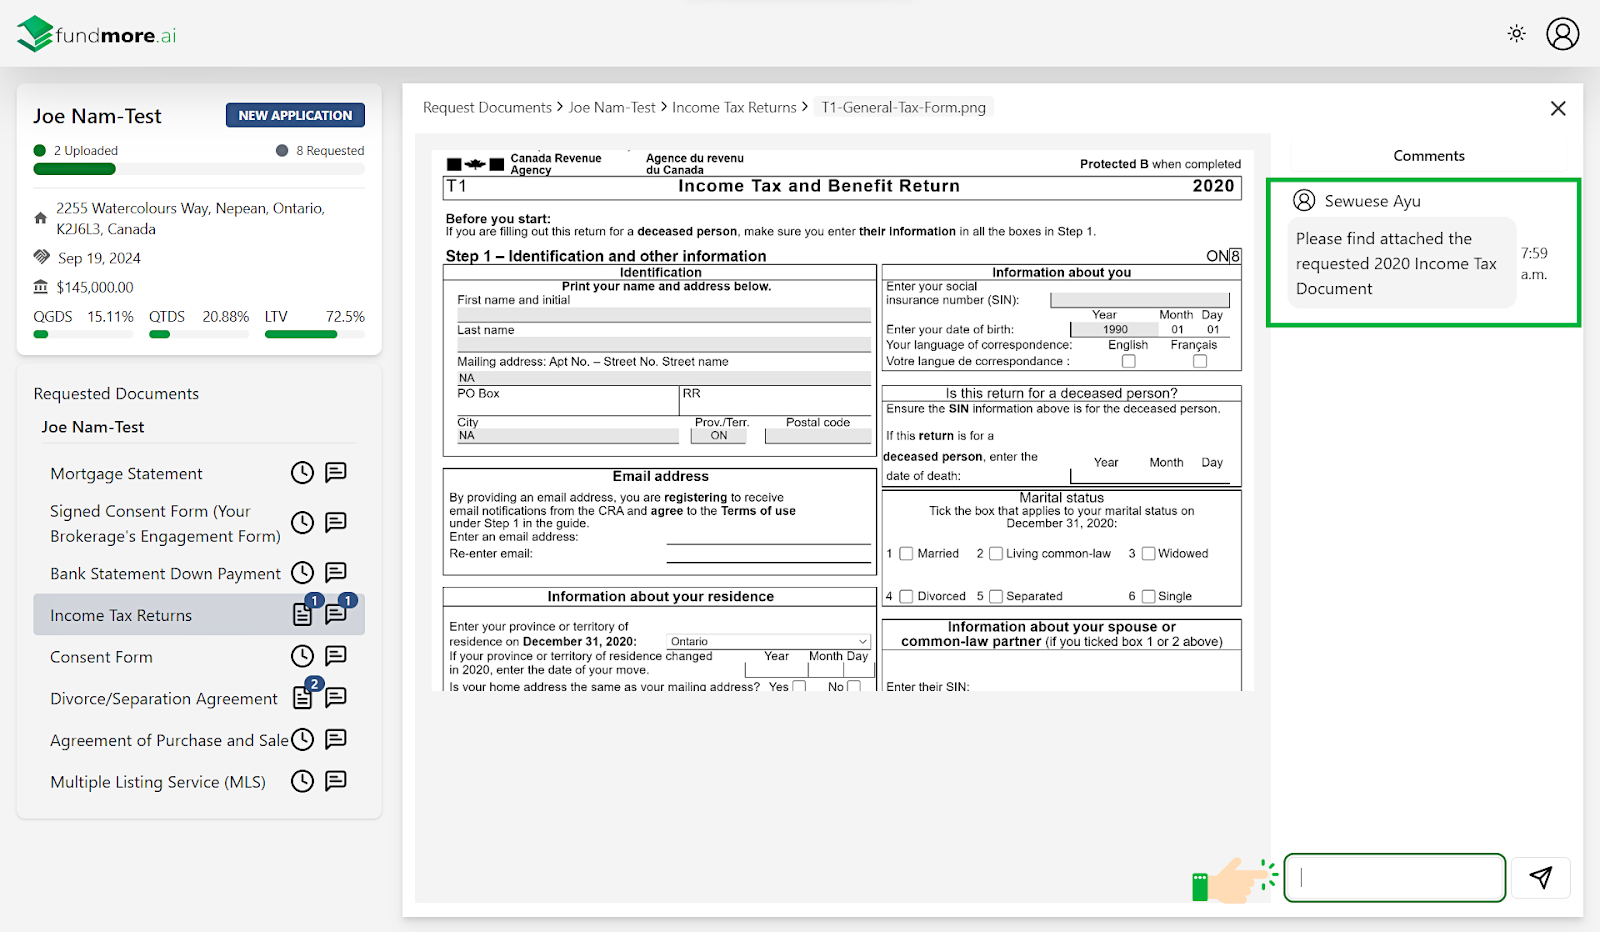
- Comments on Documents: This is accessed only after a document has been uploaded via the comment box icon to the right of the document. Clicking on this icon opens up a view that allows brokers to review the document and observe any comments provided by the lender regarding that specific document. Furthermore, brokers can add their own comments directly to the document and send them to the lender directly from this screen.
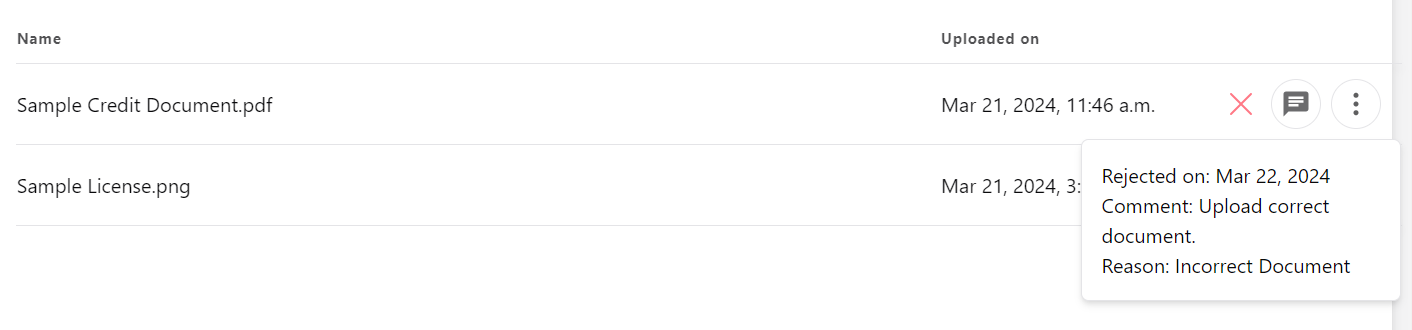
- Status Icon - This is represented by a green check mark for accepted, or a red ‘x’ mark for rejected. It indicates the decision of the lender on the specific document. If the broker has an account in the authenticated view of FundMore.IQ, the decision will immediately be visible to them. To view any details relating to the decision, the broker simply needs to hover over the status icon.
Mobile Compatibility
It is important to note that the broker’s experience is mobile friendly. If the broker opens the Upload Documents link on their mobile device, they are offered the same functionality as the web view. On a mobile device, users can leverage additional features, such as capturing and uploading document images directly from their phones.
Regardless of how the Stakeholder uploads documents, FundMore will receive the documents directly within the Conditions and Documents widget of the LOS.
Actioning a Signature Request
The system automatically dispatches signature requests upon initiation by the lender. Recipients of these requests receive an email notification listing the requested documents, and providing a link to review the document.
Note: The DocuSign functionality is only available within the authenticated view of FundMore.IQ. Therefore, to utilize this feature, stakeholders must have an account (i.e. access to the broker portal) on the platform.
To begin the document signing process, follow these steps:
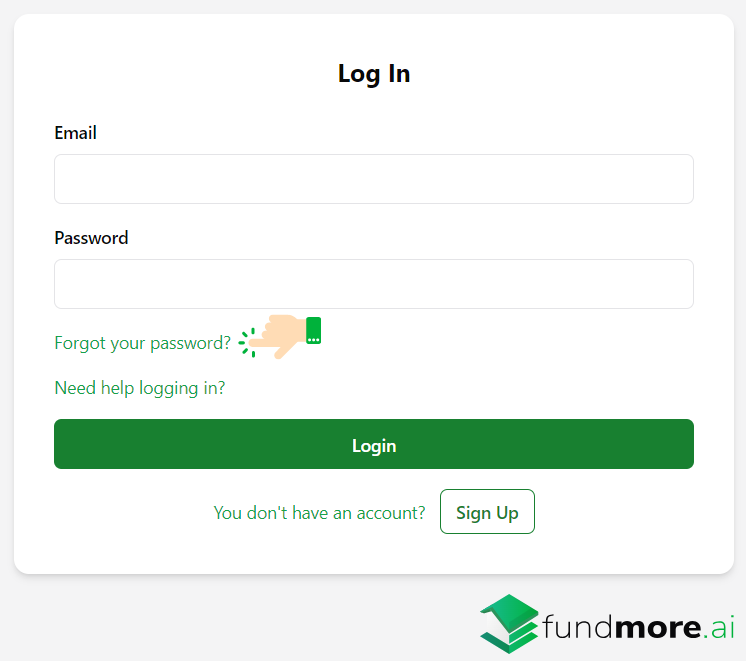
- Click on the Review Documents button within the email.
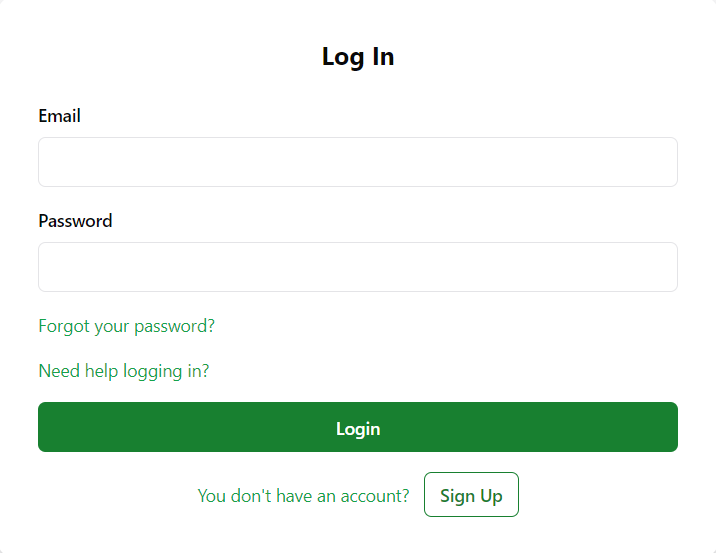
- You will be directed to the FundMore.IQ login page. Enter your credentials and click on the login button.
- Locate the document that requires a signature. Documents requiring a signature will have a “Waiting for Signature” icon located to the right of the document name.
Note: If the borrower(s) is selected by the lender as a signatory, this icon will still be visible to the broker. In this case, the broker will have visibility but cannot not act on the document.
- As a stakeholder, there are two options to sign a document: Wet Signature or DocuSign.
- Wet Signature: Wet signature is a term to describe the process of signing a physical paper document, form or contract with pen and ink. To wet sign a document, follow these steps:
- Highlight the document in the requested documents list to the left of the screen.
- Click on the ellipsis to the right of the document name in the center of the screen.
- Select the Download option. This will save the document to your computer.
- Share the document with the relevant stakeholder and have them wet sign the appropriate fields.
- Once completed, click on the Select Files button to upload the signed document. The uploaded document will instantly be sent through to the lender in the LOS.
Note: Stakeholders always have the option to wet sign and upload a document even if a DocuSign request has been sent.
- DocuSign: Stakeholders can sign the document using the DocuSign feature. It is important to note that this functionality is only available within the authenticated view of FundMore.IQ. It is essential for stakeholders to be logged in to the platform to utilize this feature. To maintain security and ensure compliance, the system identifies the logged-in stakeholder and restricts document signing privileges to those listed as signatories by the lender. Subsequent steps can only be completed when the relevant signatory is logged in. Upon logging in, signatories will see their name positioned above the document requiring their signature.
- Highlight the document and click on the Sign with DocuSign button.
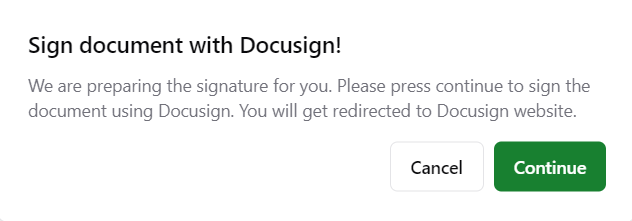
- Click on Continue in the pop-up that appears.
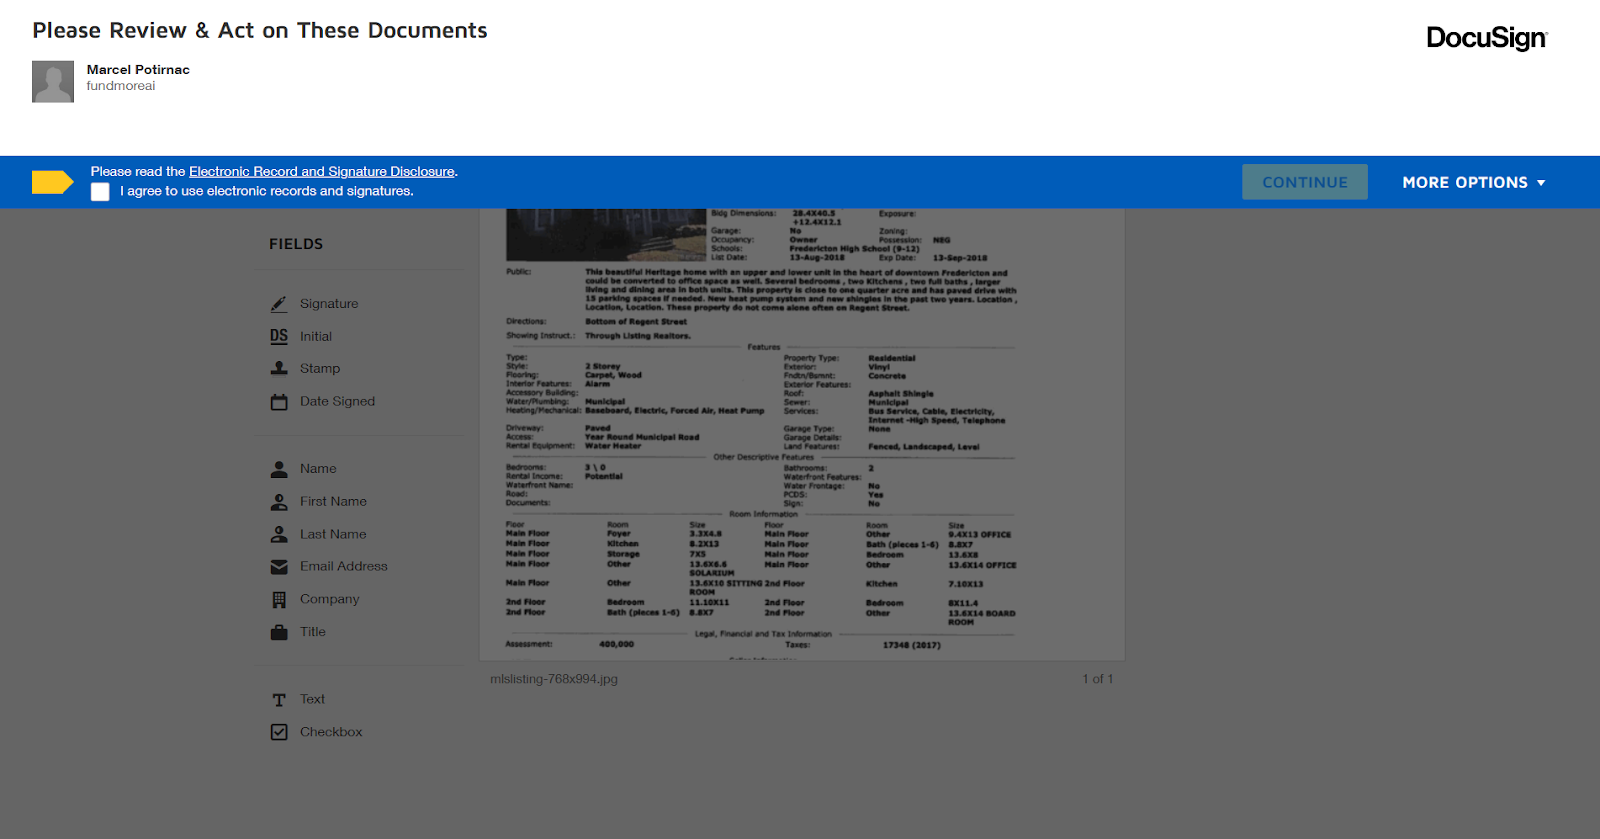
- You will be directed to the DocuSign page in a new window, where you need to Agree to sign electronically.
- Select the checkbox I agree to use Electronic Records and Signatures, then click on Continue to begin the signing process.
- Click on the “Start”/”Next”/“Sign” tags to the left of the document until all required fields have been signed.
- The fields requiring a signature will have a sign tag, click on the tag to sign.
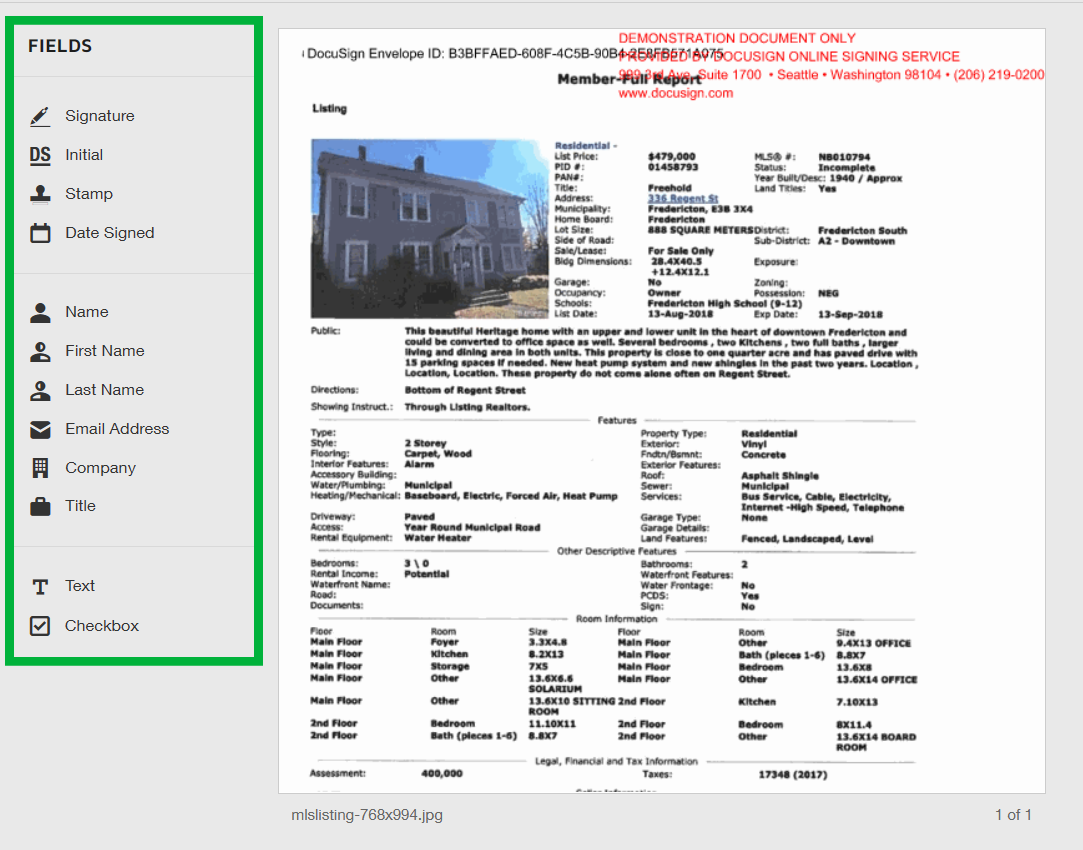
Note: If the lender has not specified the fields to sign, it is up to the stakeholder to identify appropriate fields and apply the necessary tags. To do so, use the fields to the left of the document. Click on the appropriate option, and a tag will appear. Click on the necessary field to apply the tag.
- If this is your first time signing a document in DocuSign, you will be asked to Adopt a Signature. Verify your information and make any necessary updates to your signature.
- Click on Adopt and Sign. Your signature will be added to the document.
- Once you have signed in all the appropriate fields, confirm signing by selecting FINISH.


If multiple stakeholders need to sign, the document review link will be sent to each. The signatories on documents will appear in the order they are selected within the Request Signature form. This order typically matches the Stakeholder list order in the Stakeholder widget, i.e. the Primary Applicant/Borrower is always the first stakeholder, co-applicant(s) next, etc.
Once the document has been completed, the document will automatically be sent to the lender in the LOS and a notification will be sent to the lender. The “Waiting for signature” icon will be updated to indicate that the document has been signed. Additionally, a DocuSign icon will appear next to the document name in the center of the screen.

The signed document will remain accessible in FundMore.IQ. You also have the option to download a PDF or print a copy of the document.
Password Reset
FundMore.IQ offers a straightforward process for resetting your password if you have forgotten it. This functionality is available to Stakeholders when attempting to sign in.
How to Reset Your Password:
- Navigate to the FundMore.IQ sign-in page.
- Click on the "Forgot your Password?" link below the sign-in form. This will redirect you to the password reset page.
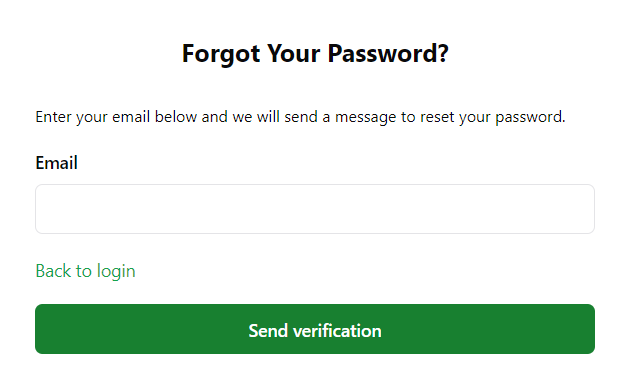
- Enter the email address associated with your FundMore.IQ account.
- Click on the "Send Verification" button. This will trigger a password reset token to be sent to the provided email address, if the email is registered in the system.
- Check your inbox for an email from FundMore.IQ containing a password reset link. If you do not see the email in your inbox, make sure to check your spam or junk folder.
- Click on the password reset link within the email. This will redirect you to a page where you can set a new password for your account.
- Create a New Password. On the password reset page, enter your new password in the designated fields. Make sure to choose a strong and secure password.
- Confirm Password Change. Once you have entered your new password, confirm it by re-entering it in the “Repeat Password” field.
- Click on the "Reset Password" button to finalize the password reset process.
- If successful, you will be redirected to the Document Request pipeline in FundMore.IQ. You can now use your new password to sign in.

Note: If you encounter any issues during the password reset process or have any questions, please contact our support team for assistance.
Multi-Language Support
FundMore.IQ features a locale system that supports multiple languages on the platform. With French language enabled, the platform can save and display translated content, facilitating seamless use in bilingual and multilingual environments.
English:

French:

IQ Notifications Table
|
Event |
Assigned Team Member(s) |
Broker: Unauthenticated View |
Broker: Authenticated View |
Other Stakeholder* |
|
New Document Request Created |
In-app |
|
|
- |
|
Document Request Note from Lender |
In-app |
|
|
- |
|
Document Request Note from Broker |
In-app |
- |
|
- |
|
Document Uploaded by Broker |
In-app |
- |
- |
- |
|
Comment from Lender [i.e. on an Uploaded Document] |
- |
|
|
- |
|
Comment from Broker [i.e. on an Uploaded Document] |
In-app |
- |
|
- |
|
Lender Approves Document |
- |
Email [includes decision and comments] |
Email [includes decision and comments] |
- |
|
Lender Rejects Document |
- |
Email [includes decision and comments] |
Email [includes decision and comments] |
- |
|
Additional Document Request Created |
In-app |
|
|
- |
|
No DocuSign Integration: Signature Request Created using Document Request Option |
In-app |
Email [Document accessible only in Authenticated View] |
Email [Document accessible only in Authenticated view] |
- |
|
DocuSign Integration: Signature Request Created using Signature Request Option |
In-app |
Email [Document accessible only in authenticated view] |
Email [Document accessible only in authenticated view] |
- |
|
Document or Signature Request Deleted |
In-app |
- |
- |
- |
|
Share Request |
In-app |
- |
- |
Email: *Sent to relevant stakeholder based on inputted email |
Product Highlights
✅ Users (Underwriter/Fulfillment) can create a list of individual documents that can be requested via a link sent to any stakeholder (request documents).
✅ Ability to create templates of documents that can be requested via a link sent to any stakeholder.
✅ Ability for the system to automatically send out a document template once the deal has been ingested.
✅ Ability to include a standard message on the links sent out for the document request.
✅ Users can send additional magic links to stakeholders added later. I.E. Solicitors.
✅ Stakeholders can upload documents via the link.
✅ The documents being requested in the link can be added by stakeholders throughout the loan process. Lenders can add or delete requested documents as needed.
✅ When updates are made to the request, notifications are sent to applicable stakeholders and the link reflects the changes.
✅ Uploaded documents will link to applicable conditions in the LOS.
✅ If an uploaded document cannot be linked to a condition it will appear in a not linked (unassigned) section of Conditions and Documents.
✅ Users (Underwriter/Fulfillment) can link unlinked documents to conditions.
✅ Users receive notifications when documents are uploaded.
✅ Documents are visible to the users as soon as they are uploaded.
✅ Users can review uploaded documents.
✅ Users (Underwriter/Fulfillment) can act on uploaded documents (accept, reject).
✅ Ability to send documents to stakeholders.
✅ Ability to update email addresses for stakeholders and identify which one is to be used to send DR link and documents to.
✅ Ability to upload and save signed documents to LOS and link them to a condition. I.E. Signed commitment condition.
✅ Ability for the system to allow more than one upload for the same document type.
✅ Ability to remove documents if uploaded based on permissions.
✅ Ability for the system to store as per defined retention periods.
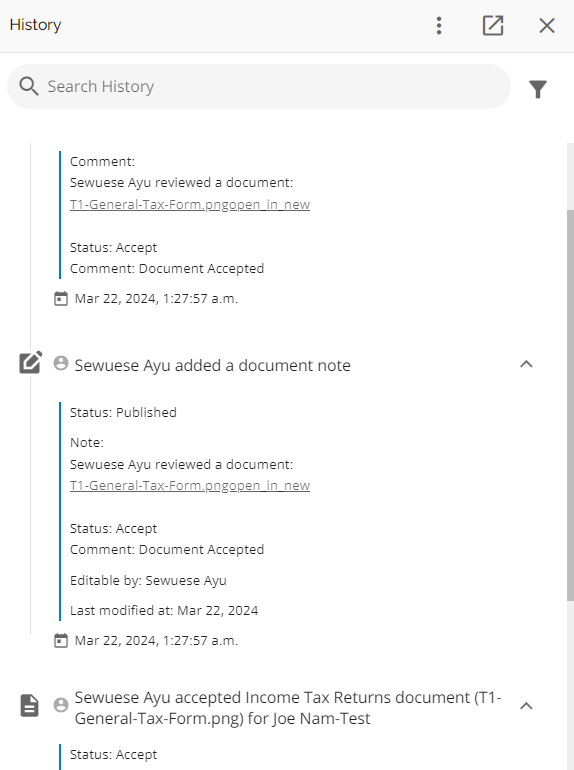
✅ Ability for the system to capture audit history of all actions (document request sent/edited, documents uploaded, documents accepted/rejected etc.
✅ Users and Stakeholders can comment on documents. Users can choose if the comment is visible externally or not.
✅ Stakeholders notified of actions taken on documents (accept or reject).
✅ Ability to request signatures on documents from stakeholders.
✅ Integration with DocuSign so stakeholders can seamlessly e-sign documents. Alternate option to wet sign documents is available, offering enhanced flexibility.
✅ Is mobile friendly for Stakeholders.
✅ Stakeholders have the option to sign up or not. The amount of information they receive is dependent on their choice. p or not. The amount of information they receive is dependent on their choice.