Table of Contents
Introduction
Features & Functionality
Adding A Lock Reason
Delete A Lock Reason
Editing Lock Reason
Introduction

Lock reasons are created to help automate the workflow of an application going through the stages of the pipeline and provide structured reasons for a user/company to lock or unlock an application. Locking an application may occur automatically (when an application is declined or marked as Funded) or manually. Locking an application can occur for various reasons, whether it has been declined due to not meeting funding criteria or it has successfully been funded.
Locking an application means that there can be no edits made to the application and some actions are blocked. Actions that cannot be taken on a locked application include the following: Manage Duplicates, Merge Application, & Decision (Pend, Conditionally Approve, or Fund) unless you unlock it first. You will know this because those actions will be grayed out. Actions that can be taken on a locked application are Clone, Export as CSV, Send to Closing Services, Archive, Unlock, Related Applications, and Delete. You are able to set up your own lock criteria in the Lock Reasons section of Manager Portal.
Location
To find the Lock Reasons section, follow these steps:
- Navigate to the Manager Portal from the top menu.
- In the Manager Portal, select the “Lock Reasons” option from the left sidebar.
Features & Functionality
Search box - Located on the top left corner of the section, just below the top header ‘Lock Reasons’. In the search box, you are able to enter text/keywords related to the previously created lock reasons. All lock reasons with the search criteria in them will appear in a list below.
‘Add New Lock Reason' Button - Enables you to create a new lock reason.


Sorting the Lock Reason List - Columns can be sorted by ascending or descending order by clicking on the arrow to the right of the heading title. When the arrow is facing upwards, the list is sorted in ascending order. When it is facing downwards, the list is sorted in descending order.
Ascending: Descending:

Type - Drop down menu choice of Lock or Unlock.
Reason - This is the reason for locking or unlocking the application. (i.e. CANCELED)
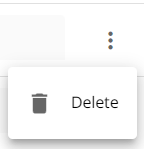
Ellipsis - Clicking on the ellipsis opens up the option to delete a lock reason if necessary.
Items Per Page - Depending on how large your list is, you may have more than one page of Lock reasons. To navigate through pages use the Items Per Page navigation at the bottom right hand side of your screen. With this functionality you can indicate how many items per page you would like to see in groups of 10, 15, 25, 50, or 100. You can see how many pages there are and scroll forwards and backwards through the pages if need be.


Adding A Lock Reason
To add a new lock reason, follow these steps:
- Click the ‘Add New Lock Reason’ button.
- In the pop-up that appears, enter the data into the relevant fields which consist of: Type & Reason.
Note: All fields are required, as indicated by the asterisk to the right of the field header and the red underlining of a field when a line does not meet the requirements. - Click on the ‘Create Lock Reason’ button when you are done updating the new lock reason information. Your reason will be added to the list.
Delete A Lock Reason
To delete a decline reason, follow these steps:
- Find the reason you wish to delete in the list and navigate to the inline ellipsis to the far right.
- Click on the ellipsis and select the “Delete” option.
Your selection will be removed from the list.
Editing Lock Reason
To edit the details of a Lock Reason, follow these steps:
- Find the reason you wish to edit in the Lock Reason list.
- In the line of the reason, find the field you wish to edit and click on it.
- Update the data as necessary in the field.
The system will automatically save any updates made.