Table of Contents
The Origination Pipeline View Ellipsis
Unassigned Deals in Role-Linked Stages
Performing Actions at the Application Level
Introduction
The Origination Pipeline is where users can see all the applications assigned to them, unless they have roles with broader permissions to view, edit, or engage with deals beyond their own. You can easily manage applications in the pipeline and track the stage of each application, along with their unique qualifying information. This includes details like whether the applicant is a Company or an Individual, the Applicant's Name, Other Stakeholders (co-applicants or guarantors), the Application's Status (approved, locked, or product change warning), the Subject Property Address, the Loan Amount, the Loan Number, the Deadline to Accept Date, the Closing Date, the Broker Information, the Team Members Assigned to the deal, and the Application Source (Ingested from Filogix, Velocity, or Lendesk, or Manually Created). The Origination Pipeline provides a quick and concise way to review deals and see a high-level overview of their information and stages.
Pipeline loading optimization
NOTE: This is controlled by a tenant setting that is disabled by default. If you would like this setting enabled, please contact the Client Success team.
Introduced as a system optimization to improve performance and stability, this update enhances how application data is loaded within the pipeline.
It resolves issues caused by large data loads, improving reliability and reducing performance bottlenecks. Pipeline streaming has been introduced (initially for key views: default view and approval-requested view), along with a feature flag to safely manage rollout and monitor impact.
Supporting updates to configuration and dependencies have also been included to enable these improvements.
Automatic Assignment: The Automatic Assignment feature is enabled when User Preferences, Approval Limits, and maximum deal capacity are configured in User Management within the Manager Portal, and the Automations are turned on within the Company Settings. If these are set up and activated, applications will be automatically assigned to users based on the preferences established in the Manager Portal. This ensures that users only see the deals that are relevant to them in their pipeline views.
Origination Pipeline
Upon logging into FundMore.ai, you will be directed to the Origination Pipeline page by default. To navigate to the Origination Pipeline while anywhere else in the system, go to the top menu and click Origination Pipeline.

Note: You can see which page you are on by the colored underlining of the header in the top menu. For instance, while in the Origination Pipeline View you will see it underlined:

When you first access the Origination Pipeline, the applications are by default organized according to the Priority, with the Critical priority applications appearing at the top and the low priority ones at the bottom - this applies to each stage within the pipeline. The Origination Pipeline will display all deals for you and your direct reports, if applicable.
There are two views available to view the Origination Pipeline - Board (Kanban) and List:
- The Board view, represented by a multi-part box icon
 , displays applications on a Kanban board that represents the stages of the application. Each record on the board provides key summary information about the application. The application tiles within the stages can be expanded by selecting the 'Expanded View' toggle.
 - Note: The board view is a more compact view than the list view and more "applications" can be seen at a glance in the board view.
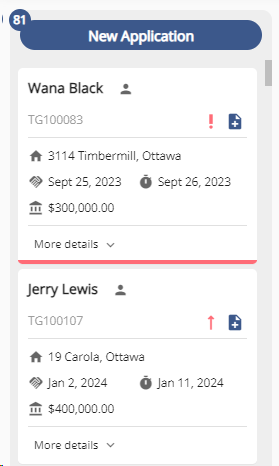
- Each stage in the board view displays a counter at the top, which reflects the total number of applications currently in that stage. The counter helps users monitor the workload and progress at a glance. When the number of applications reaches 99 or more, the counter will display as 99+, indicating that there are at least 99 applications in that stage. This cap is designed to provide a quick view without overwhelming the display with high numbers.

- The List view, represented by a horizontal line icon
 , displays applications in a sortable list. Each application in the list includes key information. To sort the list, simply click on a column heading. Clicking again will reverse the sort order.
 - In the list view, there may be a scroll bar on the right hand side of the screen to scroll the list vertically as needed. You will notice the default sort is by Priority in descending order.

Users have the option to set their preferred view as the default in the system. By default, the system displays the Board view, but if a user prefers the List view, they can set it as their default view. The system will automatically default to their preferred view whenever they log in or access the Pipeline. To do so, the user simply needs to access Settings, scroll down to the User Settings section and click on their preferred choice in Pipeline View:
|
Board: |
List: |
|
|
|


Pipeline View for Multiple Mortgages
We have enhanced our pipeline to improve visibility for applications with multiple mortgages. Now, this information is displayed in both the default and list view.
Board (Default) and List View


Expanded Board View

Scroll Bars - Depending on the number of stages your instance has, you may or may not see all stages on one screen. If you need to, you can utilize the scroll bar located at the bottom of the screen to scroll horizontally as needed. There are also scroll bars to the right of each stage to scroll vertically as needed.
Filtering
Both views display all in-progress applications with options to show deals with 'Approvals' (i.e. applications that require approval), show 'My requests', show 'Overdue applications', and show 'Unassigned Deals' as well as enhanced filtering. Filtering is multiselect meaning you can combine filters. You can also combine filters with the sort function.
These filtering options can be found in the top left corner of the Pipeline View, below the Applications header and the ‘Create New Application’ button.
Note: As seen below, your filter options may vary depending on your permissions.


Approvals - Displays all applications sent to the user for approval that have not yet been reviewed.
My Requests - This filter is particularly useful for managers or users who have direct reports. By selecting this filter, managers can easily separate their team's deals and focus on their own deals. For users with team members, the Application Pipeline will automatically display all applications for both themselves and their team members. My Requests show the deals assigned to the user and any deals created or submitted by the user - depending on their permissions for their role. Meaning, if a user does not have the permission ‘"List Own Applications in Pipeline" enabled they will not see applications they created.
Overdue Applications - Filters the pipeline to show only applications that have overdue tasks. Its purpose is to provide the users with a tool to help them prioritize their work.
Unassigned Deals - This filter allows you to view and manage only unassigned deals in the pipeline. Unassigned deals are deals that have not been assigned to any user. The availability of this filter depends on the permissions assigned to your role. The filter includes a counter that shows the number of unassigned deals in the pipeline. This means that in addition to the other deals within their pipeline, users with the relevant permission can also see the unassigned deals in their pipeline. Once a deal is assigned, the deal will no longer appear in Unassigned Deals. This is particularly useful for lenders who need to quickly identify and manage unassigned deals as needed.
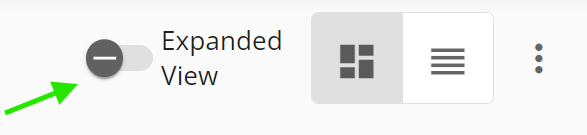
Expanded View - Available in Board or Kanban view only. Toggle on to increase tile size to display more information if applicable.
Filter Icon (Enhanced Filtering) 
We have enhanced the filtering capabilities within the Pipeline View. The filter options include: Stages (Multi-select), Product Statuses (Multi-select with No Status option available), Application Statuses (Multi-select), Priority (Multi-select), Application Type (Multi-select), Application Purpose (Multi-select), Ingestion Source (Multi-select), Products (Multi-select), Days After Closing (Multi-select), Term Range, Closing Date, Deadline (i.e. Deadline to accept), Condition of Financing Date, Creation Date, Last Modified Date, & Source of Business (Multi-select).
Note: When the No status option in the Product Statuses filter is applied, it will remove any applications from the pipeline that have a status applied. In the case of an application with multiple products, if any one of the products does not have a status but the others do, this application will continue to show in the filtered results.

The filters can be combined as needed. In the example below, the Pipeline View is filtered to show deals in the Underwriting stage with a Critical priority. A filter counter will appear above the filter icon whenever a filter is selected. This counter dynamically adjusts as filters are applied or removed to serve as a visual indicator for users.

Users with Direct Reports
If a user has direct reports, they can switch their pipeline to see the deals for those individuals. When they switch to the pipeline view of their direct reports (Show My Team Applications), they can filter the pipeline view by the following:
- All My Team Deals
- Single or Multi-Select between my team members and just see a subset of deals
- Applications that have overdue tasks based on their team member selection
They will not see the “My Requests” or Unassigned Deals filters any longer and by default they will see all deals from their own reports. However, the Direct Manager will be able to toggle between their My Team Applications Pipeline and Origination Pipeline with ease.
Note: Currently this functionality only allows for 1 level of filtering. Meaning if a user has multiple levels of direct reports, they can only filter their immediate direct reports. It will not take into consideration those that are reporting into their direct reports.


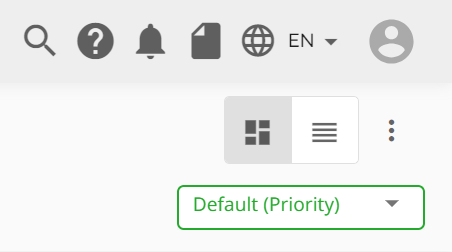
Sorting View
In the Board view of the pipeline, you can sort applications by different categories such as Default (Priority), Applicant Name, Updated Date, Creation Date, Mortgage Broker, Application Stage, Loan Number, Closing Date, Decline To Accept, and External Loan Number. To sort, simply click the 'Default (Priority)' drop-down menu located on the top right of the page, just below the board or list view buttons. Each view will organize the applications in the pipeline based on the selected category within their respective stage column. For example, if you choose to sort by Updated Date, the view will arrange the applications in each stage starting with the most recent date(s) and descending to the oldest update date(s). If you sort by Closing Date or Deadline To Accept, the applications will be sorted to show the earliest (oldest) deals at the top, and the more recent ones at the bottom. Sorting is single select only, but can be combined with Filtering.

Searching Applications
There are two search boxes to keep in mind, each one behaves differently:
- Global Search: Accessible via the search icon (magnifying glass) in the top navigation menu (to the left of the help icon) - this search function displays results for origination, archived, and servicing deals. Each result clearly identifies which pipeline it belongs to, allowing users to search across all pipelines, provided they have the necessary permissions. Please note that it will be searching Origination, Servicing and Archived applications.
To do a global search for a specific application, simply click on the magnifying glass icon. From there, you can search by the applicant's name, phone number, or broker name.
As you type in the search field, the display will automatically update to show only borrowers that match the entered text. If you want to see all active borrowers, simply remove the entered text.
Note: The borrowers you see will depend on your permissions.
![]()

-
- Pipeline-Specific Search: Located at the top left of the page in the Origination, Servicing & Archived (origination & servicing) pipelines, to the right of the Applications header. This search dynamically updates as you type and only shows deals relevant to the selected pipeline - either origination, servicing, origination archived, or servicing archived.
To search for a specific application in any of these pipeline views, simply click in the search bar. From there, you can search by the applicant's name, broker name, subject property address, phone number, application # or loan #.
As you type in the search bar, the display will automatically update to show only borrowers that match the entered text. If you want to see all active borrowers, simply remove the entered text.
Note: The borrowers you see will depend on your permissions.


Pipeline Icons
|
Icon |
Name |
Description |
|
|
Individual Icon |
Indicates that the application is associated with an individual. |
|
|
Company Icon |
Indicates that the application is associated with an company. |
|
|
Ellipsis |
When clicked, a drop down menu appears with application options (e.g. manage duplicates). These options do not include Funding or Declining a deal. These actions can only be done within the application (i.e. in the Dashboard). Note: you must hover on the top right of the tile for the Ellipsis to appear. |
|
|
Warning Icon |
Indicates if the product(s) used in the application have been changed after being applied or if there is an outstanding DLA required. |
|
|
Manually Created Icon |
Application was created manually. |
|
|
Clone Application Icon |
Application was created through cloning another application. |
|
|
Merge Applications Icon |
Application was created through merging with another application. |
|
|
Uploaded from PDF Icon |
Application was created through uploading a PDF application. |
|
|
Lock Icon |
Indicates the application has been locked. |
|
|
Ingested from Filogix Icon |
Application was ingested from the POS Filogix. |
|
|
Marked as Pending icon |
Application was marked as pending. |
|
|
Ingested from Velocity Icon |
Application was ingested from the POS Velocity. |
|
|
Ingested from Lendesk Icon |
Application was ingested from the POS Lendesk. |
|
|
Primary Property Address Icon |
Subject property address associated to the application. |
|
|
Closing Date Icon |
Date the application is scheduled to close or fund. |
|
|
Acceptance Deadline Date Icon |
Indicates the date by which the client needs to sign back the commitment in order to proceed with the application. |
|
|
Insurer Pending Icon |
Indicates application has been submitted to insurer and is pending decision. |
|
|
Insurer Error Icon |
Indicates application has been submitted to the insurer and has errors in the submission. |
|
|
Insurer Approved icon |
Indicates application has been submitted to the insurer and has been approved. |
|
|
Conditionally Approved Icon |
File has been marked as Conditionally Approved. |
|
|
Loan Amount Icon |
Identifies the loan amount associated to the application. |
|
|
Task Status Indicator |
The task status indicator is color-coded to help users quickly identify if a deal has outstanding tasks and the status of the task that is due soonest. The colors indicate if the task is overdue, due shortly, or due in the future. Additionally, when hovering over this line, users can view the actual time left on the task that is due soonest. |
|
|
Priority Status Indicators |
These icons allow users to identify the priority status of an application. There are four priorities to choose from: Critical, High, Medium, and Low. Each priority level is visually represented by a distinct color-coded icon, as described below: - Critical Priority: Represented by a Red Exclamation. - High Priority: Represented by a Red Arrow. - Medium Priority: Represented by a Yellow Arrow. - Low Priority: Represented by a Green Arrow. |


Avatar Profile Icon for Deals
When users are in the Pipeline View, they are able to see at a glance who is assigned to a deal. The assigned users are represented in an avatar profile icon at the top right corner of the deal card. Furthermore, if they hover over the icon, it will display the name of the user. If no one is assigned to the deal, they will see an unassigned icon. The avatar profile icon will either display with a user’s initials, or, if they have uploaded a profile picture in their user settings their profile picture will display.
Board/Kanban View:

List View:

Priority Setting for Deals
We have implemented a feature that allows users to identify per application the priority level of that deal. Users can set the priority from directly within the application, or within the pipeline view (i.e. both board and list views). There are four priorities to choose from: Critical, High, Medium, and Low. The priority can be reset to None after it is initially set if need be. Each priority level is visually represented by a distinct color-coded icon as seen below:

Within the pipeline view, priority-based sorting is the default view. This means that applications will be displayed in order of priority from top to bottom, allowing users to quickly identify and address high-priority items.
Pipeline (Board) View:
|
|
|

Pipeline (List) View:

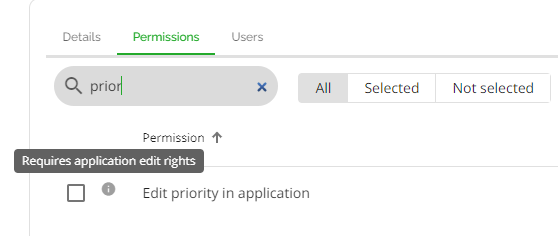
The permission required to utilize this feature is called “Edit priority in application” permission. If a role has this permission enabled, the users assigned to that role are able to edit the priority status of applications. The permission defaults to toggled off for all roles.
Whenever a priority status on a file is added, removed, or changed, users will receive an in-app notification, unless they have muted their notifications.
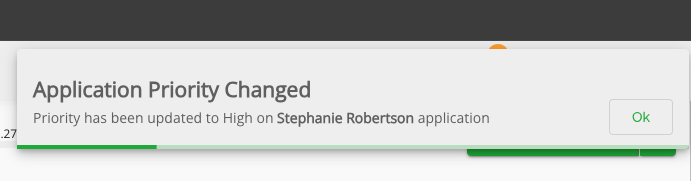
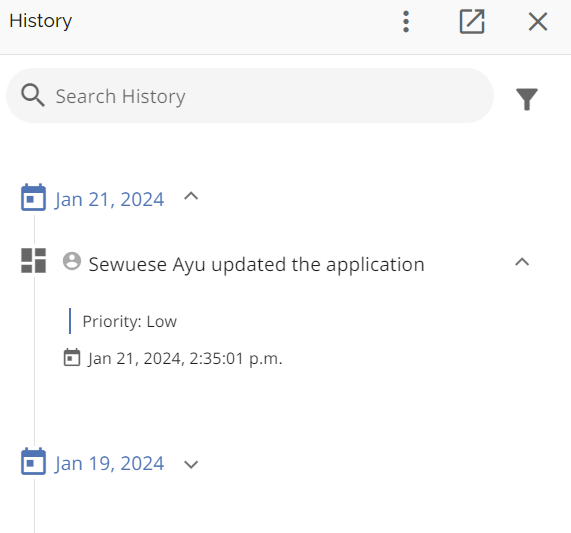
When the priority for a deal has been updated, a history log is created to indicate the change.
The Origination Pipeline View Ellipsis
-png.png?width=450&height=318&name=Untitled%20design%20(4)-png.png)
Show Archived Applications - To view any archived applications, go to the top right corner of the page next to the board and list view buttons. Click on the ellipsis, and a drop-down menu will appear. Select the ‘Show Archived Applications’ option. You will be directed to the Archived Applications screen. You will notice that regardless of your pipeline view preference (board or list) the Archived Applications pipeline view displays in list view. The default view is in order of priority as is the Origination pipeline with Deadline Date (oldest to farthest) being the secondary order. While you are in the Archived Pipeline view you will see an orange banner across the top providing you with the option to return to the Active Applications Pipeline.

Note: Archived Applications were designed to serve as a tool for maintaining a clutter-free pipeline. They allow you to move older applications that are no longer active, ensuring they can still be accessed if needed, but are kept out of your day-to-day view.
To return to the Active Applications Pipeline View, in the orange header bar on the top of the page, click on ‘Return to Applications’. When clicked, this will redirect you to the active applications pipeline. Alternatively, you can click on the ellipsis in the top right corner and select the “Show Active Applications” option.

Show My Team Applications - By selecting this option, you will be directed to the pipeline view of your team's applications. Note: You can only access this option while in the Origination Pipeline view (active applications pipeline). The option will be greyed out in the Archived Applications pipeline view. In this view, you will notice that the filtering options have changed slightly and you no longer see the Approvals, My Requests, or the Unassigned filters. By default the Show My Team Applications Pipeline view will display with all applications for all your team members filtering out your applications. You can then filter applications by team member (single or multi-select) and overdue status as well as the same additional filters (Stages, Product Statuses, Application Statuses, Priority, Application Type, Application Purpose, Ingestion Source, Products, Days After Closing, Term Range, Closing Date, Deadline, Condition of Financing Date, Creation Date, Last Modified Date, & Source of Business). The sorting function in this view remains the same as the Applications pipeline view. This feature provides managers and users with team members the flexibility to quickly view and take necessary actions on their team member's applications and manager service levels, if needed.

As in the Applications pipeline view, you have the ability to switch between Board or List view and have the same functionality in these views as you do in the Application Pipeline view.
It should be noted that the My Team Applications pipeline only goes down 1 level (direct reports only). Multiple levels of direct reports will be addressed via reports.
Changing Stages
In the Board view, you can easily move a file from one stage to the next by dragging and dropping the tile, as long as there are no pending tasks. Stage transition is sequenced. This means that you can only move forwards or backwards one stage at a time. We have chosen to do this in order to prevent any possible skipping of tasks and ensure a tighter process for lenders.
If there are tasks outstanding, the user will get a pop up message indicating that there are tasks outstanding that must be completed first. If the user has the appropriate permissions, they may be able to move the application to the next stage by performing a Force Stage Completion. If they do not have those permissions, then they must complete the tasks before moving the application to the next stage.

B
Block Stage Transition: Adjudication
Note: This is a tenant specific setting and may not apply in your environment.
The system will block an application from moving forward if an application is marked as Pending after the adjudication stage. In that instance, the application can still move backward but not forward.
Finally, if an application has progressed past the adjudication stage after being conditionally approved and is subsequently moved back to adjudication, you will notice the appearance of a "re-adjudication" icon at the top of the dashboard.

Unassigned Deals in Role-Linked Stages
We have implemented functionality to link a role to application stages. This is set up in the Manager Portal by Admin level users. The linked stages functionality offers the ability to use the stages as queues of unassigned work. Lenders are able to link a role to one or more application stages. When an unassigned deal within a stage is linked to a specific role, all users with that role will see the deal in their Pipeline View. For example, there is an unassigned deal in the Document Review stage, and the Ops Fulfillment role is linked to that stage. If no user with the Ops Fulfillment role is assigned to the deal, all users with the role will see the deal in their Pipeline View until a user with the applicable role is assigned.
Note: This will not apply if the role is unassignable, as an unassignable role cannot be linked to stages. Furthermore, once someone is assigned or self-assigns to that role for a particular deal, the deal will no longer show up in the Pipeline View for other users with the same role.
Also important to note are the pipeline permissions that are assigned to the roles. If the permission “List applications in pipeline” meaning all applications - created by or assigned to anyone is enabled, the application will continue to show in the unassigned user’s pipeline even if someone has been assigned to that role.
Performing Actions at the Application Level
Board View

List View

From any application within the pipeline, you are able to perform the functions of Managing Duplicates, or Setting Priority.
Note: These options may differ depending on the tenant's environment.
In the Board view, click on the ellipsis that becomes visible when you hover over the application card. Click on the ellipsis and a drop down menu will appear with the appropriate choices. Click on the action you wish to proceed with.
In the List view, the ellipsis is to the far right of the application line. For more information regarding Manage Duplicates see the corresponding Product Feature Guide.