Table of Contents
Manage Duplicates Pop-up Screen
Merge Applications (Deprecated - No Longer Available)
Finding the Second Application to Merge
Selecting the Second Application
Conflict between 2 Applications
Editing Merged Application Data (Deprecated)
Confirm Actions and Merge Applications Pop Up
Introduction
The Related Applications feature allows you to check if multiple applications have been submitted with the same applicants, property address, or broker. It also shows the application stage to determine if the related application is active, declined, or archived.
The Manage Duplicates feature allows you to handle multiple applications at once by choosing an action for each individual application. You have the options to keep, decline, delete, or archive the application.
The Merge Applications feature allows users to combine the two similar applications into a new active application. This functionality has since been deprecated (removed) from the system.
Note: There is no automation in the LOS to indicate if there is a duplicate or related application if not a resubmission! Users must use the Related Applications functionality to search for related or duplicate applications.
Related Applications
Location
- Select Pipeline View found on the top menu.
- Click on the application you wish to work in.
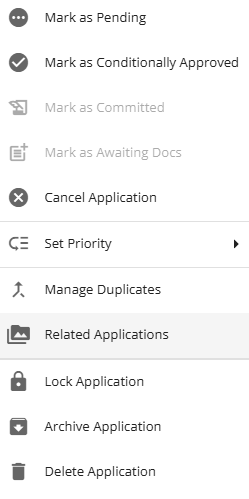
- In the application dashboard, click the ellipsis (
) found beside the ‘Decline’ button.
- Selected “Related Applications” from the drop down menu.
Related Applications Pop-Up

Within the Related Applications pop-up, users can see applications with similar borrowers, subject property address, and brokers. Each tab displays the primary applicant, Other Applicants, Current Application Stage, Address, Purpose, Loan Amount and Closing Date.
Borrower Tab - This is the default tab containing a list of applications with the same applicant names.
Property Tab - This tab generates a list of applications with the same subject property address.
Broker Tab -This tab generates a list of applications that have the same broker associated with the deal.
Note: For an application to list as a related application the values must be an exact match. I.E. Property Tab. There is an application with the subject property listed as 19 Carola Street, Nepean, Ontario K2G 0X9 and another application with the same property address listed as 19 Carola St., Nepean, ON K2G 0X9. These will not match on property because of the input differences (Street vs St and Ontario vs ON).
This will apply to all tabs - borrower, property, & broker.
To take a deeper look at an application within the generated list, click on the applicant’s name found in the “Primary Applicant” column. This will redirect you to that application dashboard in a new tab.
Archived applications are marked with an icon () that appears on the far right of the pop-up screen (beside the ‘Closing Date’ column).
Note: This feature is for viewing purposes only. If you identify any active applications that you would like to archive, decline, delete or keep, proceed to the Manage Duplicates section.
Manage Duplicates
The Manage Duplicates functionality allows you to view and manage active applications with the same primary applicant and property address. It is intended to clean up the list of active applications on the Pipeline View by selecting one of the options found in the Action dropdown menu. These options include: keep, decline, delete, or archive.
Location
You can access the Manage Duplicates feature in two different locations, Pipeline View and Application Dashboard.
Pipeline View Location - Within the Pipeline View, hover over the application you wish to manage. Click the ellipsis that appears in the top right corner of the application tile and select ‘Manage Duplicates’ from the drop-down menu,

Application Dashboard Location - Select the application you wish to manage. In the application dashboard, click the ellipsis found beside the ‘Decline’ button and select “Manage Duplicates” from the drop-down menu.

Manage Duplicates Pop-up Screen

The Manage Duplicates pop-up displays the current application selected and a list of other applications with the same Primary Applicant and Property Address. The application you selected is the first application on the list in the green text, and the similar applications are identified below with a black text. In the ‘Action’ column, you can select an option from the drop down menu for each individual application to organize them as desired.
To view an application from the list, click on the text in the ‘Loan #’ column. This will redirect you from the pop-up screen into the other application's dashboard.
Actions
In the Manage Duplicates pop-up screen, you can select one of the four options found in the drop down menu in the Action column. The options include:
Keep -This keeps the application active. When selected, the application will remain in its current stage.
Delete - The application is deleted from the system. FundMore.ai does not advise deleting any applications.
Decline - The application will be locked and will move to the “Decline” stage.
Archive - The application will no longer be active and can be viewed in the “Show Archived Applications” Pipeline View. This is not a permanent decision and applications can always be unarchived.
Once you have selected the desired action for each application, click on the ‘Confirm Actions’ button. This will execute the actions selected in the Action column.
The Decline and Archive actions can be undone if needed. You simply follow the directions for taking an application out of Decline or Unarchiving the application.
Merge Applications (Deprecated - No Longer Available)
Note: This functionality is NOT available in production environments, only in some sandbox environments.
The Merge Application functionality is intended to be used to clean up multiple submissions of the same applications in the early stages of underwriting. You can find the function of merging applications through the Pipeline View and in the dashboard of an application.
Note: The merge application functionality is disabled if the application is in the ‘Funded’ or ‘Declined’ stage.
Pipeline (Kanban/Board) View

- Navigate to the Pipeline View.
- Find the application you would like to merge.
- Hover your mouse over top right corner of the application tile and an ellipsis will appear.
- Click on the ellipsis and in the drop down list select ‘Merge Applications’.
Pipeline (List) View

- Navigate to the Pipeline View.
- Find the application you would like to merge.
- Click on the application ellipsis and in the drop down list, select ‘Merge Applications’.
From Application

- Find the application you would like to merge and click on it to enter the dashboard.
- In the application dashboard, navigate to the left side menu and click on the ellipsis next to the 'Decline' button.
- In the drop down list, select the ‘Merge Applications’ option.
Finding the Second Application to Merge

A list of similar applications will appear in a pop-up. A similar application is one that has the same primary applicant name (any part of the name that matches, such as First Name or Last Name), or the same subject property address. You can select the second application from the list by clicking on it.
To take a deeper look at a secondary application in the list, you can click the view application button on the far right of each application in the list. This will open the application dashboard of the selected application in a new tab of your browser.

Selecting the Second Application

Once you have decided on the second application, highlight it by selecting it. Once selected, click on the ‘Compare Applications’ button.
Comparing Applications Page

Top Warning Bar
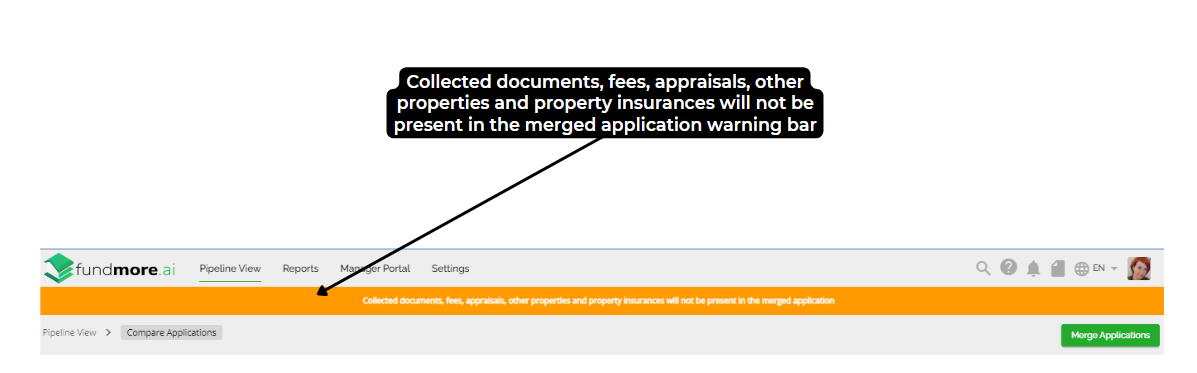
Currently, any collected documents, fees, appraisals, other properties and property insurances will not be present in the merged application. You will need to update these in the new merged application manually. Furthermore the application tasks, conditions and chats will not transfer over. The warning bar will appear as a reminder of this every time you merge applications, serving as a helpful prompt for the user.
Conflict between 2 Applications

First Application
This first application is the application that was initially selected when beginning the merging process. On the merging application page, all data in the Preview of Merged Application will be based on this application, indicated by the presence of green checkmarks.
Second Application
The second application refers to the application that was chosen from the generated list when you initially clicked on the merge applications button or from the list that appeared after searching for a secondary application in the same pop-up.
Preview of Merged Application

The "Preview of Merged Application" section displays the data from the first application selected for merging. It provides a preview of all the data selected from the conflicting applications, as well as any manually entered information. This section allows you to preview the new application data before it is finalized.
Editing Merged Application Data (Deprecated)
There are three ways to edit the data in the "Preview of Merged Application" section.
- By clicking on the “All Application Data Viewed” checkbox
- Clicking the individual checkboxes associated to the conflicting fields located in each application section.
- Entering data manually in the ‘Preview of Merged Application” section fields.
All Applications Data Viewed Checkboxes

To switch the view of all fields between the first and second applications, select the checkbox located in the top right corner of each application section next to the applicant's name.
Note: By checking this box, you will apply all the fields of the selected application. If you have checked boxes in both applications or manually entered data, this function will take precedence and populate the fields with the information from the selected application.
Individual Conflicting Field Checkboxes
In the ‘Conflicts between 2 Applications’ section, you can choose a specific field and view the data by selecting the checkbox beside the conflicting information. Only fields that do not match appear as conflicts.
Manually Entering Data in ‘Preview of Merged Application’ Section
If the data is incorrect in both applications, you can manually input the correct information.
Note: If you manually enter data into a field and then select a checkbox in the 'Conflicts between the 2 applications' section, the data associated with that checkbox will replace the manually entered information.
When all fields are completed to your satisfaction in the Preview of Merged Application section, click the ‘Merge Applications’ button.

Confirm Actions and Merge Applications Pop Up

Once you have clicked the Merged Application button, it will open a pop up where you will need to decide whether you would like to archive or delete the other application(s). This action can be done through the drop down menus to the right of each application in the list. The drop down menu defaults to delete. Once you decide on archive or delete, select the ‘Confirm Action and Merge Applications’ button. This will complete the Merge Applications process.
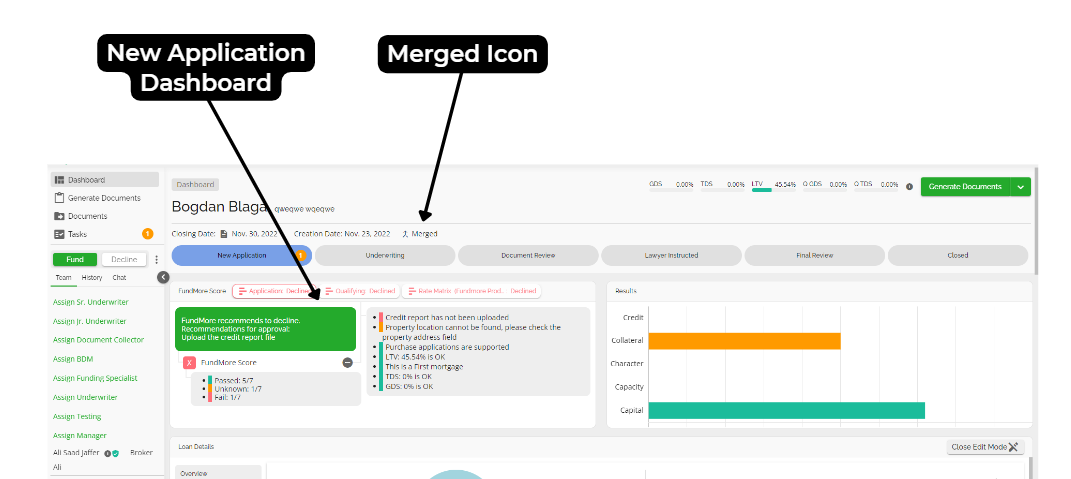

If there are no errors, the system will redirect you to the dashboard of the new application created. You can locate the archived applications in the archived applications section of the Pipeline View. Any deleted applications will be removed from the system. When the new application is created and displayed on the Pipeline View, there will be an icon on the application showing it was "Merged". When you click into the application dashboard, this icon also displays at the top of the application.
To understand more about Archived Applications, view the Pipeline View Product Feature Guide.
Troubleshooting 'Merge' Errors

If you encounter any difficulties while trying to merge applications, you can resolve them by reviewing the "Preview of Merged Application" section. Typically, the fields causing errors will be highlighted with red underlining. Simply go through these fields, make any necessary updates, and ensure that they contain accurate data. Once you have addressed the fields with new information, you can proceed by clicking the "Merge Applications" button and completing the "Confirmed Actions and Merge Applications" process.