Table of Contents
Registration Process for FundMore.ai Support
Customer Portal Features and Functionality
What Happens When FundMore Receives Your Ticket
Introduction
We have revamped our support process to enhance the user experience. Recognizing the importance of seamless communication and efficient issue resolution, we have updated our customer portal, which serves as the central hub for all your support needs. The portal streamlines the process for ticket submission, tracking, and management. This guide will be a comprehensive resource to understand the support process.
Registration Process for FundMore.ai Support
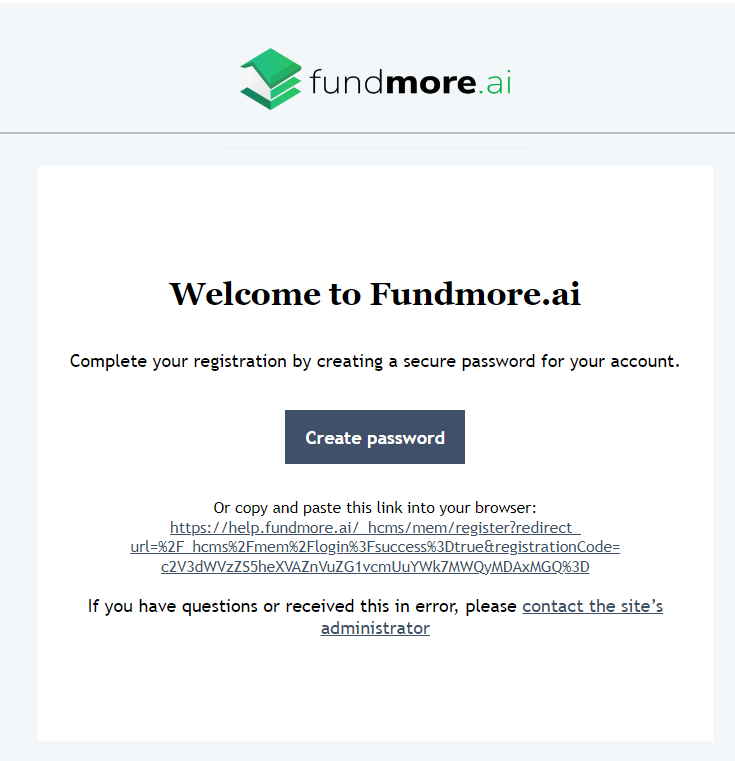
- You will receive an email invitation to register for an account in the Customer Portal.
- Click on the Create Password button. Alternatively, you can use the link included in the email. Simply copy and paste it into your browser.
- This will direct you to a page where you need to set up your password.
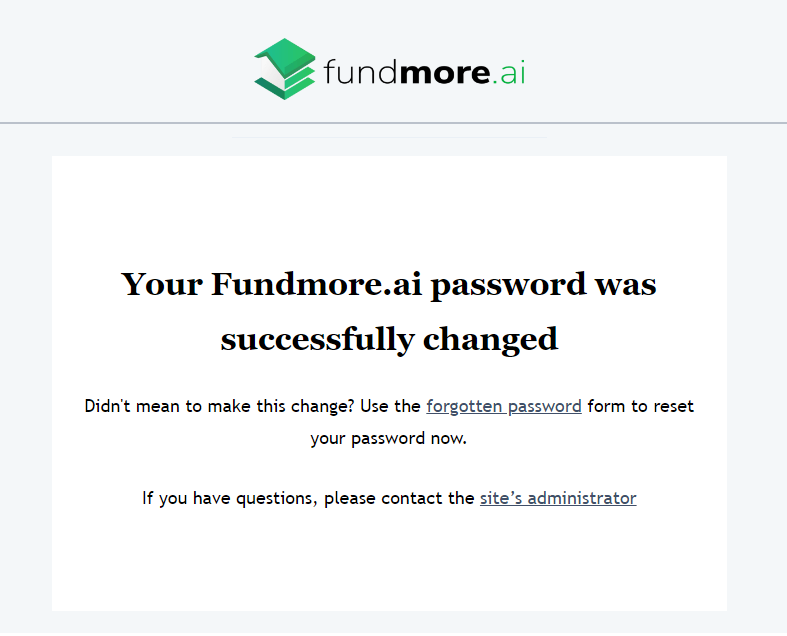
- Enter your password in the Password and Confirm Password fields. Both passwords must be identical, and must adhere to the password requirements displayed on the screen.
- Once completed, click on the Save password button. This will update your account in the system.

You will be directed to the login screen where you can use your credentials to login. Also, you will receive an email notification confirming that the password has been successfully changed.
Note: If at any time you need assistance, simply click on the “Contact the site's administrator” link to reach out to the system administrator/support team.
Once your account has been set up, you can proceed with submitting your support ticket.
Customer Portal Features and Functionality
Tickets Pipeline
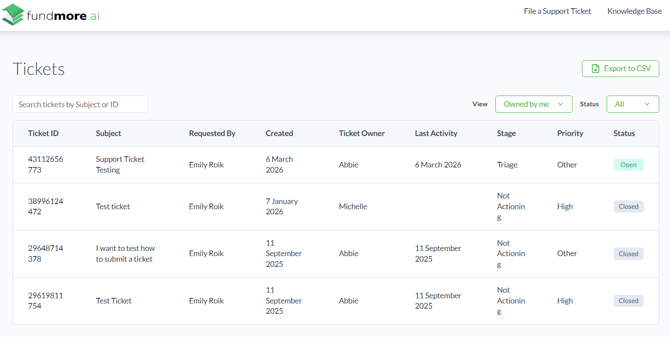
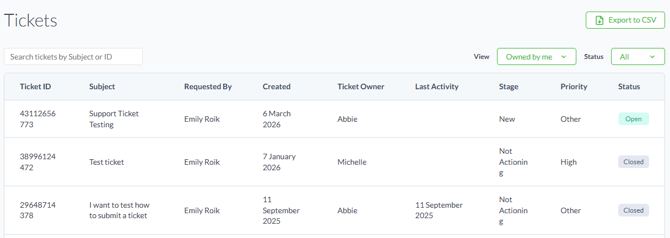
The Tickets pipeline is your gateway to managing support tickets. It is the first page you see as you log into the customer portal, and displays all existing tickets in a list view. The tickets are sorted by creation date in descending order, meaning that the newest tickets appear at the top of the list, while the oldest tickets appear at the bottom. There are nine columns within the pipeline:
- ID: Unique identifier assigned to each ticket. We will refer to this as the Ticket ID#
- Subject: Brief description or title of the ticket.
- Requested by: The individual within your organization that initially submitted the ticket.
- Created: Indicates the date the ticket was initially submitted.
- Ticket Owner: The member of our CS Team that this ticket is assigned to.
- Last Activity: Indicates time elapsed since the last interaction or update on the ticket.
- Stage: Indicates the current step of the ticket within the support workflow.
Stages include:
-
- New
- Triage
- Investigation
- In Progress
- Waiting on Contact
- Pending Preview Deployment
- Pending Prod Deployment
- Closed
- Not Actioning
- Priority: The severity of the issue. Priorities include: Critical, Urgent, High, Other.
- Status: Current status of the ticket i.e., Open or Closed.
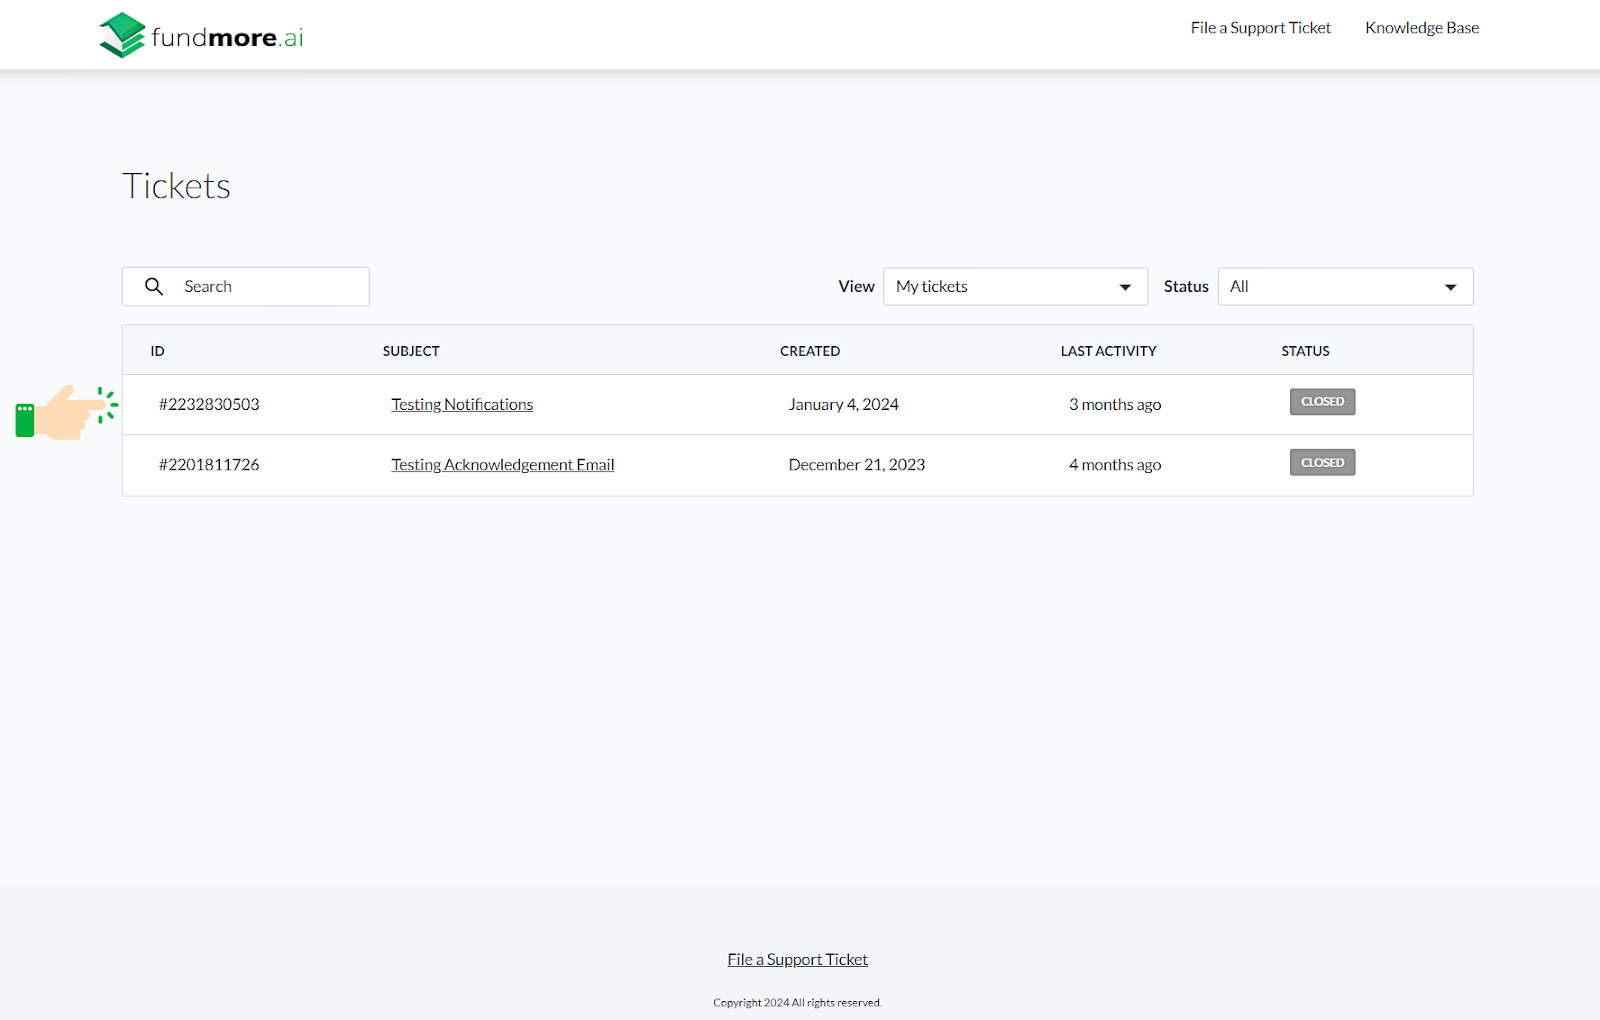
Searching for Tickets
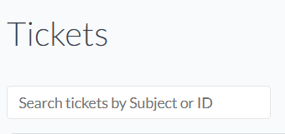
Users have the ability to search for a specific ticket. To do so, use the search bar below the “Tickets” header in the top left-hand corner of the page. You can search by Ticket ID or Subject. Simply enter the relevant text or keyword in the search bar and hit Enter on your keyboard. Any tickets containing the search criteria will be displayed.
Filtering

There are two filter options available: Filter by Status or Filter by View.
Filter by Status has three options: All, Open, or Closed tickets. By default, All tickets are displayed. To view only Open or Closed tickets, select the appropriate option.
Filter by View has two options: “Owned by me,” which displays only the tickets you have created, or “Owned by organization”, which displays all tickets created by members of your organization. Both filters are single select but, you can maximize efficiency by combining filters with the search function.
Navigation Bar
Company Logo - Clicking on the company logo redirects you to the Tickets pipeline.
File a Support Ticket - Click on this link to submit a ticket. See the ‘Submitting a Support Ticket’ section, just below, for more details.
Knowledge Base - Clicking on this link redirects you to the FundMore.ai knowledge base, which contains comprehensive product feature guides on our system.
Submitting a Support Ticket
For a step-by-step demonstration on how to complete the support ticket submission form, please click here.
- Go to the Customer Portal. Upon registering for an account, you will be automatically logged into the Customer Portal. To access it subsequently, you have two options:
Direct Access via URL:- Open your web browser and visit https://help.fundmore.ai/portal. It may be helpful to bookmark this URL for easy reference.
- Within the LOS interface, click on the "Help" icon located in the Top Menu.
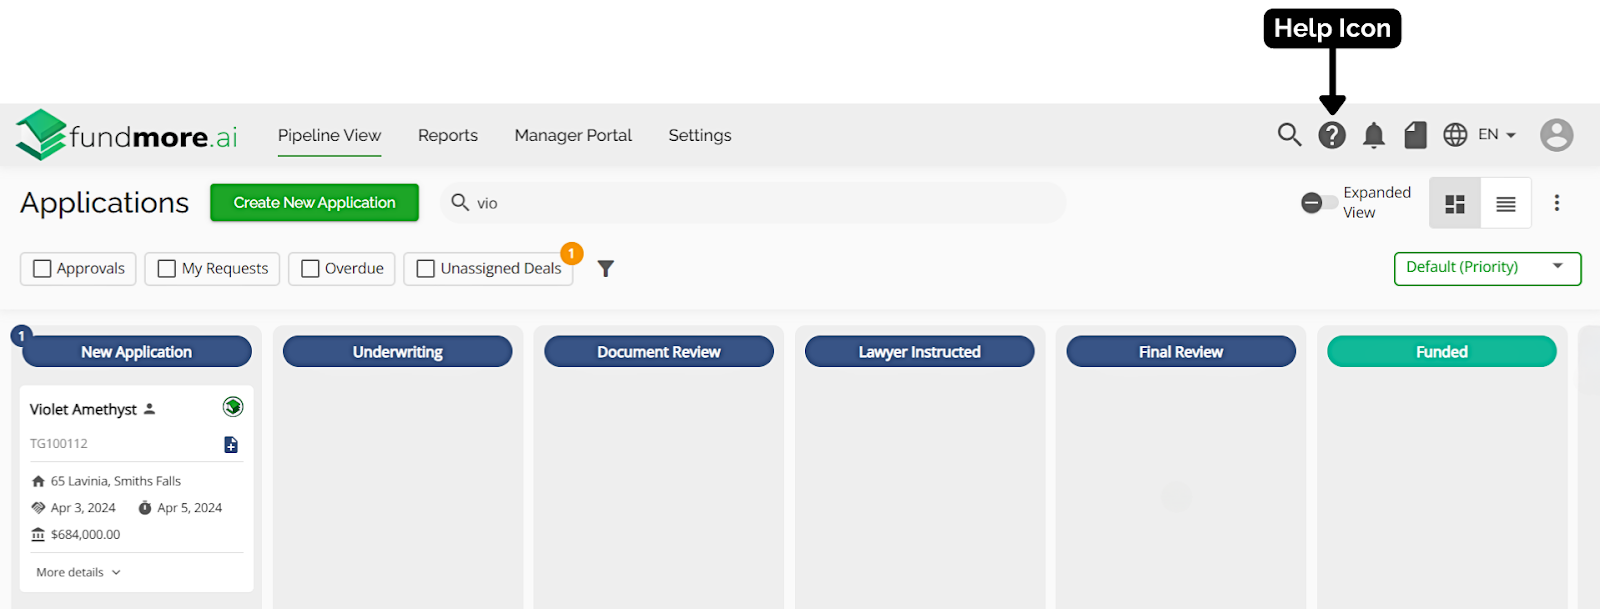
-
- You will be redirected to the FundMore.ai Help Page.
- On the Help Page, navigate to the top navigation bar and click on the "Go to Customer Portal" link.
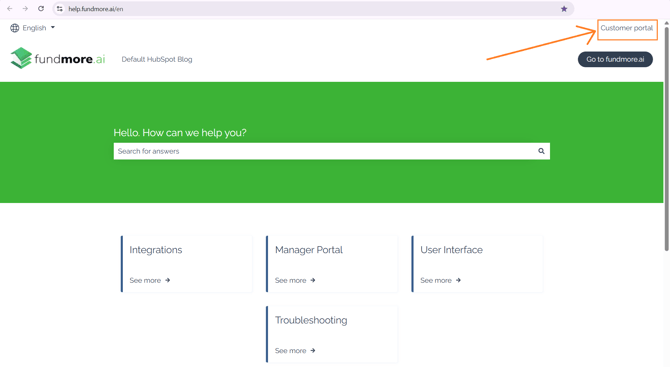
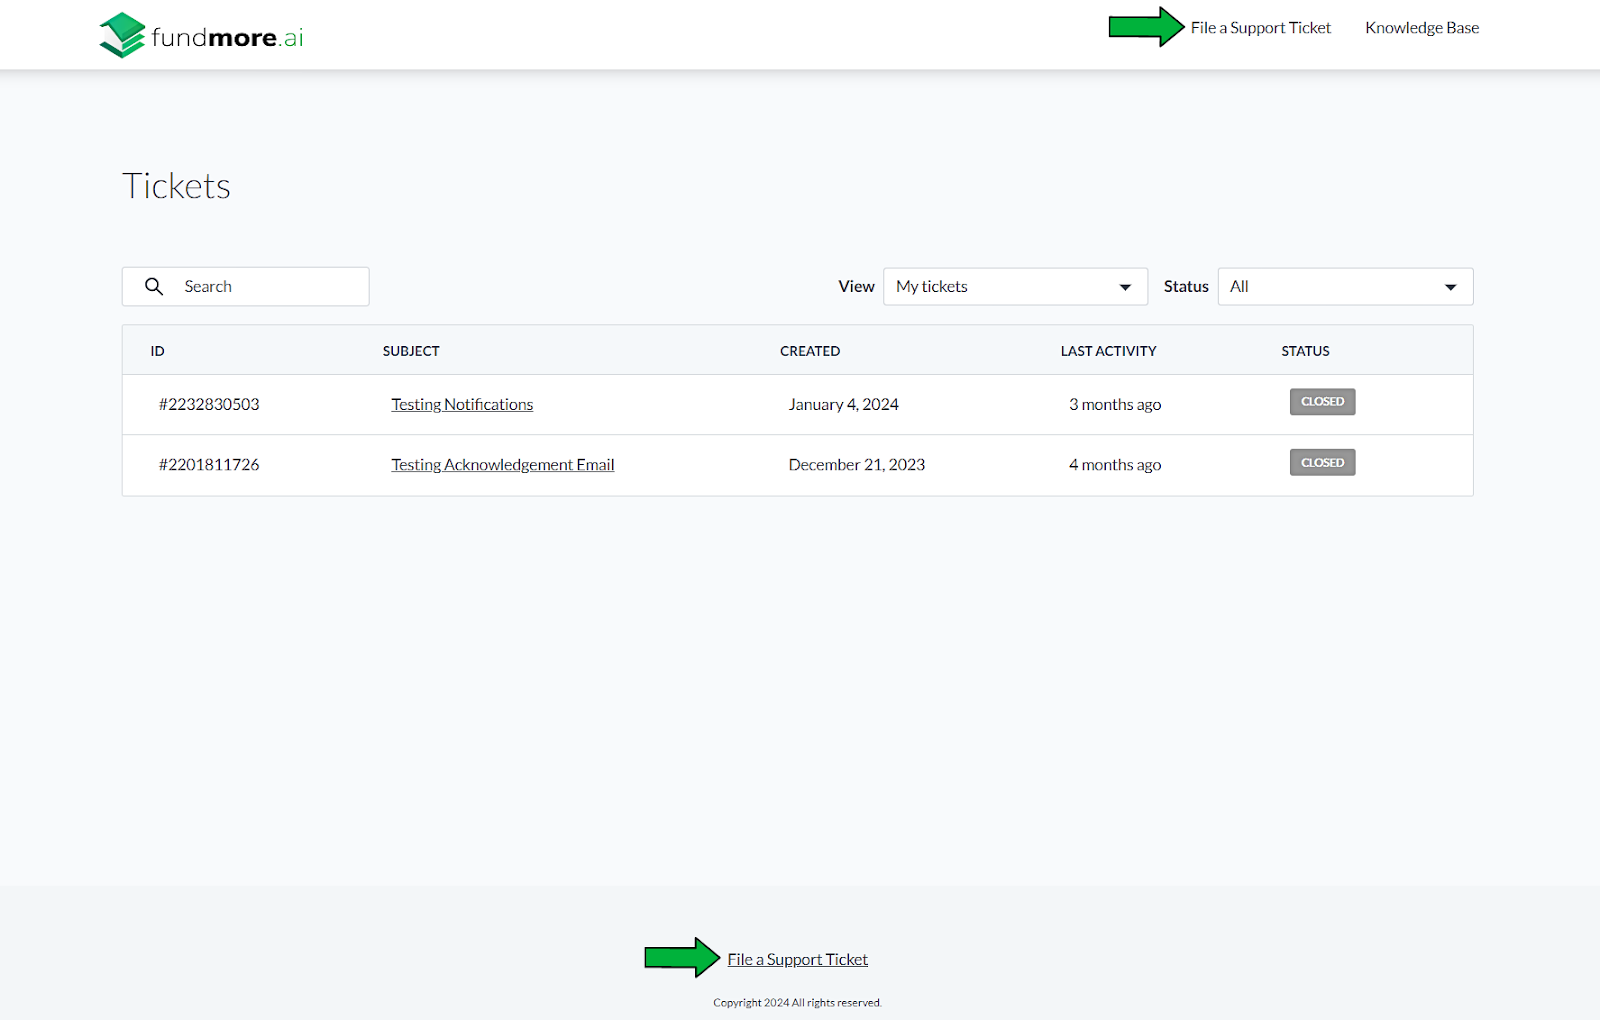
- You will be redirected to your portal landing page where you can submit a ticket, and view any existing tickets.
- To submit a new ticket, click on “File a Support Ticket” at the top or bottom of your landing page. This will open up our new support submission form.
Please provide as much detail as possible when submitting the request. The more information you include (steps to reproduce, screenshots, examples, etc.), the easier it will be for our team to identify the issue and resolve it quickly.
For ticket priority, our CS Team uses the following guidelines. Please consider this when assigning a priority to your ticket:
Critical: Critical production issue affecting all users, including system unavailability and data integrity issues with no workaround available.
Urgent: Major functionality is impacted, or performance is significantly degraded. The issue is persistent and affects 50% of clients/users and/or major functionality, with no reasonable workaround available. Includes time-sensitive requests for data export.
High: System performance issue or bug affecting some but not all users. A short-term workaround is available, but not scalable.
Other: Inquiry regarding a routine technical issue; information requested on application capabilities, navigation, installation, or configuration; but affecting a small number of users with a reasonable workaround available.
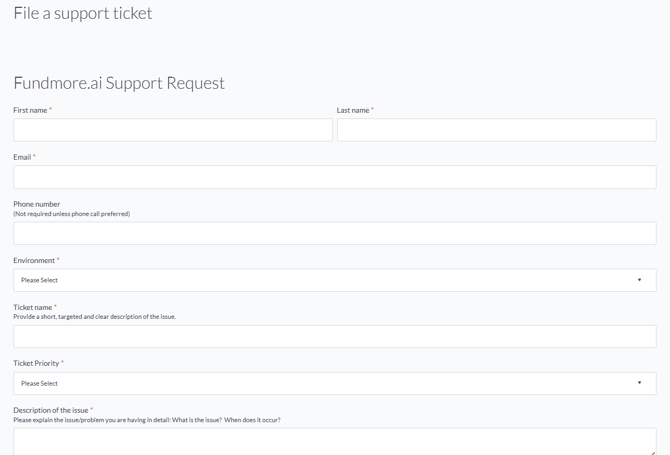
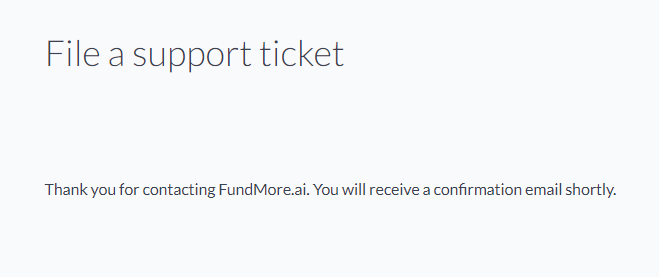
4. Once complete, click on Submit at the bottom of the form.
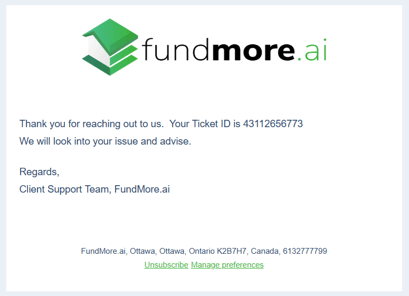
You will receive a confirmation, both in-app and via email, that your ticket has been submitted. The email confirmation will include a unique Ticket ID number (ID), simplifying future reference to your ticket.
The ticket will appear at the top of your pipeline in the customer portal, marked with an open status.
Ticket Management
To access or manage a ticket, click on any field associated with the ticket entry from the list in the portal, i.e. the Tickets pipeline.
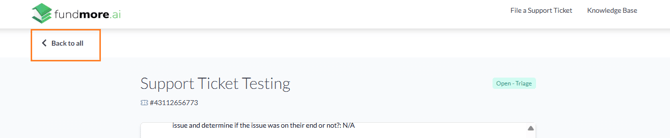
You will be directed to the ticket page where the Ticket Subject, ID and Status will be displayed at the top. All ticket activity will be displayed in chronological order, with the oldest entries (typically representing details from the initial form submission) at the top, and the most recent activity at the bottom.
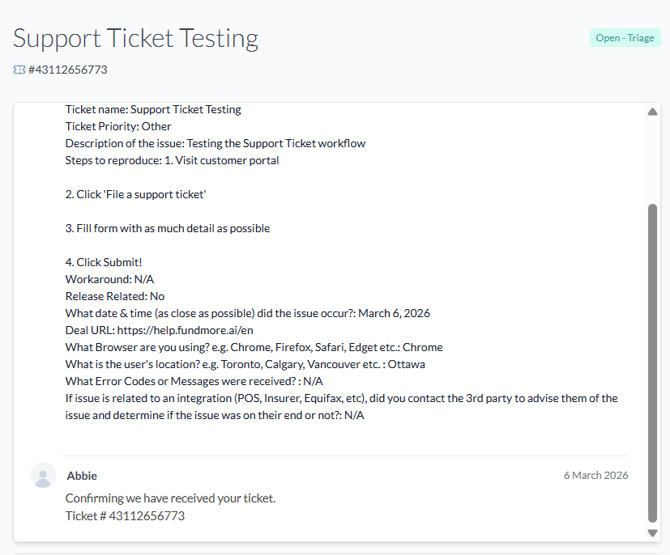
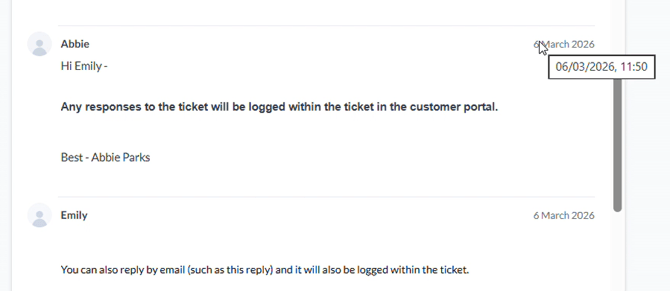
To view the exact time a reply was received, simply hover over the date and a timestamp will appear.
Responding to Tickets
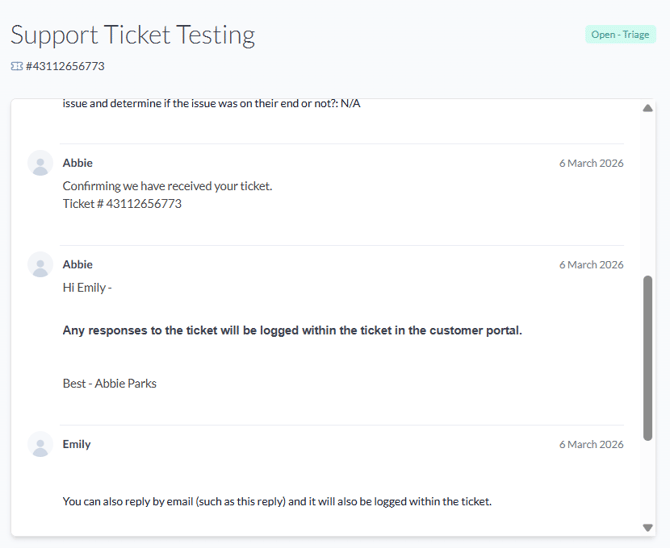
Upon receiving a response from the FundMore team, you will be notified via email. The response will be logged within the ticket in the customer portal, and it will also be sent in an email thread. Clients have the flexibility to respond to tickets directly within the portal or through the email thread in their inbox.
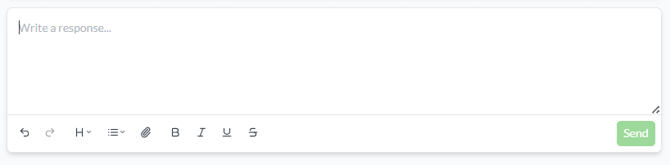
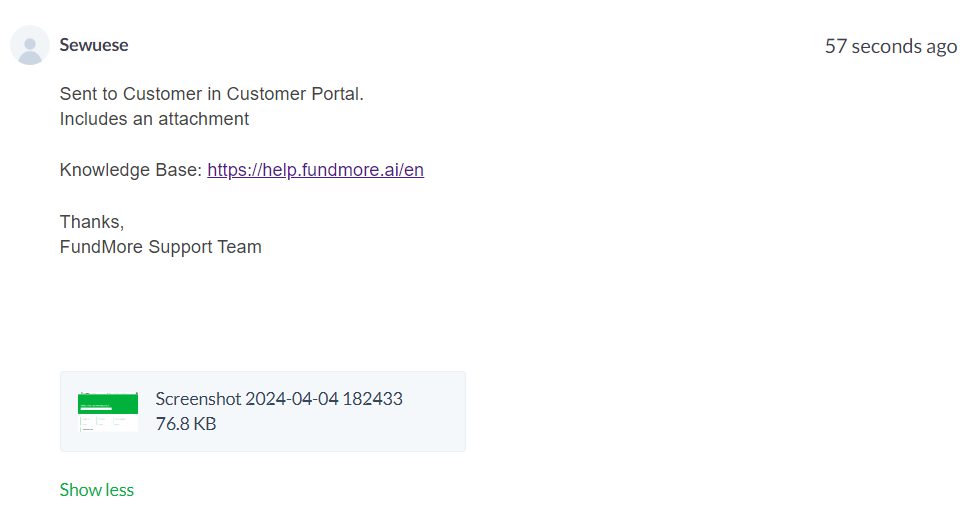
To respond through the portal, scroll to the 'Write a response' section at the bottom of the page. Enter any relevant information in the text box, and if necessary, utilize the “Attach a file” button to include a file. Once completed, click on the Send button to dispatch your response to the FundMore support team.
Alternatively, you can respond via the email thread. To do so, simply click on "Reply” or “Reply all" and send your response similar to any standard email.
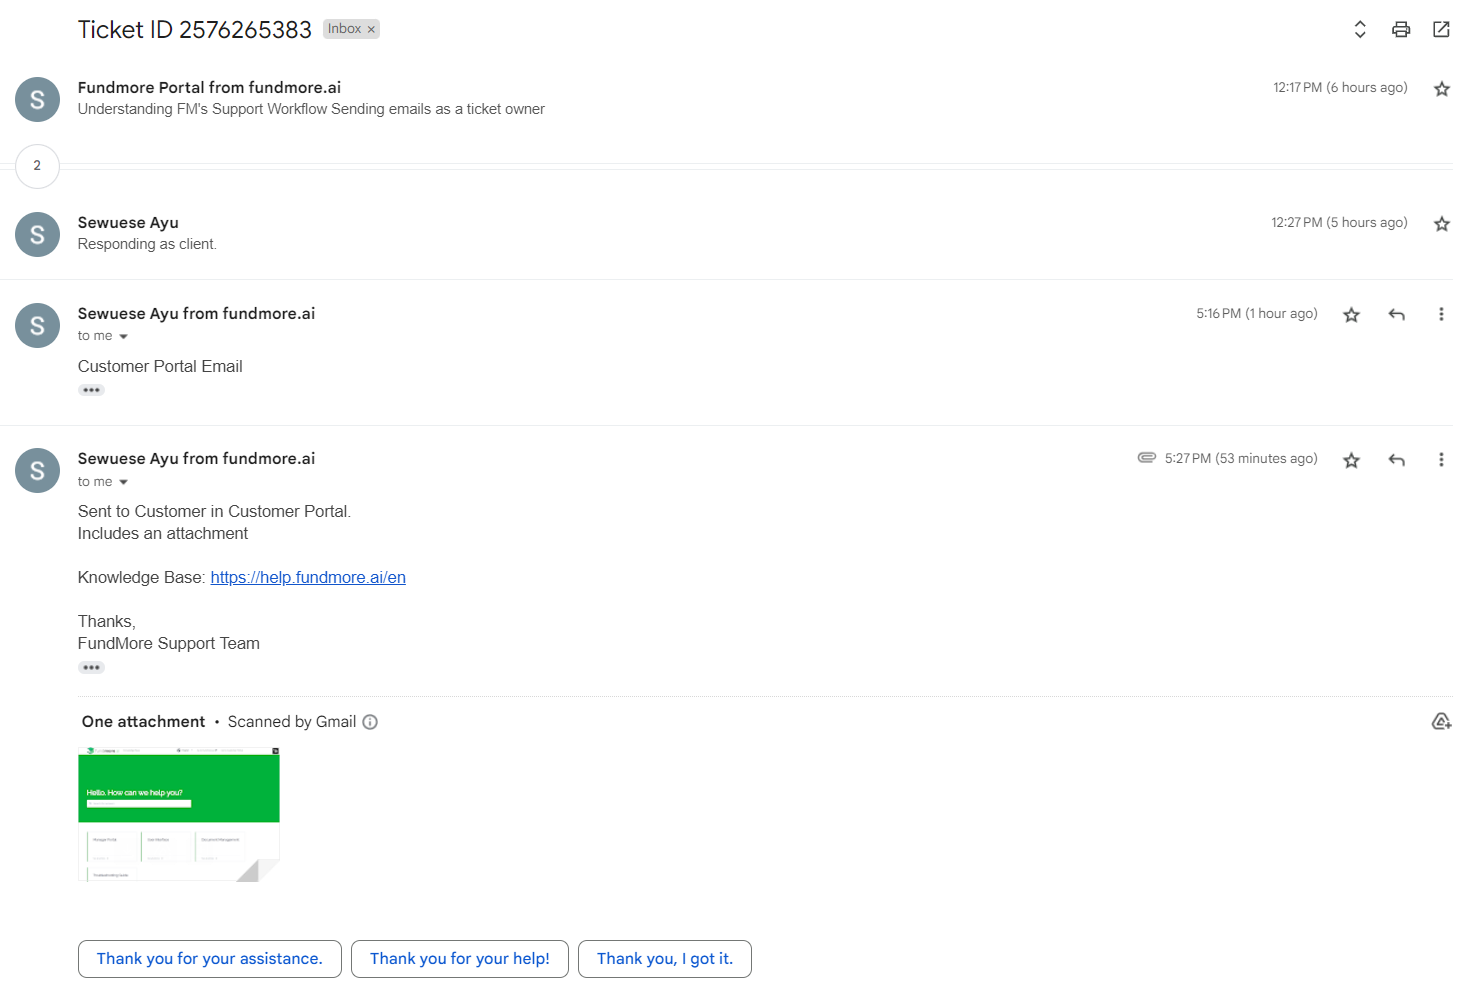
Each interaction between the FundMore Support team and the client will be logged within the ticket in the customer portal. It will include the sender’s name, a timestamp indicating when the message was sent, and any accompanying text, links, and attachments. This ensures transparency and accountability throughout the support process, facilitating seamless communication and resolution of issues.
To return to the Tickets pipeline, click on the “Back to all” button in the top left-hand corner, or click on the company logo in the top navigation bar.
What Happens When FundMore Receives Your Ticket
The following occurs upon receipt of a support ticket at FundMore.ai:
As noted above, the system will immediately send a confirmation, both in-app and via email, that your ticket has been submitted. The email confirmation will include a unique Ticket ID number (ID), simplifying future reference to your ticket.
Everyone on the CS Team will also receive notifications of the ticket submission.
A CS team member will open the ticket, review it, triage it and update the ticket properties including:
- Assigning a ticket owner (FundMore team member)
- Identifying the ticket Priority (Critical, Urgent, High, Other)
- Identifying the category of the ticket (training issue, bug, integration issue etc) as best as possible.
From here CS will respond to the submitter. Their response may be a request for more information, steps to rectify the issue, or notification that they have escalated the issue. They will identify the Ticket Priority assigned in this response.
The CS team member will then update the status/stage of the ticket accordingly (Stages include: Triage, Investigation, In Progress, Waiting on contact, Pending Preview Deployment, Pending Prod Deployment, Not Actioning, or Closed).
Triage, Investigation, In Progress, Waiting on contact, Pending Preview Deployment, Pending Prod Deployment = Open status.
Not Actioning or Closed = Closed status.
The ticket owner will provide regular updates to the status of the ticket if it remains open until it is resolved and closed.
Things to note:
If we have updated the status to Waiting on contact it is because we have gone back to the ticket submitter and requested more information or confirmation. If we have no response within 3 days we will send a follow up request. If we still have not received a response back within 1 week, we will close the ticket.
When a ticket is closed the system will automatically send a quick one question CSAT survey to the submitter to rate their experience on the resolution of that particular ticket. Feedback is very important to us at FundMore so we encourage users to be open and share with us their experience. If improvement is needed, we need to hear about it! We like to hear about it when we are doing something right too.