Table of Contents
Task Navigation Button, Due Date/Time, & Current Stage Tasks Badge
Tasks List & Headers
Completing a Task
Adding a Task
Editing Tasks
Deleting Tasks
Automatic Tasks
Task Notifications
Introduction

Tasks play a crucial role in helping the Lender's team ensure timely completion of all tasks and provide a way for team members to track the status of their tasks. In the application dashboard, you will find the "Tasks" button on the left-hand navigation menu. By clicking on this button, you will be taken to the Tasks page specific to that application. The tasks within the Application Dashboard are tailored to the application they belong to. Based on a user’s permission, they can create new tasks, edit tasks or delete them. Tasks are categorized by their associated stage within the application pipeline. The task list will vary depending on the view you are in, either "Current" or "All". Tasks that are crossed out and have a green checkmark to the left indicate that they have been completed.
It is important to note that tasks are triggered upon any stage transition if the criteria are met for the default tasks as set out in the Manager Portal. It is the act of stage transitioning that is the trigger.
Task Navigation Button, Due Date/Time, & Current Stage Tasks Badge

Next to the Tasks navigation button, you will notice a time in days, hours, and minutes. This a counter that indicates when the next task is due and it will update automatically as tasks are completed, edited, or deleted. The counter is colour coded in either green, red, or yellow. This is to assist users by providing them with a visual cue of the due status of the task. A green counter indicates that the next task is due more than 30 minutes in the future. A yellow counter means the next task is due within the next 30 minutes. A red counter indicates that the task is overdue. This visual cue helps users stay on top of their tasks and prioritize their work accordingly.
You will also see an orange number badge located to the right of the counter. This badge provides a visual representation of the number of tasks that are still incomplete within the application. There are also counters indicated in each stage header indicating the number of tasks outstanding in that stage. In the example above, there is 1 outstanding task in the Application stage and 2 outstanding in the Underwriting stage for a total of 3 outstanding as indicated to the right of the counter.
The task counter starts at deal ingestion for the initial stage. It resets at each stage transition to the tasks within the current stage presuming of course that all tasks for the stage you are transitioning from have been completed. When you force a stage transition (permission gated), any incomplete tasks from the previous stage will carry over. The countdown will still show for these tasks because they are likely the ones that need to be completed next.
Furthermore, there is also a task countdown indicator on the deal in the Pipeline View.
This countdown is now also present on the pipeline through a colored bar at the bottom of every deal card in the board view or to the left on every deal in the list view.
- Green: When the next task is due over 30 min in the future.
- Yellow: When the next task is due in the next 30 min.
- Red: When there is an overdue task.


Users can also hover over the color indicator on a deal card to see the actual time left to complete a task or if a task is overdue.

Pipeline Stage & Task Badges
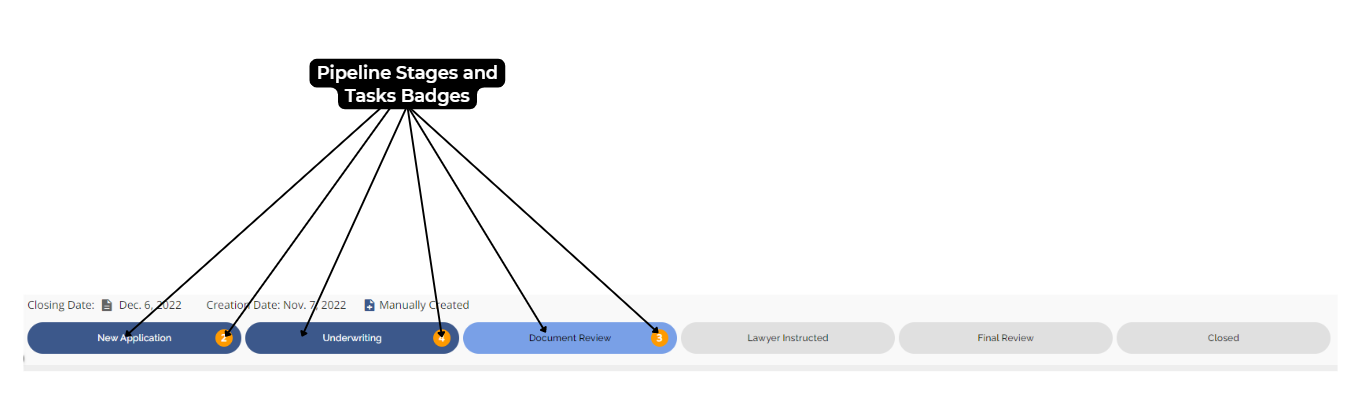
You may see an orange badge (![]() ) located to the right of the stage headers. The badge indicates there are uncompleted tasks in that stage. The number in the middle of the badge indicates the amount of uncompleted tasks, i.e. if an application is in the Document Review stage with 3 uncompleted tasks, the Tasks Badge beside the associated pipeline stage will have a 3 in the middle.
) located to the right of the stage headers. The badge indicates there are uncompleted tasks in that stage. The number in the middle of the badge indicates the amount of uncompleted tasks, i.e. if an application is in the Document Review stage with 3 uncompleted tasks, the Tasks Badge beside the associated pipeline stage will have a 3 in the middle.
Tasks List & Headers
All Tasks List
The task list can be segmented into current tasks or all tasks by selecting the Current stage button or the All button located above the task list on the far left.
![]()
Current Tasks List - Lists all outstanding tasks

All Tasks List - Lists all tasks loaded including completed and outstanding.

Sorting the List Using Column Headers
Columns can be sorted by ascending or descending order by clicking on the arrow to the right of the header title. When the arrow is facing upwards, the list is sorted in ascending order. When it is facing downwards, the list is sorted in descending order. When you sort the list, the arrow in the column of which you sorted will hold in place to indicate what your sort criteria was.
Ascending: Descending:

Task - The task column displays the name of the task that needs to be completed.
Description - The task description provides an opportunity to provide detailed information about the specific actions expected for that task.
Stage - The stage indicates the specific application stage in which the task was added and needs to be completed in.
Priority - This is the level of priority (low, medium, high) of the task. This is subjective to the lender in its utilization.
Assignee - The assignee refers to the user or role to which the task is assigned. For example, the task can be assigned to an Underwriter or a Document Collector. Tasks can be assigned to specific roles, and when users are assigned to those roles, the tasks automatically update with the assigned user. You can also manually assign a task by opening the sidebar for the task and searching for the assignee either by scrolling through the list or using the search function. It is important to note that the user you assign the task to does not necessarily need to be assigned to the deal.

Due Date - This indicates the date and time by which the task should be completed. The due date can be set in various time increments, ranging from minutes to days.
Completed by - This indicates the user who completed the task.
Completed at - This indicates the date when the task was completed.
Completing a Task
There are three different ways to complete a task:
1. By clicking on the checkbox located on the far left of the task line.
2. You can bulk complete tasks by checking the box to the left of the Task column header. This action will mark all incomplete tasks as complete.

With this feature, a confirmation popup will appear when attempting to mark all tasks as completed or uncompleted at once. This helps prevent accidental bulk updates and ensures users don’t lose track of previously completed tasks.

Key enhancements:
- confirmation dialog with dynamic messaging based on action type and task count.
- Filters tasks to only show confirmation when there are actual changes to be made, avoiding unnecessary updates if no task changes are needed.
- proper handling so that if a user cancels the confirmation popup, the checkbox returns to its original state.
- Alerts users if a bulk update fails.
3. You can mark a task as complete by using the details sidebar. To do so, click on the "Open details in sidebar" icon. This icon will appear when you hover to the right of the task's name. Once the sidebar opens, click on the ellipsis in the top right corner and select the "Complete" option.

Completing a task does not remove it. It simply strokes it out and adds the “completed by” and “completed at” information to the far right of the task.
Note: You can uncheck tasks to revert it back to incomplete the same way you can complete tasks as noted above. A word of caution though, by using the bulk method described above, this will mark ALL completed tasks back to incomplete. Depending on how far along you are in the application, it is likely you do not want to do this. Best Practice would be to uncheck completed tasks one at a time if you want to revert them back to incomplete status.
Adding a Task

To create a new task, just click on the "Add New Task" button, which is represented by a green plus button. This action will open a sidebar where you can input all the required details in the designated fields. Fields indicated with an asterisk (Task Name) are required fields.

To add the task to the list, simply click on the 'Add task' button when you have finished. You can cancel out of the action by clicking the ‘Cancel’ button. For any task that is added, a history entry will be logged noting who created the task, when it was created, and the task details (name, description, stage, etc.).
Editing Tasks
Tasks can be edited within an application. To do so, click on the "Open details in sidebar" icon next to the task's name. This icon will appear when you hover to the right of the task's name.

When you click on this icon, a sidebar will open allowing you to edit any of the fields as necessary.

When you are satisfied with the changes, click the “Save Task” button in the bottom right corner. The system will automatically save all changes and a history entry will be logged. This entry will note who edited the task, which task was edited, and when it was edited.
Deleting Tasks
To delete a task, follow these steps:
1. Click on the ellipsis to the far right for the task you wish to delete.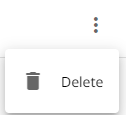
2. Click on the "Delete" option in the drop-down menu.
3. Click on the "Remove" button in the confirmation popup that appears. The task will be removed from the list.
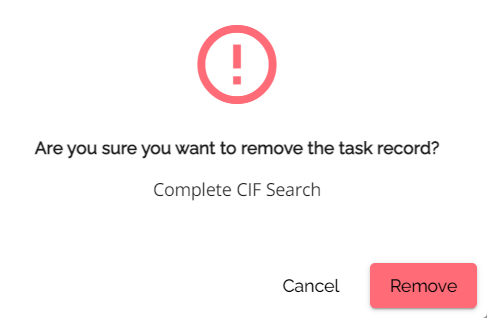
If you do not want to delete the task click on the cancel button in the confirmation popup.
When a task is deleted, a history entry will be logged. It will note who deleted the task, which task was deleted, and when.

Automatic Tasks
**Client specific**
If a file is conditionally approved and there is a change to the net rate and monthly payment, the system will auto generate a task to re-issue a COB and get a payment change form signed.

The ‘Select Product Member Number’ task will be automatically created with a priority equal to ‘High’.

Task Notifications
In app and email notifications are sent not only to the assignee but also to the task creator, the last person who modified it, and the user who assigned it once the task is completed.
Users can manage their email notifications through their settings page by letting them choose whether to receive notifications for tasks they created, modified, assigned, or completed. Notifications have also been improved with clearer details, including deal information and who performed each action.
By keeping everyone involved automatically updated, this enhancement improves communication, reduces manual follow-ups, and makes task management more transparent and efficient.

