Table of Contents
How To Adjust Your Logo Sizing
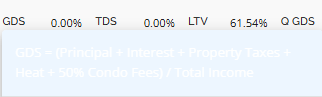
Amortized Monthly Payment for LOC
Introduction
The company settings allows you to apply your company’s branding to the platform. You will be able to enter your company name and contact information. You can set the colors to your company brand colors, upload your company logo and favicon, create your own unique Loan Numbers, turn certain automations on and off, and select a document management option.
Location
To locate the Company Settings section:
- Navigate to the Manager Portal from the top menu.
- In the sidebar on the left, select the Settings option.
‘Company’ Section

In the ‘Company’ section you can update the fields with the appropriate information associated with the headers. This information can be incorporated into generated documents using Handlebars expressions (see our Document Template Management Product Feature Guide for more information about this).
Within this section, there is a cell phone field. It is essential to ensure the accuracy of the contact phone number. When submitting applications to insurers, the system requires a contact phone number for the underwriter. Typically, the system defaults to the user’s phone number listed in User Management. However, if no phone number is provided for the user, the system will automatically use the company phone number specified in Company Settings to avoid submission errors. It is important that the user’s phone number in User Management be either accurate or blank and the phone number in Company Settings be accurate. If the user’s phone number is left blank, the system will rely on the company’s phone number.
Note: Lenders need to include the country code, area code and a prefix at minimum for the phone number to avoid errors when sending deals to insurers. For example, it should be 14166660000 or 1-416-666-0000 not 0000000, 000-0000, 6661234, 666-1234, 4166661234 or 416-666-1234.
‘Style’ Section

In the style section, you can update the colors used within the platform. You can update the Primary color, Secondary color, Success color, Review color, and Warning color by entering their Hex color codes into the associated fields. If you wish to reset the colors, click the green ‘Reset to Default Style’ at the bottom left of this section.
Note: If one of your colours is too light that may impact the visibility of the relevant data that colour is highlighting in the UI. So, you might want to validate and adjust as needed.
I.E. The following Colour is set up in Settings:
![]()
It will render in the UI as follows:
Primary Color - The main color which your platform will be accented with. For example, The Fundmore.ai default primary color is the lime green seen throughout the platform.
Secondary Color - The secondary color your platform will be accented with.
Success Color - The color of headers or banners for ‘Success’ pop-ups.
Review Color - This is the color that your ‘Review’ pop-ups will appear in.
Warning Color - This is the color that ‘Warning’ pop-ups will appear in.
‘Logos’ Section

In this section you can upload your company logo and favicon. You can do this by hovering over the field and clicking the upload icon. Your logo will appear within the AI platform and can also be incorporated into generated documents.
Note: A favicon is the small image that appears on the very left of a browser tab.
If you wish to reset to the default logos, click the green ‘Reset to Default Logos’ button at the bottom left of this section. This will revert to FundMore.ai’s logos.

How To Adjust Your Logo Sizing
A user can adjust their company logo and favicon in any platform used for design such as Adobe Photoshop, Canva, or Figma.
- Open the design software and choose a custom base (canvas) with the sizing of 280 px wide and 70 px high for a logo, and 32 px wide and 32 px high for a favicon.
- Upload the logo or image for favicon into the base and size it to the size of the base.
- Ensure you are downloading the image as a PNG file with a transparent background.
- When you are satisfied with the size, select ‘Download Image’.
‘Automations’ Section
In an effort to enhance compliance and control for lenders in their day to day operations, we allow lenders toggle on or off automations around automatic deal assignment, blocking conditional approvals when DLA is required or there are outstanding approval requests, blocking sending to servicing if there are outstanding approval requests, provide the ability to automatically generate and match client ids, along with a number of other automations.
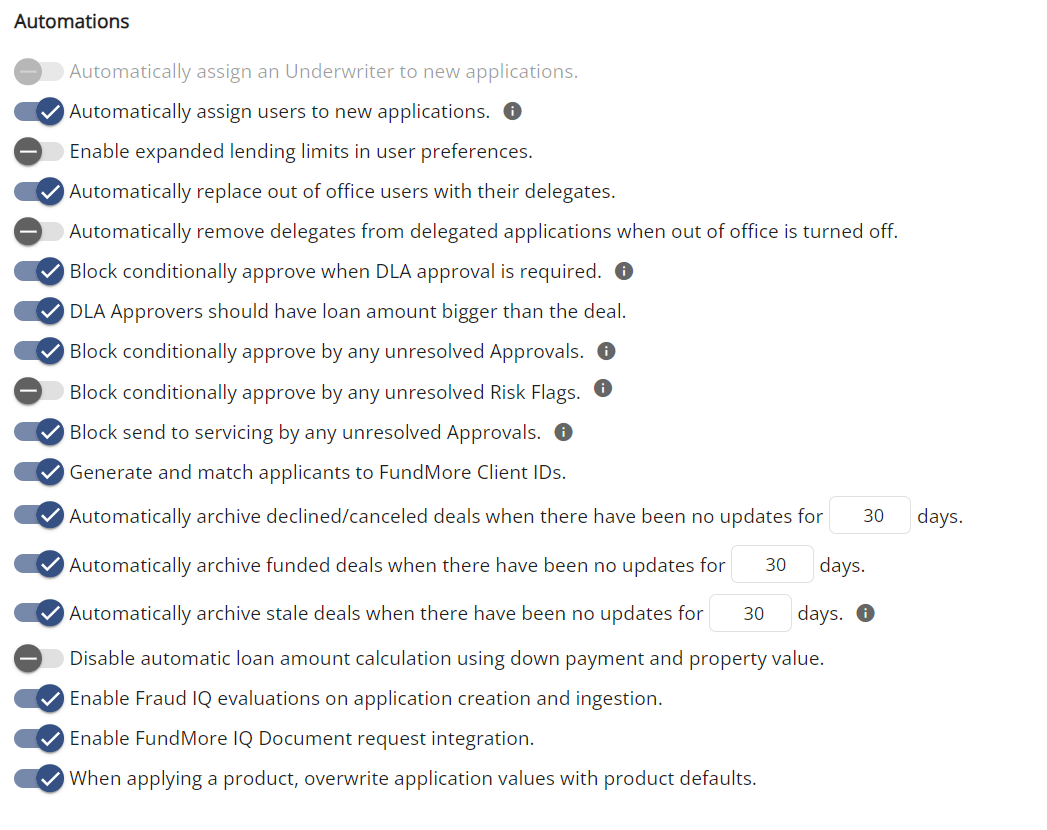
Automatically assign an Underwriter to new applications - This functionality provides the option to enable or disable the automatic assignment of an underwriter to newly submitted applications. When activated, an underwriter is automatically assigned to each new application. Conversely, when deactivated, applications are not assigned to any underwriter upon submission, allowing for manual assignment as needed.
Automatically Assign Users to New Applications - This automation streamlines the application process by automatically assigning relevant users to new mortgage applications based on predefined criteria. It ensures efficient distribution of workload and timely processing of applications.
Enable Expanded Lending Limits in User Preferences - When enabled, this functionality provides users with the ability to customize and increase lending limits when necessary. By activating this feature, users gain access to higher lending thresholds which enhances the mortgage underwriting processes by fostering greater flexibility and efficiency in loan management.
Automatically replace out of office users with their delegates - When enabled, this automation ensures that when a user sets an out-of-office status, their tasks and responsibilities are automatically delegated to specified delegates until they return.
Automatically remove delegates from delegated applications when out of office is turned off - This automation reverts delegated responsibilities back to the original user handling a deal when they disable their out-of-office status. It ensures a seamless transition by removing the delegate from the application upon the original user's return from absence.
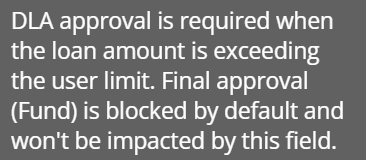
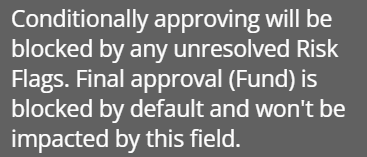
Block conditional approval when DLA approval is required - This automation prevents conditional approval of applications when DLA approval is required. When this automation is enabled, users that have exceeded the limits set up in their ‘User Details’ section must obtain DLA approval before conditionally approving a deal. The ability to use the ‘Fund’ button in the application dashboard will remain blocked even when this toggle is turned off.
Note: Final Approval (Fund) is blocked by default and won’t be impacted by this field.
DLA Approvers should have loan amount bigger than the deal - This automation ensures that DLA Approvers are only assigned to deals where the loan amount is within their lending authority.
Block conditional approval by any unresolved Approvals - This automation prevents conditional approval while there are still outstanding approvals on the file. The ability to use the ‘Fund’ button in the application dashboard will remain blocked even when this toggle is turned off.
Note: Final Approval (Fund) is blocked by default and won’t be impacted by this field.
Block conditionally approve by any unresolved Risk Flags - This automation prevents conditional approval of applications if there are any unresolved risk flags.
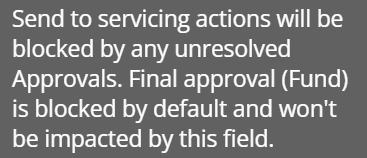
Block ‘send to servicing’ by any unresolved Approvals - This automation blocks the ability to use the ‘Send to Servicing’ actions in the application dashboard while there are still outstanding approvals on the file. The ability to use the ‘Fund’ button in the application dashboard will remain blocked even when this toggle is turned off.
Note: Final Approval (Fund) is blocked by default and won’t be impacted by this field.
Generate and match applicants to FundMore client IDs (Toggled On) - When a new deal comes into the system or when a new applicant is added, the system will try matching the applicants from the new deal with existing applicants from the system. We consider a match, if First Name, Last Name, Middle Name (if exists) and Date of Birth is matching exactly with an existing applicant. When a match is found, the Client ID from the match will be set to the applicant from the new deal. If no match is found, a new unique ID is generated. The system is currently capable of generating only numeric IDs.
If multiple matches are found based on the name and DOB, we will try to filter the list by looking at phone number, email address and SIN. If there are still multiple matches found, we will take the latest created applicant's Client ID.
In addition, we also offer users the ability to generate a new unique Client ID, for those cases where the system actually detected a person with the same name and DOB, yet the two people are different individuals. For maximum flexibility we also allow users to manually type a client ID.
For lenders that do use the client ID outside the FundMore system, we have also exposed a new WebHook “APPLICANT_CLIENT_ID_CHANGED” where we are sending in the payload for both the old and new client ID.
Automatic Archiving Functionality - Lenders have the ability to configure automatic archiving rules based on their needs. There are 3 options available:
- Automatically archive declined/canceled deals when there have been no updates for a period of days set by the lender
- Automatically archive funded deals when there have been no updates for a period of days set by the lender
- Automatically archive stale deals when there have been no updates for a period of days set by the lender. This applies to stale deals in particular, with the exception of those in the funded or declined/canceled stage, as noted in the associated tooltip.
It is a good idea to ensure you keep your active pipeline current and archive any declined, cancelled, funded or stale dated applications as timely as possible. These applications if left in the active pipeline too long can cause latency issues in periods of usage spikes negatively impacting users experience in the system (slows the system down). I.E. There is an unusual spike of numerous users refreshing their pipeline or logging in at the same time. If there are too many applications, it takes the system longer to load causing longer times for the pipeline to load for all the users.
You can toggle these automations on or off, and customize the number of days for the configuration.
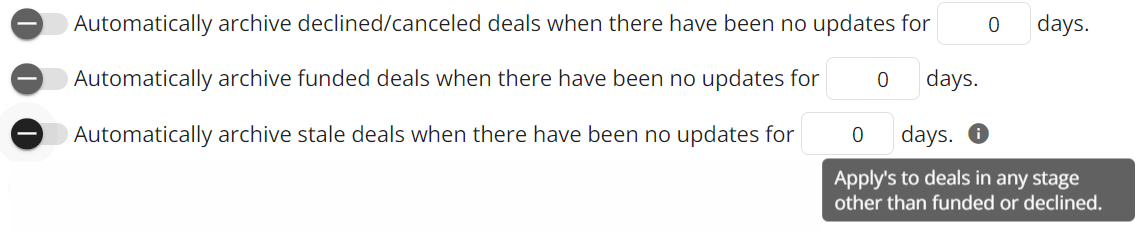
Deals that have been declined/canceled, or have not been updated for a specified number of days will automatically be archived according to your settings.
Disable automatic loan amount calculation using down payment and property value - When this automation is enabled, users can manually input the loan amount instead of having it automatically calculated based on the down payment and property value.
Enable Fraud IQ evaluations on application creation and ingestion - When activated, this automation integrates Fraud IQ evaluations into the application creation and ingestion process. It helps identify potential fraud risks early on, enhancing the overall security and integrity of the lending process.
Enable FundMore IQ Document Request Integration - Enabling this automation streamlines the document request process by facilitating efficient document requests and submissions, ultimately expediting the underwriting process.
Overwrite Application Values with Product Defaults - When toggled on, this automation ensures that whenever a product is applied or reapplied, the default settings set up in the product will override any existing values. By default, this setting is turned off. If activated, the default values specified within the product will replace any existing values in the application. This feature allows lenders to determine whether they want default values to be overridden when a product is applied or reapplied. Here is a video demonstrating the functionality: Apply Product Defaults to Application Values.
Note: This is a tenant-specific setting and may not be visible or apply in your environment. If this is the case, the functionality defaults to false or off.
Some automations have an associated tooltip, offering insight into their functionality. To view a tooltip, hover over the information icon.


‘Loan Number’ Section

Within this section, you can create your own loan numbers with unique prefixes, suffixes, number of digits, and starting numbers. In the example pictured above, the first application to be created in the system would have the Loan Number: TG100000. The second application created would have the Loan Number: TG100001.
Amortized Monthly Payment for LOC
There is a tenant setting allowing lenders to configure the amortization and rate they wish to use for the LOC calculation (amortization in months). To understand how this translates within an application, review the ‘Mortgage Terms’ Tab section of the ‘Loan Details’ Widget PFG.
Amortized Monthly Payment for LOC
There is functionality to allow lenders to calculate a payment for any existing Secured Lines of Credit for applicants. This will enable them to use the calculated payment based on their guidelines in debt service calculations instead of the payment reported by the credit bureau or the actual payment the applicants are paying which is usually an interest only payment.
Once you configure the amortization and rate in the Manager Portal the system will automatically recalculate a payment on any existing mortgages where the Loan Type is identified as Secured Line of Credit accordingly.
Manager Portal Configuration:

Existing Mortgage Entry:
Note Loan Type is Secured Line of Credit. As soon as the loan type was updated to Secured Line of Credit, the system recalculated the Monthly Payment based on the values configured in the Manager Portal.

FundMore IQ Settings
Note: The content of this section is tenant specific and may not apply in your environment.
For lenders using our document request feature, FundMore.IQ, we have created a “FundMore IQ” section in the Settings section. Similar to the white labeling for AI, this allows lenders to apply their own branding to their IQ environment.
To access the FundMore IQ Settings section, follow these steps:
- Navigate to the Manager Portal.
- Click on the Settings option in the left-hand menu. This will open the Company Settings page which defaults to the FundMore AI section.
- Click on the FundMore IQ tab. In the section that opens, you can make any necessary changes.
In the section for IQ, you can update the colors used within the platform (i.e. Primary and Secondary), and the company logos. For more information on this, refer to the ‘Style’ Section and ‘Logos’ Section above. If you wish to reset the colors to their default, click on the ‘Reset to Default Style’ button. Similarly, if you wish to reset the logos to their default, click on the ‘Reset to Default Style’ button.